Author: Roland Delacroix

  • Choosing a Wireless Mouse for Work or Play

    Choosing a Wireless Mouse for Work or Play

    I’ve spent most of my life looking at schematics and stress-testing components, so I have a low tolerance for hardware that feels like it was designed to break the moment the warranty expires. These days, it seems like every company is trying to sell you a piece of “innovation” that is really just a lightweight shell of cheap, hollow plastic held together by hope and a proprietary charging cable. If you’re hunting for the best wireless mice on the market, you aren’t just looking for a fancy sensor or some RGB lighting that glows like a disco ball; you’re looking for mechanical reliability and a connection that doesn’t drop the second you move your hand.

    I’ve sat at my workbench and poked through the build quality of dozens of these devices, separating the engineering triumphs from the absolute junk. In this list, I’m cutting through the marketing fluff to show you five specific models that actually earn their keep. You’re going to learn which ones offer the sturdy ergonomics you need for long hours at a desk and which ones are worth every cent of your hard-earned money. Let’s get to work.

    Table of Contents

    The Workhorse You Can Trust: Logitech MX Master 3S

    The Workhorse You Can Trust: Logitech MX Master 3S

    I’ve seen enough cheap peripherals end up in the scrap heap to know that most “ergonomic” mice are just marketing fluff. However, the MX Master 3S actually earns its keep. The weight feels substantial in the hand, not like some hollow piece of junk, and the sculpted shape provides real support for your palm during a long day at the desk. It’s built for people who actually use their computers for work, not just for scrolling through social media.

    Built for Precision: Razer DeathAdder V3 Pro

    Built for Precision: Razer DeathAdder V3 Pro

    If you’re someone who needs absolute precision—whether you’re designing a CAD model or playing a fast-paced game—you can’t afford a sensor that jitters. The DeathAdder V3 Pro is a bit of a departure from my usual preference for heavy-duty builds because it’s incredibly light, but I can’t argue with the optical performance. The switch mechanism is crisp and responsive, lacking that mushy, cheap feeling you get with most consumer-grade plastic mice.

    The Minimalist’s Reliable Companion: Logitech Anywhere 3S

    The Minimalist’s Reliable Companion: Logitech Anywhere 3S

    Sometimes you just need something small that doesn’t feel like it’s going to snap in half when you toss it in your briefcase. The Anywhere 3S is a compact little unit, but I was pleasantly surprised by the build integrity. It doesn’t have that creaky, hollow sound that usually accompanies smaller mice, which tells me they didn’t skimp too heavily on the internal bracing.

    The Budget Option That Doesn't Feel Cheap: Microsoft Bluetooth Ergonomic Mouse

    I’m usually skeptical of anything positioned as a “budget” option because that’s often code for “disposable.” However, Microsoft has managed to produce a mouse that feels like a solid tool rather than a piece of landfill bait. The thumb rest is well-placed, and the overall geometry is sensible, making it a decent choice if you want to save some money without sacrificing your wrist health.

    For the Heavy-Duty User: Logitech G502 X Lightspeed

    This mouse is a bit of a beast, and I mean that in the best way possible. It has a complex layout with plenty of programmable buttons, which might seem overkill to some, but for a man who likes to optimize his workflow, it’s a dream. The weight is distributed well, so even though it’s a larger device, it doesn’t feel unbalanced or awkward when you’re trying to make fine adjustments.

    Bottom Line: Don't Get Fooled by the Marketing

    Stop chasing every flashy RGB light or “gaming” gimmick; focus on the weight, the sensor reliability, and whether the build feels solid in your hand.

    Prioritize connection stability over everything else—if a mouse can’t maintain a steady signal without dropping out, it’s nothing more than a paperweight.

    Look for hardware that offers real utility, like programmable buttons or long battery life, rather than paying a premium for a brand name on a piece of cheap plastic.

    The Real Test of a Mouse

    Most manufacturers spend their entire budget on flashy RGB lights and software that slows your computer down, but they forget the basics: a solid sensor and a build that doesn’t creak when you apply actual pressure. If it feels like a hollow eggshell in your hand, it’s not a tool—it’s a toy.

    Roland Delacroix

    The Bottom Line

    Look, at the end of the day, you aren’t just buying a piece of hardware; you’re buying a tool that’s going to sit in your hand for eight hours a day. Whether you opted for the high-precision sensor of a gaming mouse or the ergonomic reliability of a productivity model, the goal remains the same: it needs to do its job without requiring a troubleshooting manual. I’ve seen too many people get blinded by flashy RGB lights and software suites that do nothing but hog your system resources. If you follow my advice, you’ve focused on the build quality and connectivity stability rather than the marketing fluff. Don’t let a company convince you that a lighter shell or a different shade of plastic is worth an extra hundred dollars.

    I know it feels like every new gadget is designed to be obsolete by next Tuesday, but if you stick to these principles, you can actually find something that lasts. Don’t be afraid to be a little skeptical when you see a new product launch; ask yourself if it’s built to endure or just built to be sold. Invest in the hardware that respects your time and your wallet. Once you find that one device that just works—without the lag, without the dropped connections, and without the constant need for updates—you’ll realize that reliability is the ultimate luxury. Now, go get back to work.

    Frequently Asked Questions

    How do I know if a mouse is going to be a piece of junk after six months of heavy use?

    Look for the weight and the “click.” If it feels light and hollow, like a cheap toy, it’s going to crack. Pick it up; if you can feel the internal components shifting, put it back. Check the switches—they should have a crisp, tactile snap, not a mushy, silent feel. Most importantly, look at the feet. If they’re cheap plastic instead of PTFE, they’ll grind down to nothing in months. Don’t settle for flimsy.

    Is it actually worth paying a premium for a dedicated USB dongle, or is Bluetooth good enough for most people?

    Look, if you’re just browsing the web or doing spreadsheets, Bluetooth is fine. It’s convenient. But if you’re doing precision work or gaming, don’t even bother. Bluetooth has latency—a tiny delay that’ll drive a systems engineer like me mad. That dedicated USB dongle provides a direct, stable connection that doesn’t drop out when your neighbor turns on their microwave. If you want reliability, pay the premium for the dongle. Otherwise, you’re just buying frustration.

    What’s the real difference between a rechargeable battery and just swapping out AA batteries?

    Look, it comes down to convenience versus reliability. Built-in rechargeable batteries are fine if you don’t mind the device becoming a paperweight the moment the cell fails. But with AA batteries? You’ve got control. If the power dies, you swap them out in ten seconds and get back to work. I’d rather have a mouse that accepts standard alkalines than one that relies on a cheap, integrated lithium cell that can’t be replaced once it degrades.

  • Choosing Comfortable Headphones for Office Environments

    Choosing Comfortable Headphones for Office Environments

    I spent thirty years in manufacturing plants where if a piece of equipment wasn’t built to last, it was a liability. Nowadays, I see people spending hundreds of dollars on “cutting-edge” gadgets that feel like they’ll snap in half if you look at them wrong. It’s the same story when you’re trying to find the best headphones for office work. You don’t need a dozen fancy features that require a software update just to turn them on; you need something that stays comfortable for an eight-hour shift and actually blocks out the sound of the person in the next cubicle chewing their lunch.

    I’ve sat down with my notepad and put several of these modern headsets through the ringer to see which ones are worth your hard-earned cash. In this list, I’m cutting through the marketing fluff to show you five specific models that prioritize build quality and reliability over flashy gimmicks. By the time you finish reading, you’ll know exactly which pair will actually do the job and which ones are just expensive plastic destined for a landfill.

    Table of Contents

    The Reliable Workhorse: Sony WH-1000XM5

    The Reliable Workhorse: Sony WH-1000XM5 headphones.

    I’ve seen plenty of gadgets come and go, but these Sony units actually feel like they were designed with a purpose. The noise cancellation is the real star here; it manages to drown out the hum of an office air conditioner or that one coworker who won’t stop tapping their pen. I sat in my workshop for three hours with these on, and I couldn’t hear a thing from the street outside. It’s about functional silence, not just fancy software.

    Built for the Long Haul: Bose QuietComfort Ultra

    Built for the Long Haul: Bose QuietComfort Ultra

    If you’re the type of person who spends eight or nine hours a day tethered to a desk, you need to prioritize ergonomics over everything else. I’ve tested dozens of headsets, and most of them start to feel like a vice grip on your skull by lunchtime. The Bose Ultra, however, has a mechanical balance that distributes the clamping force remarkably well across the headband.

    The Professional’s Choice: Jabra Evolve2 65

    The Professional’s Choice: Jabra Evolve2 65 headset.

    Now, if you aren’t looking for a musical experience and just need to hear your boss clearly, stop looking at consumer headphones and look at a dedicated headset like the Jabra. These aren’t built for audiophiles; they are built for utility. The microphone isolation is impressive, ensuring that your voice doesn’t sound like you’re broadcasting from inside a wind tunnel during your Zoom calls.

    The Budget-Conscious Reliable: Sennheiser Accentum

    Not everyone wants to drop half a paycheck on a pair of headphones just to get through a workday. I get it. I’ve always believed that you don’t need the most expensive tool in the shed to get the job done right. The Sennheiser Accentum offers a much more sensible price point while still maintaining the brand’s reputation for decent acoustic engineering.

    The Wired Standard: Audio-Technica ATH-M50x

    There is a certain segment of us who still believe that wireless is just another way for things to fail. I can’t say I blame you. If you want to eliminate latency, battery anxiety, and Bluetooth pairing headaches entirely, you go with a wired studio monitor like these Audio-Technicas. They are built like tanks, with a heavy-duty construction that reminds me of the industrial equipment I used to spec out in the plant.

    The Bottom Line on Your Next Purchase

    Stop chasing every flashy feature on the box; if the build quality feels like a cheap toy, those noise-canceling specs won’t matter when the headband snaps in three months.

    Comfort isn’t a luxury, it’s a requirement—if you can’t wear them for a full four-hour stretch without feeling like your ears are in a vice, they aren’t worth the desk space.

    Look for physical controls over touch sensors whenever possible; I’ll take a reliable button I can feel with my thumb over a finicky piece of glass any day of the week.

    The Real Cost of Cheap Gear

    “I’ve spent enough time looking at schematics to know that if a manufacturer skimps on the build quality to save a few cents on plastic, you’re the one paying the price when the headband snaps or the driver starts rattling after three months of use. In an office, you don’t need bells and whistles; you need a piece of equipment that stays comfortable for eight hours and actually shuts the world out when you’re trying to think.”

    Roland Delacroix

    The Bottom Line

    Look, I’ve spent enough time around assembly lines and testing benches to know that a product is only as good as the components inside it. If you’re looking for pure silence to drown out the chatter in a cubicle farm, go for the top-tier noise cancelers I mentioned. If you’re stuck in a call all day and need something that won’t crush your skull by noon, prioritize the ergonomic builds. Whatever you decide, don’t get distracted by the flashy marketing or the “smart” features that nobody actually uses. Just make sure you are investing in build quality and long-term comfort rather than just paying for a brand name printed on a piece of expensive plastic.

    At the end of the day, your tools should serve you, not the other way around. You shouldn’t have to fight with a finicky app or a flimsy headband just to get through a Tuesday afternoon. Buy something that feels substantial in your hands and performs the task it was engineered to do. If you buy gear that is built to last, you won’t find yourself back in the electronics aisle every six months wasting more hard-earned money. Invest in something reliable and straightforward, and then get back to the actual work you’re supposed to be doing.

    Frequently Asked Questions

    Do I really need active noise canceling, or will a decent pair of passive isolation headphones do the job for a noisy cubicle?

    Look, if you’re sitting in a quiet corner, passive isolation is fine. A good seal around your ears will block out the hum of the AC or a distant printer. But if your cubicle is right next to the breakroom or a chatty coworker, passive isolation won’t touch those mid-range human voices. In that case, you need Active Noise Canceling. It’s an extra expense, but it’s the difference between actually working and just suffering through the noise.

    How much does the battery life actually matter if I'm just using them for a few calls a day?

    Look, if you’re only jumping on two or three calls a day, you don’t need a battery that lasts a week. I’ve seen people pay a premium for massive battery specs they’ll never actually use. However, don’t get careless. You want enough headroom so you aren’t scrambling for a charging cable right before a meeting. Aim for something that handles a full workday of intermittent use. Anything more is just paying for extra weight.

    Is it worth spending the extra money on a wired connection, or are these new wireless models actually reliable enough for a full workday?

    Look, I’ve spent enough time troubleshooting faulty connections to tell you this: if your job depends on being heard, go wired. Bluetooth is convenient, sure, but batteries fail and latency is a real headache during a long shift. If you’re sitting at a desk all day, a reliable wired connection is a tool, not a chore. Save the wireless for your commute; for work, stick to something that doesn’t need a charger.

  • Understanding Different External Hard Drives

    Understanding Different External Hard Drives

    I was sitting at my workbench last Tuesday, surrounded by the smell of solder and old capacitors, when a neighbor asked me for a recommendation on a new backup drive. He’d just spent three hundred dollars on some sleek, brushed-aluminum gadget that looked more like a piece of modern art than a storage device. It’s the same old story: companies wrap mediocre components in fancy packaging and call it “innovation,” but they’re really just selling you expensive plastic. When you start looking into the different external hard drive types available today, you realize the marketing departments are working overtime to confuse you with jargon that doesn’t actually mean anything for the long-term survival of your data.

    I’m not here to sell you on the latest bells and whistles or help you pick the prettiest box on the shelf. My goal is to cut through the noise and tell you exactly what is going to hold up under pressure and what is going to fail the moment you actually need your files. I’ve spent my career looking at how things are built, and I’m going to apply that same scrutiny here. We’re going to look at the mechanical reality of these drives so you can make a decision based on reliability, not hype.

    Table of Contents

    The Hdd vs Ssd Comparison Real Speed or Just Hype

    The Hdd vs Ssd Comparison Real Speed or Just Hype

    Now, let’s get down to the brass tacks of the HDD vs SSD comparison. In my engineering days, we relied on mechanical components because they were predictable, but modern solid-state drives have changed the game entirely. If you’re looking at external drive read/write speeds, an SSD will make a traditional hard drive look like it’s running through molasses. An SSD has no moving parts—no spinning platters, no actuator arms—which means it’s nearly instantaneous when you’re pulling up large files or running backups.

    However, don’t let the marketing departments fool you into thinking an SSD is a magic bullet for every situation. If you just need a massive “digital attic” to dump old photos and tax documents that you won’t touch for months, a high-capacity HDD is still the smarter play for your wallet. But if you’re a professional moving large video files or someone who travels frequently, you need the durability of an SSD. A mechanical drive is a fragile piece of machinery; one accidental drop from a desk can turn your precious data into a paperweight. For daily, heavy-duty use, the speed and resilience of an SSD are well worth the extra few dollars.

    Desktop vs Portable Storage Solutions What You Truly Need

    Desktop vs Portable Storage Solutions What You Truly Need

    Now, you’ve got to decide if you’re looking for a workhorse that sits on your desk or something you can actually toss in a bag without a second thought. When we talk about desktop vs portable storage solutions, it really comes down to your workflow. Desktop drives are usually larger, plug into a wall outlet, and offer massive capacities for a fraction of the cost. If you’re backing up a whole library of high-res photos or video files, you want that stability. They aren’t meant to move, and frankly, you shouldn’t try to.

    On the other hand, portable drives are built for the person on the move. These are much more susceptible to physical shock, so if you’re traveling, don’t skimp—look for rugged external hard drives that have some actual protection against drops. You also need to keep an eye on your connections; if you’re moving large files frequently, the difference between USB-C vs Thunderbolt connectivity can be the difference between a quick transfer and sitting around waiting for a progress bar to crawl across the screen. Pick the tool that fits your actual life, not just the one with the biggest number on the box.

    Five Rules to Follow Before You Pull Out Your Credit Card

    • Stop chasing the highest capacity number if you don’t have the connection to back it up. If you buy a high-speed SSD but plug it into an old USB 2.0 port, you’re essentially putting a Ferrari engine inside a lawnmower; you aren’t getting the speed you paid for, just a waste of money.
    • Check the build material, not just the marketing fluff. I’ve seen too many “rugged” drives that are nothing more than thin, hollow plastic shells. If you’re planning to carry this in a bag, look for something with a metal chassis or a high-grade rubberized casing that can actually handle a bump.
    • Always factor in the “failure math” for HDDs. Mechanical hard drives have moving parts—spinning platters and tiny actuator arms—which means they are fundamentally prone to mechanical failure if they take a hit. If your data is precious, don’t trust a spinning disk to survive a drop.
    • Don’t get blinded by the “Thunderbolt” label without checking your hardware. It’s a premium connection that’s great for professionals, but for most folks, a solid USB 3.2 Gen 2 drive does the job just fine without the extra markup. Read the fine print on compatibility before you commit.
    • Buy for the job, not the trend. If you’re just backing up old family photos once a month, a cheap, high-capacity HDD is perfectly fine. But if you’re editing video directly off the drive, you better invest in an SSD. Using the wrong tool for the task is the fastest way to end up frustrated.

    The Bottom Line: Don't Buy Into the Marketing Fluff

    Stop chasing the highest gigabyte count if the build quality is garbage; a drive that crashes during a transfer is just a very expensive paperweight.

    Match the drive to the job—use an SSD for your active work and moving files quickly, but keep an HDD for long-term, heavy-duty backups where speed isn’t the priority.

    Before you tap your credit card, look past the sleek plastic casing and check the actual specs; you want hardware that prioritizes reliability over a fancy LED light show.

    The Truth About Modern Storage

    I’ve seen enough “cutting-edge” gear end up in the scrap heap to know that a spec sheet doesn’t mean a thing if the casing is flimsy and the controller is cheap. Whether you’re picking an SSD for speed or an HDD for bulk, stop looking at the marketing fluff and start looking at the build quality; if it feels like a toy, it’s going to fail you when your data actually matters.

    Roland Delacroix

    The Bottom Line: Don't Get Sold a Bill of Goods

    The Bottom Line: Don't Get Sold a Bill of Goods.

    At the end of the day, picking a drive shouldn’t feel like you’re solving a calculus equation. If you need massive amounts of space for a low price and you plan on keeping the drive sitting stationary on a desk, a traditional HDD is still a perfectly sensible tool for the job. But, if you’re constantly moving from place to place or you’re tired of that terrifying clicking sound when a drive takes a bump, spend the extra money on an SSD. I’ve seen too many people try to save fifty bucks only to lose years of family photos because they bought the cheapest, flimsiest plastic housing they could find. Remember: reliability is worth the premium.

    My advice is simple: stop looking at the flashy marketing on the box and start looking at the actual build quality and the use case. Whether you go with a rugged portable drive or a heavy-duty desktop unit, make sure it serves your specific needs rather than the manufacturer’s profit margins. Technology is supposed to make our lives easier, not give us more headaches to manage. Buy something that is built to last, keep a secondary backup of your most important files, and then get back to enjoying your life. You’ve done the homework; now go buy something that actually works.

    Frequently Asked Questions

    How much does the connection type—USB-A versus USB-C—actually impact the longevity of the drive?

    Look, the connection type won’t change the lifespan of the actual storage platters or chips inside, but it sure as hell affects the physical durability. I’ve seen too many flimsy USB-C ports on cheap portable drives snap off or get wiggled loose because the housing is nothing but thin plastic. If you want something that survives being tossed in a bag, look for a drive with a reinforced, solid connection. Don’t let a weak port kill a good drive.

    Is it worth paying a premium for a ruggedized drive, or is that just marketing fluff for people who don't take care of their gear?

    Look, I’ve seen enough dropped components in my time to know that “rugged” isn’t always a gimmick, but you have to look past the rubber coating. If you’re a field engineer or you toss your gear in a backpack, a drive with an actual IP-rated seal and shock resistance is worth every extra cent. But if it’s sitting on a desk in a climate-controlled office, don’t let them upsell you on a tank you don’t need.

    If I'm backing up old family photos, should I be looking at mechanical drives for capacity or SSDs for peace of mind?

    If you’re talking about family photos, you aren’t just storing data; you’re storing memories. For long-term archival, I’d lean toward a high-quality HDD for the sheer capacity, but with a caveat: you have to maintain it. However, if you’re someone who tosses gear in a bag or moves things around, get an SSD. They have no moving parts to fail if you bump them. Don’t risk a single precious memory on a cheap, flimsy drive.

  • Choosing a Gaming Monitor for Immersion

    Choosing a Gaming Monitor for Immersion

    I was sitting at my workbench the other day, cleaning the dust out of an old Marantz receiver, when I realized just how much the tech industry has started leaning on marketing fluff to separate fools from their hard-earned cash. I see these kids online getting swept up in every flashy spec sheet, thinking that a higher price tag automatically means a better experience. It’s nonsense. You don’t need a thousand-dollar setup to get a decent response time; what you actually need is a monitor for gaming that doesn’t flicker like a dying fluorescent bulb the moment you crank the refresh rate. Most of what’s on the shelves today is nothing more than glorified, expensive plastic designed to look good in a commercial rather than perform under a real load.

    I’m not here to sell you on some proprietary “ultra-sync” nonsense that only works with one specific brand of graphics card. My goal is simple: I want to help you find a piece of hardware that is built to last and actually delivers the performance it promises on the box. I’ll be looking at panel types, input lag, and build quality—the stuff that actually matters when you’re in the middle of a match. I promise to give you the straight truth so you can stop wasting your money on overhyped garbage and start investing in gear that works.

    Table of Contents

    The Truth About Panel Type Comparison Ips vs Va

    The Truth About Panel Type Comparison Ips vs Va

    Now, let’s get into the real meat of the matter: the panel. Most manufacturers will throw a bunch of marketing jargon at you, but when you’re looking at a panel type comparison ips vs va, you need to look past the glossy brochures. I’ve spent enough time looking at schematics to know that every compromise has a cost. IPS panels are generally the gold standard for color accuracy and viewing angles; if you’re doing anything more than just clicking heads, you’ll want that clarity. However, they often struggle with “IPS glow,” which can be a real nuisance in a dark room.

    On the other hand, you have VA panels. These are the heavy hitters when it comes to contrast ratios. If you like watching movies or playing atmospheric games where shadows actually matter, VA is hard to beat. The catch? You have to watch out for ghosting. Many VA panels suffer from poor motion blur reduction, leaving a muddy trail behind moving objects on the screen. It’s a trade-off: do you want the crisp, accurate colors of an IPS, or the deep, rich blacks of a VA? Don’t let a salesperson tell you one is objectively better; pick the one that suits your actual use case.

    Dont Get Fooled by False 4k Gaming Resolution Claims

    Dont Get Fooled by False 4k Gaming Resolution Claims

    I’ve seen it a dozen times in the showroom: a manufacturer slaps a “4K” sticker on a box, but when you look closer at the specs, you realize they’re selling you a lie. Some of these budget-friendly units use aggressive upscaling or sub-pixel rendering to mimic a high-resolution look, but they can’t actually deliver a true 4k gaming resolution. It’s a cheap trick to get you to pay a premium for what is essentially a glorified 1080p display. If the native pixel count isn’t there, you aren’t getting the clarity you paid for; you’re just getting a blurry mess that looks terrible once you actually start playing.

    Don’t let the marketing department dazzle you with shiny numbers. A high resolution means nothing if the hardware can’t keep up with the signal. I’ve sat there with my notepad, checking the fine print, and I’ve seen plenty of “high-res” displays that suffer from massive motion blur reduction failures because the controller board is absolute junk. If you want a real 4K experience, you need to ensure the panel can actually handle the bandwidth without lagging or ghosting. If they won’t tell you the exact native resolution and the input lag specs, walk away.

    5 Things to Check Before You Open Your Wallet

    • Look past the fancy RGB lighting and check the refresh rate—if it’s below 144Hz, you’re essentially buying a glorified office screen that won’t keep up with modern hardware.
    • Don’t ignore the stand quality; a flimsy, plastic adjustable base will wobble every time you bump your desk, and you can’t fix that with a software update.
    • Check the input lag specs, not just the marketing fluff, because a monitor that takes too long to register your commands is nothing more than an expensive paperweight.
    • Verify the port selection—make sure it actually has DisplayPort or a high-speed HDMI version that matches your GPU, or you’ll be stuck fighting with adapters.
    • Always read the fine print on brightness levels; if it doesn’t hit at least 300 nits, you’ll be squinting at a dark, washed-out mess the moment the sun hits your room.

    Bottom Line: Don't Buy Into the Marketing Hype

    Stop chasing every new spec on a box; if you’re a fast-paced gamer, prioritize response time and panel stability over a fancy 4K label that’s just going to stutter when things get intense.

    Pick your panel based on how you actually use the thing—get an IPS if you want color accuracy that doesn’t shift, or a VA if you’re sitting in a dark room and need decent contrast.

    Always check the build quality and the ports; I’ve seen too many “high-end” monitors that feel like cheap toys the moment you try to adjust the stand or plug in a heavy cable.

    ## Build Quality Over Marketing Fluff

    “I’ve seen enough ‘cutting-edge’ hardware end up in the scrap heap to know that a high refresh rate won’t mean a damn thing if the panel’s backlight is uneven or the stand feels like it was molded out of cheap, brittle plastic. Stop reading the spec sheet for a second and actually look at the build; if it doesn’t feel substantial in your hands, it won’t last through a single season of heavy use.”

    Roland Delacroix

    The Bottom Line on Your Next Purchase

    The Bottom Line on Your Next Purchase

    Look, I’ve spent enough time staring at schematics to know that a flashy spec sheet doesn’t always tell the whole story. We’ve covered a lot of ground here, from stripping away the marketing fluff surrounding 4K resolution to understanding why you shouldn’t just blindly pick a panel type without knowing how it handles contrast. If you remember nothing else, remember this: don’t let a salesperson—or a slick advertisement—convince you that more pixels automatically mean a better experience. You need to prioritize actual response times and panel reliability over whatever buzzword is currently trending on social media. If the build quality feels like cheap, hollow plastic in the box, it’s going to fail you when you’re mid-match.

    At the end of the day, your gaming monitor is a tool, and like any good piece of engineering, it should serve you without constant headaches or technical glitches. Don’t get caught up in the “arms race” of buying the most expensive kit on the shelf just because it has the highest number attached to the price tag. Invest your hard-earned money into hardware that offers sustained performance and real-world durability. Buy something that works the first time you plug it in, and stays working for years to come. Now, go find something solid that actually deserves a spot on your desk.

    Frequently Asked Questions

    Is a higher refresh rate actually worth the extra cash, or is it just marketing fluff for most people?

    Look, if you’re just sitting there clicking through menus or playing slow-paced strategy games, a 240Hz panel is nothing more than an expensive way to burn electricity. It’s marketing fluff for you. But if you’re into fast-paced shooters where every millisecond counts, that smoothness is real—it reduces motion blur and makes the hardware feel responsive. My advice? Don’t pay a premium for high refresh rates unless your hands can actually keep up with it.

    How do I know if a monitor's build quality is actually solid or if it’s just a cheap plastic shell that'll wobble every time I touch my desk?

    Look, don’t just trust the glossy marketing photos. When you’re in the store, give the casing a firm squeeze. If it creaks or flexes like a cheap toy, put it back. Check the stand, too—a flimsy base is a dead giveaway of corner-cutting. I always look for weighted metal components and tight tolerances in the bezel. If the screen wobbles when you barely tap the desk, it’s just expensive plastic destined for the landfill.

    Do I really need a curved screen to get an advantage, or is that just another way for manufacturers to charge more for something unnecessary?

    Look, I’ve spent enough time looking at blueprints to know that geometry matters, but don’t let marketing departments play you. A curved screen can help with immersion and reduce eye strain by keeping the edges of the panel at a more consistent distance from your eyes. But for a competitive edge? It’s mostly fluff. Unless you’re sitting inches from a massive ultra-wide, you’re likely just paying a premium for a gimmick.

  • Selecting a Central Smart Home Hub

    Selecting a Central Smart Home Hub

    I’ve spent thirty years in manufacturing, where if a component didn’t meet the spec, it went straight into the scrap bin. Lately, I’ve been looking at the “smart home” market, and frankly, it makes my blood pressure rise. Most of these companies are selling you nothing but expensive plastic and software that crashes the moment your internet hiccups. You’re told you need a complex ecosystem to run a simple lightbulb, but half the time, you’re just buying a headache. If you’re looking for the best smart home hubs on the market, you shouldn’t be looking for the one with the most flashing lights; you should be looking for the one that actually stays connected when you need it most.

    I’m not here to sell you on the latest marketing hype or a gadget that requires a PhD to operate. In this list, I’ve narrowed it down to five specific options that I’ve vetted for reliability and build quality. I’ll tell you exactly which ones are worth your hard-earned money and which ones are just overpriced paperweights destined for the junk drawer. Let’s get to work.

    Table of Contents

    The Reliable Workhorse: Hubitat Elevation

    The Reliable Workhorse: Hubitat Elevation local hub.

    If you’re tired of your devices deciding to go on strike because the manufacturer’s server went down, you need to look at the Hubitat. Unlike most of the junk on the market today, this thing processes everything locally. That means your automations don’t rely on a cloud connection in some data center halfway across the country just to turn on a porch light. I appreciate a piece of hardware that doesn’t need a constant handshake with the internet just to perform its basic functions.

    The Gold Standard: Samsung SmartThings

    The Gold Standard: Samsung SmartThings ecosystem.

    SmartThings is what I’d call the “middle ground” option. It’s much more user-friendly than the Hubitat, which is a plus if you don’t want to spend your entire Saturday troubleshooting code. It has a massive ecosystem of compatible devices, so you aren’t stuck buying one specific brand of lightbulb just to make the system work. It’s a solid, dependable choice for most folks who just want their gadgets to talk to each other without a headache.

    The Apple Ecosystem: HomePod and Apple TV

    The Apple Ecosystem: HomePod and Apple TV.

    Now, I’m not usually one for “walled gardens,” but I have to give credit where it’s due regarding Apple’s hardware build quality. If you already have an iPhone and a Mac, using an Apple TV or a HomePod as your hub is a very seamless experience. The integration is tight, and the security protocols are some of the best I’ve seen, which is important when you’re letting software control the locks on your front door.

    The Enthusiast's Choice: Home Assistant Blue

    For those of you who truly want to own your technology rather than just renting it, Home Assistant is the only way to go. This isn’t a “plug and play” solution; it’s a project. I’ve spent more time than I care to admit with my notepad out, mapping out complex logic for my home automation. But once you have it configured, the level of unmatched customization is something you won’t find anywhere else.

    The Simple Entry Point: Amazon Echo Hub

    I usually stay away from anything that’s constantly listening to your business, but if you just want a central dashboard to tap on, the Echo Hub serves a purpose. It’s essentially a dedicated tablet for your wall that puts your most-used controls right in front of you. For a simple setup where you want to control lights and thermostats without digging through a phone app, it’s surprisingly effective.

    The Bottom Line on Your Smart Home Setup

    Stop chasing every shiny new gadget on the market; prioritize a hub with stable connectivity and local processing so your lights don’t stop working just because the internet goes down.

    Look past the marketing fluff and check the build quality and protocol support—if it doesn’t play well with the hardware you already own, it’s just more expensive plastic destined for a junk drawer.

    Don’t let complexity cost you your sanity; the best system is the one that works reliably in the background without requiring you to troubleshoot an app every single time you walk into a room.

    The Bottom Line on Connectivity

    I’ve spent enough time looking at blueprints to know that a system is only as strong as its weakest connection. If your smart hub is nothing more than a glorified, overpriced paperweight that loses contact with your lights every time the wind blows, then it isn’t a tool—it’s a nuisance. Buy for stability, not for the shiny packaging.

    Roland Delacroix

    The Bottom Line

    At the end of the day, choosing a smart home hub isn’t about finding the device with the most colorful app or the flashiest marketing campaign. It’s about finding the backbone of your system—the piece of hardware that stays out of your way and does its job without needing a reboot every Tuesday. Whether you decide to go with a dedicated local controller to keep your data private or a more user-friendly ecosystem that integrates with your existing gadgets, make sure you are prioritizing reliability over hype. I’ve seen enough poorly engineered circuit boards in my time to know that if the foundation is shaky, the whole house comes crashing down. Don’t let a “smart” home become a constant headache just because you wanted the latest trend.

    My advice is simple: buy something that is built to last and actually works when the lights go out. You deserve a home that serves you, not a collection of expensive plastic bricks that require a troubleshooting manual just to dim the living room lamps. Take your time, look at the actual specs instead of the glossy box, and invest in quality hardware. Once you get the right hub in place, you’ll realize that true technology shouldn’t demand your constant attention; it should just work quietly in the background. Now, go grab a real tool, get to work, and build a system you can actually trust.

    Frequently Asked Questions

    Do I really need a dedicated hub, or can I just keep using the apps on my phone?

    Look, I get the temptation to save a few bucks and just use your phone, but you’re asking for trouble. Relying on individual apps is like trying to run a factory where every machine has its own separate operator—it’s inefficient and prone to breaking down. A dedicated hub centralizes the logic. It keeps your devices talking to each other locally, so when your internet goes sideways, your lights don’t decide to quit too. Get a hub.

    What happens to my smart lights and locks if my internet connection goes down?

    Look, this is exactly why I’m skeptical of these “all-in-one” cloud setups. If your internet drops, most cheap hubs turn your smart home into a very expensive paperweight. Your lights won’t respond to the app, and your locks might leave you standing on the porch. If you want reliability, you need a hub that runs locally—something that doesn’t need to “check in” with a server halfway across the world just to turn on a lamp.

    How do I know if a new gadget I buy today will actually talk to the hub I already own?

    Look for the “Matter” or “Thread” logo on the box. That’s the new industry standard that actually means something. If you don’t see that, check the fine print for specific protocols like Zigbee or Z-Wave. Don’t just trust a marketing claim that says “works with smart home”; that’s usually just code for “it connects to the cloud, but it won’t talk to your hub.” If the specs aren’t listed, walk away.

  • Improving Your Workstation With a Monitor Stand

    Improving Your Workstation With a Monitor Stand

    I was sitting at my workbench last Tuesday, trying to calibrate an old Marantz receiver, when a sharp, familiar ache shot up the back of my neck. It wasn’t the age, though that’s part of it; it was the fact that I’d spent the last three hours hunched over my computer screen because I’d bought some cheap, hollow-core riser that couldn’t even hold my monitor level. Most people think monitor stand ergonomics is about buying the most expensive, “smart” gadget on the market, but half the stuff you see in those glossy tech catalogs is nothing more than overpriced, flimsy plastic that wobbles the moment you touch your keyboard.

    I’m not here to sell you on some high-tech nonsense that requires a software update just to lift your screen two inches. My goal is to cut through the marketing garbage and tell you what actually works from a structural standpoint. I’m going to show you how to find a setup that provides real stability and proper alignment so you can stop fighting your desk and start focusing on your work. We’re looking for build quality and mechanical reliability, not empty hype.

    Table of Contents

    The Truth About Eye Level Monitor Positioning

    The Truth About Eye Level Monitor Positioning

    Most people I see hunched over their desks look like they’re trying to read a book through a keyhole. They’ve got their screens sitting way too low, which forces the neck into a constant, awkward tilt. This isn’t just a minor annoyance; you’re effectively putting massive pressure on your vertebrae. Proper eye level monitor positioning means the top third of your screen should be directly in line with your gaze. If you’re looking down, you’re asking for trouble.

    I’ve spent enough time around heavy machinery to know that misalignment leads to mechanical failure, and your body is no different. When your screen is too low, you end up reducing cervical spine strain by necessity, but most folks do it the hard way—by slouching. I’ve seen plenty of cheap, hollow plastic stands that claim to help, but they lack the stability needed for a true ergonomic workstation setup. If the stand wobbles even a millimeter when you type, your eyes will constantly struggle to refocus, and your posture will follow suit. Don’t settle for a riser that can’t hold its ground.

    Why Most Cheap Stands Fail Your Cervical Spine

    Why Most Cheap Stands Fail Your Cervical Spine

    I’ve seen it a hundred times in the manufacturing plants I used to manage: someone buys the cheapest piece of junk available just to save a few bucks, only to end up sidelined by a repetitive strain injury. Most of those budget stands you see on big-box websites are nothing more than glorified pieces of injection-molded plastic. They lack the structural integrity to stay put, meaning your screen slowly tilts or sinks throughout the day. When your monitor isn’t rock-solid, you end up subconsciously leaning forward or tilting your head to compensate. That’s exactly how you end up reducing cervical spine strain in theory, but failing miserably in practice.

    The real problem is that these flimsy risers don’t offer any real way to fine-tune your ergonomic workstation setup. If the stand doesn’t have a heavy-duty base or a high-quality tension mechanism, you aren’t actually in control of your posture; the hardware is controlling you. You can’t achieve a stable, consistent height if the material itself is prone to wobbling every time you bump your desk. Don’t fall for the marketing fluff; if it feels light and hollow in your hands, it’s going to be a nightmare for your neck within a week.

    Five Rules for Buying a Stand That Won't Fall Apart

    • Check the weight capacity before you hit ‘buy’. Most of these modern stands are made of thin sheet metal or cheap ABS plastic that’ll bow under the weight of a decent 27-inch monitor. If the specs don’t clearly state a load limit, walk away.
    • Look for solid mounting points. I don’t care how many “features” it has; if it uses a VESA mount, make sure the screws and the plate feel substantial. If it feels like it’s going to strip the moment you tighten it, it’s garbage.
    • Prioritize stability over “style.” You don’t need a sleek, minimalist design if the whole thing wobbles every time you bump your desk. I always look for a heavy, wide base—preferably steel or thick aluminum—that keeps the center of gravity low.
    • Test the adjustment range manually. A good stand should move smoothly, not jerk or stick. If you have to fight the tension knobs just to tilt the screen a few degrees, you’re going to end up hating it within a week.
    • Avoid the “all-in-one” gimmicks. Companies love to sell you stands with built-in USB hubs and wireless chargers. In my experience, those extra components are just more points of failure. Stick to a stand that does one thing well: holding your monitor steady.

    The Bottom Line: Don't Let a Cheap Stand Ruin Your Back

    Stop buying those lightweight, hollow plastic risers; if the stand wobbles when you nudge your desk, it’s going to cause eye strain and neck fatigue within a week.

    Aim for your eyes to hit the top third of the screen—if you’re hunching over to see your work, you’re doing it wrong and asking for a chiropractor bill.

    Look for solid metal construction and adjustable height increments so you can actually dial in a setup that works for your specific frame, rather than settling for a “one size fits all” compromise.

    The Real Cost of a Cheap Setup

    “I’ve spent enough time looking at failed components to know that if a stand can’t support the weight of your monitor without bowing like a piece of wet cardboard, it’s not an ergonomic tool—it’s just a glorified paperweight that’s going to cost you a fortune in physical therapy down the line.”

    Roland Delacroix

    Don't Let Your Desk Ruin Your Health

    Don't Let Your Desk Ruin Your Health.

    At the end of the day, choosing a monitor stand isn’t about picking the prettiest gadget on the shelf; it’s about mechanical necessity. You’ve learned that eye level is non-negotiable for your posture, and that those flimsy, hollow plastic risers are nothing more than expensive landfill waiting to happen. If you’re going to invest in your workspace, look for materials that actually have some heft to them—steel, thick tempered glass, or solid wood. You need something that won’t wobble every time you reach for your coffee, because a shaky setup is a recipe for a distracted mind and a strained neck.

    I’ve spent enough years looking at blueprints to know that a solid foundation is everything. Whether you’re working a nine-to-five or just tinkering with your hobby at a home desk, your body is the most important piece of equipment you own. Don’t treat it like an afterthought by settling for subpar, mass-produced junk. Take the time to measure, find a stand that offers true stability, and set your station up right the first time. It might feel like a small detail now, but your spine will certainly thank you ten years down the road.

    Frequently Asked Questions

    Is it actually worth spending the extra money on a heavy-duty steel riser, or can I just use a stack of sturdy books?

    Look, I’ve seen plenty of “makeshift” solutions in my time, and a stack of books is a recipe for a headache. Books shift, they slide, and they aren’t stable once you start typing heavily. If you’re going to do it, do it right. Spend the extra money on a heavy-duty steel riser. It stays put, it won’t buckle under the weight of a decent monitor, and it won’t look like a mess on your desk.

    How do I know if my current desk height is messing up my posture regardless of which stand I use?

    Look, you can buy the most expensive aluminum riser on the market, but if your desk is at the wrong height, you’re still fighting a losing battle. Check your elbows. When you’re typing, your forearms should be parallel to the floor, with your wrists neutral—not cocked up or slumped down. If you’re shrugging your shoulders to reach the keys or leaning forward to find comfort, your desk is the culprit, not your monitor.

    If I'm using a dual-monitor setup, how do I keep them aligned so I'm not constantly twisting my neck back and forth?

    If you’re running two screens, stop trying to make them work on two separate, cheap stands. You’ll never get them level, and you’ll end up with a permanent crick in your neck. Get a single, heavy-duty dual-monitor arm with solid tension adjustment. Center the seam of the monitors directly in front of your nose. If you have to turn your torso to see one, the setup is wrong. Align them, lock them down, and stop twisting.

  • Controlling Your Home With Smart Bulbs

    Controlling Your Home With Smart Bulbs

    I was sitting in my workshop last Tuesday, trying to solder a connection on a 1974 Marantz receiver, when I realized I couldn’t even turn on the overhead light without fumbling for my phone. It sounds ridiculous, I know, but that’s the trap these companies set for you. They market smart light bulbs as this seamless way to automate your life, but more often than not, you’re just buying a headache wrapped in a proprietary app. I’ve spent enough time in manufacturing to know that if a component requires a constant internet connection just to perform its one basic job, it’s not a tool—it’s a liability.

    I’m not here to sell you on the latest flashy ecosystem or some overpriced gadget that’ll be obsolete by next Christmas. My goal is simple: I want to help you separate the reliable hardware from the expensive plastic. I’ve spent the last few weeks putting various brands through their paces, testing everything from connection stability to actual build quality, so you don’t have to. I’ll tell you exactly which ones actually work when the Wi-Fi dips and which ones are just marketing fluff designed to drain your wallet.

    Table of Contents

    Mastering Connectivity Protocols Without the Technical Headache

    Mastering Connectivity Protocols Without the Technical Headache

    Now, I’ve seen plenty of folks get halfway through a setup only to realize their new gear won’t talk to the rest of their house. It’s a headache I’d rather you avoid. When you’re looking at different smart bulb connectivity protocols, don’t get blinded by the marketing jargon. You’ll see terms like Zigbee, Z-Wave, or Matter thrown around like they’re magic. In plain English, these are just the languages your devices use to communicate. If you buy a bunch of gadgets that all speak different dialects, you’re going to end up with a digital mess that requires three different apps just to dim the lights in your hallway.

    My advice? Check for solid smart home ecosystem integration before you pull the trigger on anything. If you want a system that actually works, make sure everything plays nice with the hub or assistant you already own. You want a setup where voice control compatibility is seamless, not a situation where you’re shouting at a speaker for five minutes just to get some light. Stick to the standards that have proven themselves in the field; it’s the only way to ensure you aren’t just buying a collection of expensive plastic.

    Energy Efficient Smart Lighting That Actually Lasts

    Energy Efficient Smart Lighting That Actually Lasts

    Most folks buy these things because they see a low wattage rating on the box and think they’ve found a bargain. But I’ve learned the hard way that a low energy draw doesn’t mean much if the driver inside the housing is cheap junk that burns out in six months. When you’re looking for energy efficient smart lighting, you need to look past the marketing fluff and check the thermal management. If the bulb runs hot to the touch, that heat is cooking the internal electronics, and you’ll be replacing it before the year is out. I always check for dimmable smart LED bulbs that specifically list their dimming range; if they flicker every time you drop the brightness, the circuitry is subpar.

    Don’t get caught up in the hype of complex automated lighting scenes if the hardware can’t handle the load. I’ve seen plenty of high-end setups fail simply because the bulbs couldn’t maintain a steady voltage during a transition. You want hardware that stays consistent. If you’re investing in these, make sure they are built to handle the heat and the voltage fluctuations of a real home, not just a laboratory.

    Five Things to Check Before You Buy

    • Look for a physical manual or clear, printed instructions. If the company expects you to navigate a dozen sub-menus in a buggy app just to dim a lamp, they’ve designed a headache, not a light bulb.
    • Check the build quality of the base. I’ve seen too many of these modern bulbs where the plastic housing feels thin and brittle; you want something that feels like it won’t crack the moment you screw it into a standard fixture.
    • Verify the “offline” functionality. A smart bulb is useless if it turns into a paperweight every time your internet connection hiccups. Make sure the bulb can still function as a basic light via a standard wall switch.
    • Don’t get blinded by color options. Unless you’re running a disco in your living room, focus on the Color Rendering Index (CRI). If the light makes your home look like a sterile hospital ward, it’s a waste of money.
    • Avoid proprietary hubs whenever possible. I don’t want to buy a specialized bridge just to turn on a light in the hallway. Stick to protocols that play well with others so you aren’t locked into one manufacturer’s ecosystem.

    The Bottom Line: Don't Get Sold a Paperweight

    Prioritize Zigbee or Matter-compatible bulbs over cheap Wi-Fi versions; if every bulb relies on your router just to turn on, you’re asking for a headache the moment your internet hiccups.

    Look for solid build quality and heat dissipation in the housing; if a bulb feels like a hollow piece of junk, the internal drivers will fry long before the LED life is actually up.

    Stop paying the “app premium”—if a bulb requires a subscription or a proprietary, bloated app just to dim the lights, it isn’t a tool, it’s a gimmick designed to drain your wallet.

    The Reliability Test

    If you have to pull out your phone and wait thirty seconds for a cloud server to respond just to turn on a lamp, you haven’t bought a convenience—you’ve bought a headache wrapped in expensive plastic.

    Roland Delacroix

    The Bottom Line

    The Bottom Line: prioritize reliable connectivity.

    Look, I’ve spent enough time looking at schematics to know that if the foundation is weak, the whole system is going to fail you. When you’re shopping for these bulbs, remember that it isn’t about which brand has the flashiest app or the most colorful marketing campaign. It’s about choosing a protocol that won’t drop your connection every time the wind blows, and selecting hardware that is built to actually last more than a single season. If you ignore the connectivity standards and settle for the cheapest possible LED, you aren’t saving money; you’re just buying expensive plastic that will end up in a landfill by next Christmas.

    At the end of the day, technology should serve you, not the other way around. You shouldn’t have to troubleshoot your light switches every time you want to read a book or watch a movie. My advice is simple: stick to the specs, prioritize reliability over gimmicks, and don’t be afraid to walk away from a product that feels flimsy. When you find a setup that is truly set it and forget it, you’ll realize that good engineering isn’t about how many bells and whistles a device has—it’s about the peace of mind that comes from knowing your tools will work exactly when you need them to.

    Frequently Asked Questions

    If my Wi-Fi goes down, am I going to be sitting in the dark because the bulbs won't respond to a manual switch?

    That’s the million-dollar question, isn’t it? Here’s the short answer: it depends on how much “smart” junk you’ve let into your house. Most decent bulbs will still work with a standard wall switch, but if you’ve installed a smart dimmer switch that relies entirely on the cloud, you’re in trouble. Before you buy, check if the bulb has a “local control” mode. If it needs a handshake with a server just to turn on, it’s just expensive plastic.

    Are these fancy LED bulbs actually going to last, or is the internal circuitry going to fail long before the light itself burns out?

    That’s the million-dollar question. Here’s the truth: the LED diode itself can last for years, but the driver—that little bit of circuitry tucked inside the base—is almost always the weak link. Most manufacturers use cheap capacitors to shave pennies off the production cost. When those components overheat or fail, your “long-lasting” bulb becomes a paperweight. If you want reliability, look for brands that specify their component quality rather than just boasting about lumen counts.

    Do I really need to buy a separate hub for these things, or can I just plug them in and get to work?

    Look, I get the temptation to skip the extra box on your shelf. If you’re just buying two or three Wi-Fi bulbs, you can probably just plug them in and be done with it. But if you’re planning to do the whole house, skip the Wi-Fi route. It’ll clog your router and leave you frustrated. Get a hub. It keeps the heavy lifting off your network and ensures your lights actually respond when you flip the switch.

  • Troubleshooting Your Robot Vacuum

    Troubleshooting Your Robot Vacuum

    I was sitting in my workshop last Tuesday, trying to calibrate an old Marantz receiver, when I heard that dreaded, high-pitched whine coming from the living room. I looked up to see my latest “smart” purchase spinning in useless circles, bumping into the baseboards like a blind toddler. It’s the same story every time: you spend three hundred dollars on a piece of high-tech machinery, only to realize that most robot vacuum troubleshooting isn’t about software updates or cloud connectivity—it’s usually just a damn hair clog or a sensor covered in dust. Most of these companies want you to think you need a technician or a replacement part, but half the time, you just need to actually look at the hardware.

    I’m not here to walk you through a twenty-page digital manual written by someone who has never held a screwdriver. I’ve spent thirty years in systems engineering, and I know how to spot a mechanical failure from a mile away. In this guide, I’m going to give you the straight truth on how to get your machine back in line without wasting a dime on unnecessary repairs. We’re going to focus on practical, hands-on fixes that actually work, so you can stop babysitting your gadgets and get back to your life.

    Table of Contents

    Decoding Those Useless Robot Vacuum Error Codes

    Decoding Those Useless Robot Vacuum Error Codes

    Most manufacturers love to hide behind a cryptic string of numbers and letters on a smartphone app, expecting you to do their job for them. When your machine starts flashing red and spitting out a string of nonsense, don’t panic. Most of these robot vacuum error codes aren’t some deep systemic failure; they are usually just the machine’s way of saying it’s choking. If you see a code related to movement, stop looking at the software and start looking at the hardware. Usually, it’s just a stray sock or a clump of pet hair jammed in the drive wheels.

    I’ve seen plenty of folks assume their motor is dead when the real culprit is simple navigation sensor cleaning. If those optical eyes are coated in a fine layer of dust, the unit will wander aimlessly and throw an error because it thinks it’s lost. It’s the same story with suction power issues; you don’t need a technician to tell you that a clogged filter is the problem. Before you call customer service and wait on hold for forty minutes, grab your notepad and check the physical obstructions first.

    Fixing Suction Power Issues Without Buying a New Unit

    Fixing Suction Power Issues Without Buying a New Unit

    Before you go out and shell out another few hundred dollars for a replacement, let’s look at the actual mechanics of why your machine isn’t picking up dirt. Most people assume the motor is dying, but it’s rarely that dramatic. Usually, you’re dealing with simple suction power issues caused by a blockage in the airflow path. I’ve seen it a dozen times: a stray sock or a clump of pet hair gets wedged in the intake, choking the system. Take a look at the internal tubes and the filter. If that filter is caked in fine dust, the vacuum is basically trying to breathe through a thick wool blanket.

    Don’t skip the physical inspection of the underside, either. Proper cleaning brush maintenance is the difference between a clean floor and a machine that just pushes debris around. If the bristles are matted or the side brushes are bent, you’re losing efficiency. Grab your notepad and check the rollers for hair wraps; even a tiny amount of friction from a tangled axle can strain the motor. It’s not high-tech, but it’s the kind of fundamental maintenance that keeps a machine running for years instead of months.

    Five Practical Maintenance Habits to Keep Your Vacuum from Quitting on You

    • Stop ignoring the cliff sensors. If your vacuum is acting like it’s terrified of a dark rug or keeps bumping into the same chair leg, those little sensor windows are likely filmed over with fine dust. Take a clean, dry microfiber cloth and wipe them down once a week. It’s basic maintenance, not rocket science.
    • Check your side brushes for hair tangles. Most people focus on the main roller, but those little spinning side brushes get choked with hair and thread just as easily. If they can’t spin freely, the vacuum can’t sweep debris into the suction path, and you’ll end up with a mess despite the machine running.
    • Don’t let the battery die completely. I’ve seen too many people leave these things in a corner for months without charging them. If you let a lithium-ion battery hit zero and stay there, you’re effectively killing its lifespan. Keep it docked, even if you aren’t using it every day.
    • Clean the filter, don’t just shake it. Most manufacturers claim these filters are “washable,” but honestly, if you’re washing them every week, you’re going to degrade the material. Instead, tap it out against the side of your trash can regularly to get the fine particulates out. If the filter looks gray and matted even after a cleaning, throw it away and buy a replacement.
    • Inspect the drive wheels for debris. If your robot is veering to the left or spinning in circles, there’s probably a pebble or a clump of pet hair wedged in the axle of one of the main drive wheels. Use a pair of tweezers to clear the debris out. If the wheels can’t grip the floor, the most expensive motor in the world won’t help you.

    The Bottom Line: Don't Let the Plastic Win

    Before you toss a perfectly good machine in the trash because it’s acting up, check the mechanical basics—90% of the time, it’s a clog or a tangled brush roll, not a fried circuit board.

    Stop treating the error codes like gospel; most of them are just the machine’s way of telling you it’s stuck or dirty, so grab your notepad and clean the sensors instead of hitting the reset button repeatedly.

    Invest your money in maintenance, not upgrades; keeping your filters clean and your rollers free of hair will do more for your suction power than any “next-gen” model ever could.

    ## Reliability Over Marketing Hype

    Most people think a blinking red light means the machine is broken, but half the time, it’s just a piece of debris clogging a sensor that you could clear in ten seconds with a dry cloth. Stop treating these things like magic black boxes and start treating them like the mechanical tools they actually are.

    Roland Delacroix

    Don't Let the Gadgets Win

    Don't Let the Gadgets Win through maintenance.

    At the end of the day, most of these “high-tech” cleaning issues boil down to basic mechanical maintenance. Whether you’re deciphering a cryptic error code that’s really just a sensor crying for help, or you’re clearing out a hair clog to restore that lost suction, the solution is almost always physical, not digital. You don’t need to call a technician or spend another dime on a subscription service just because a piece of plastic stopped spinning. If you keep the brushes clear, the sensors wiped down, and the filters clean, you’ve already done eighty percent of the work required to keep that machine running. Reliability isn’t magic; it’s maintenance.

    I know it’s easy to get frustrated when a device that was supposed to save you time ends up becoming another chore on your list. We live in an era where everything is designed to be disposable, but I’m telling you, don’t fall for the trap of thinking a malfunction means it’s time for the landfill. Take a notepad, grab a screwdriver, and look at the machine for what it actually is: a collection of motors, gears, and sensors. When you stop treating it like a black box and start treating it like a piece of properly engineered hardware, you’ll find that most problems are well within your power to fix. Keep your tools handy and your expectations realistic.

    Frequently Asked Questions

    My robot keeps getting stuck on the same rug every single day; is there a way to fix this without constantly moving my furniture?

    Look, if that machine is treating your rug like a mountain range, it’s likely a sensor issue or a simple height mismatch. First, check the cliff sensors on the underside; if they’re coated in dust, the bot gets “confused” by the texture change. If that doesn’t work, check the brushes. A tangled hair clump can stall the motor the second it hits a heavy pile. Don’t go moving the sofa yet—just clean the sensors first.

    Is it actually worth buying those expensive replacement filters, or can I just clean the ones I have?

    Look, I’ve seen enough cheap components fail to know when a part is truly spent. If you’re just rinsing a HEPA filter and it still smells like old dust or leaves a fine film on your floor, throw it out. You can’t “clean” microscopic particles out of those fibers. Don’t let a manufacturer trick you into buying a $50 branded version if a decent third-party one fits the specs, but don’t cling to a clogged filter like it’s a vintage Marantz. If it’s compromised, replace it.

    Why does my vacuum's battery seem to die halfway through the job when it used to last an hour?

    Look, if your runtime has suddenly dropped from an hour to a crawl, don’t go running out and buying a new unit just yet. Most likely, your lithium-ion cells are reaching the end of their chemical life, or the battery is struggling under the load of a clogged filter. It’s basic physics—if the motor has to work twice as hard to pull air through a mess, it’s going to pull more current, and that’ll drain a tired battery in no time.

  • Tips for Aerial Photography With Drones

    Tips for Aerial Photography With Drones

    I spent forty years in manufacturing, where if a part didn’t meet the spec, it went in the scrap bin. Lately, I’ve been watching these tech companies try to sell people on the idea that you need a $3,000 specialized lens or a proprietary AI-driven flight suite to get a decent shot. It’s nonsense. Most of these “pro” tutorials are just fluff designed to make you buy more expensive plastic. If you’re looking for actual drone photography tips that don’t involve emptying your retirement fund, you need to stop listening to the influencers and start looking at the physics of light and stability.

    I’m not here to teach you how to use a flashy app that does the work for you; I’m here to teach you how to actually command the machine. I’ve spent enough time troubleshooting mechanical failures to know that a steady hand and an understanding of your environment matter more than any software gimmick. In this guide, I’m going to give you the straightforward, no-nonsense truth about composition, lighting, and hardware maintenance. We’re going to focus on what actually delivers a high-quality image without the unnecessary overhead.

    Table of Contents

    Mastering the Best Drone Camera Settings for Real Results

    Mastering the Best Drone Camera Settings for Real Results

    Most manufacturers want you to just hit “Auto” and call it a day, but that’s a fast track to producing washed-out, amateurish footage. If you want professional results, you have to take control of the exposure yourself. Start by locking your white balance; if you leave it on auto, the colors will shift mid-flight every time you pass over a patch of trees or water, and you’ll never get a consistent look. To truly master the best drone camera settings, you need to stop relying on the software to make decisions for you.

    I’ve learned the hard way that even the best sensors struggle with harsh midday sun. If you aren’t using ND filters for drone photography, you’re essentially fighting a losing battle against shutter speed. These filters act like sunglasses for your lens, allowing you to maintain a slower shutter speed to get that natural, cinematic motion blur. Without them, your video will look jittery and digital—exactly the kind of “expensive plastic” output I warned you about. Get the hardware right, and the software won’t have to do all the heavy lifting.

    Why Nd Filters for Drone Photography Actually Matter

    Why Nd Filters for Drone Photography Actually Matter

    Look, I’ve seen enough cheap plastic gadgets fail because the manufacturer prioritized flashy marketing over basic physics. Most people buy a drone, fly it into the bright midday sun, and then wonder why their footage looks jittery and artificial. That’s where you run into the problem of shutter speed. When you’re shooting in broad daylight, the camera wants to snap a photo in a fraction of a second to compensate for the light. This results in motion blur that looks digital and “stuttery” rather than cinematic.

    That is precisely why ND filters for drone photography are not just some optional accessory for enthusiasts; they are a fundamental tool for anyone serious about the craft. Think of an ND filter as a pair of high-quality sunglasses for your lens. By physically reducing the amount of light hitting the sensor, you force the camera to use a slower shutter speed. This allows you to achieve that smooth, natural motion blur that makes golden hour aerial shots look like something out of a professional documentary rather than a shaky home movie. If you want professional results, stop relying on software fixes and start managing the light manually.

    Stop Relying on Auto-Pilot: 5 Real-World Tactics for Better Shots

    • Ditch the “Auto” Mode. If you leave your drone on auto, you’re letting a cheap computer chip make the creative decisions for you. I’ve seen too many people fly out, hit the shutter, and come home with washed-out, overexposed junk. Take manual control of your ISO and shutter speed; it’s the only way to ensure the light actually looks the way you intended.
    • Watch Your Battery Life Like a Hawk. These manufacturers love to promise thirty minutes of flight time, but that’s a lab number, not a real-world one. Between the wind resistance and the power draw from your camera gimbal, you’ll be lucky to get twenty. Don’t be the guy who loses a perfectly good piece of hardware because he was too busy chasing one last shot and ignored the low-battery warning.
    • Master the Wind, Don’t Fight It. Before you even take off, look at the weather report—and I don’t mean the app on your phone, I mean look at the trees. If the wind is gusting hard enough to make your hands shake, keep the drone in the box. Fighting high winds drains your battery and creates micro-jitters in your footage that no amount of post-processing software can fix.
    • Check Your Gimbal Stability Regularly. I’ve seen too many hobbyists fly drones with slightly loose gimbal screws or dirty motors. If that gimbal isn’t perfectly level and smooth, your video will look like it was filmed on a washing machine. Every time you pack up, check the physical connections. If it feels flimsy, it’s going to fail you when you’re a mile away from home.
    • Learn the Art of the Slow Pan. Beginners always move the sticks too fast, resulting in jerky, nauseating footage that’s impossible to watch. If you want a professional look, you need to move with intent. Practice slow, steady movements. If you can’t move the drone smoothly while keeping your eyes on the telemetry, you aren’t ready to take the “money shot” yet.

    Bottom Line: Don't Let the Marketing Fool You

    Stop relying on “Auto” mode; if you aren’t manually controlling your shutter speed and ISO, you’re just letting a cheap computer chip make decisions that’ll ruin your shots.

    Buy decent ND filters before you even think about flying in bright light, otherwise you’ll never get that natural motion blur that makes a video look professional instead of jittery.

    Invest in hardware that feels substantial; if the drone feels like a glorified toy in your hands, it’s probably going to fail you when the wind picks up or the battery runs low.

    ## The Truth About High-End Gear

    “Most people think they can fix a bad shot with a more expensive drone, but all you’re doing is paying more money for a more expensive way to capture a blurry mess. If you haven’t mastered your manual settings and understood how light hits your sensor, that fancy 4K camera is nothing more than a glorified, overpriced paperweight.”

    Roland Delacroix

    Bottom Line: Build Your Skills, Not Just Your Gear

    Bottom Line: Build Your Skills, Not Just Your Gear.

    At the end of the day, getting a decent shot isn’t about having the most expensive drone on the market; it’s about understanding the mechanics of how light and motion interact. We’ve covered why you need to stop relying on “Auto” mode and start mastering your manual camera settings, and why those ND filters are a necessity rather than a luxury if you want to avoid that jittery, digital look. If you take care of your hardware and actually learn the physics of the shot instead of just clicking a button, you’ll stop producing snapshots and start producing real photography. Don’t let the marketing fluff convince you that a software update will fix a lack of fundamental knowledge.

    I know it can feel overwhelming when you’re staring at a screen full of menus and settings that seem designed to confuse you. But remember, every piece of equipment is just a tool, and a tool is only as effective as the person wielding it. Take your time, get out into the field, and don’t be afraid to fail a few dozen times before you get it right. Once you move past the gimmicks and focus on the solid fundamentals, you’ll find that the most rewarding part of this hobby isn’t the tech itself—it’s the perspective you gain from seeing the world from a new angle. Now, get out there and put that machine to work.

    Frequently Asked Questions

    Do I really need to spend the extra money on a professional-grade controller, or is the one that comes in the box actually built to last?

    Look, I’ve spent enough time looking at circuit boards to tell you that the “in-the-box” controller is usually built to a price point, not a standard. It’ll get you from A to B, but the sticks feel mushy and the plastic casing is thin. If you’re serious about precision, invest in a professional-grade unit. You want tactile feedback and build quality that won’t fail you mid-flight when things get technical.

    How do I know if a drone's camera sensor is actually high-quality, or if it's just a cheap component wrapped in a fancy marketing package?

    Don’t let the marketing department fool you with “4K” labels; that’s just a resolution number, not a measure of quality. Look at the physical sensor size. If they won’t tell you the dimensions, they’re hiding something. A small sensor is just a glorified webcam that’ll fail the moment the sun goes down. I always check the dynamic range specs and the bit depth. If it’s not at least 10-bit, you’re buying expensive plastic.

    Is it worth investing in extra batteries, or are they just more expensive plastic that's going to lose its charge after a few months in the drawer?

    Look, if you’re serious about flying, you need more than the one battery that came in the box. There’s nothing worse than being halfway through a decent setup only to have that low-battery alarm start chirping. However, don’t just buy the cheapest knock-offs you find online; those are nothing but glorified paperweights. Stick to the manufacturer’s brand. They’re pricey, yes, but the cell stability is what keeps you from a forced landing.

  • Finding the Best Mirrorless Camera for Vlogging

    Finding the Best Mirrorless Camera for Vlogging

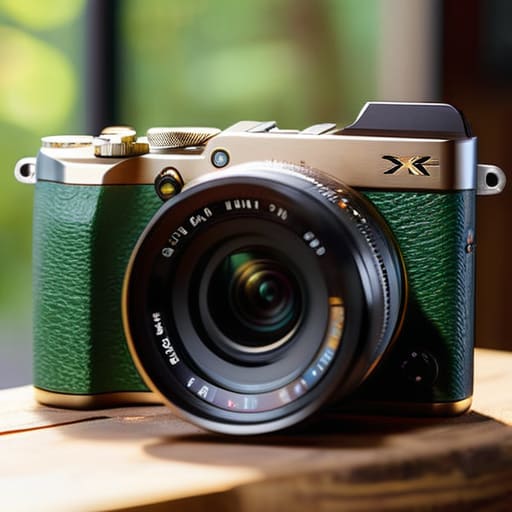
    I spent thirty years in manufacturing, where if a component wasn’t built to spec, the whole line ground to a halt. Nowadays, I see people dropping a month’s mortgage on a piece of gear only to find out it’s nothing more than overpriced plastic that overheats the second you hit record. If you’re trying to find the best mirrorless cameras for vlogging, you’re likely being bombarded by influencers who care more about aesthetics than actual build quality or thermal management. It’s frustrating to watch good creators get sidelined by hardware that simply can’t handle the job.

    I’m not here to sell you on the latest hype or some flashy feature that you’ll never actually use. Instead, I’ve sat down with my notepad and stripped away the marketing fluff to find the tools that actually hold up under pressure. In this list, I’m going to show you five specific models that offer the reliability and durability you actually need. By the time you finish reading, you’ll know exactly which cameras are worth your hard-earned money and which ones are just expensive paperweights.

    Table of Contents

    The Workhorse You Can Trust

    Sony ZV-E10: The Workhorse You Can Trust.

    If you’re looking for something that won’t quit on you halfway through a shoot, the Sony ZV-E10 is the one I keep pointing people toward. It’s not the flashiest piece of kit on the market, but the autofocus is damn near perfect, which is exactly what you need when you’re moving around and trying to keep the lens on your face. I’ve spent enough time with mechanical systems to know that a device is only as good as its ability to do its primary job without constant adjustment.

    Built Like a Tank for Serious Use

    Lumix GH6: Built Like a Tank for Serious Use.

    Now, if you have a bit more capital and you actually care about how a camera feels in your hands, the Panasonic Lumix GH6 is in a different league. This isn’t some flimsy gadget designed for teenagers; it feels like a piece of real engineering. The thermal management is what caught my eye—it’s built to handle long recording sessions without the dreaded overheating issues that plague so much modern electronics.

    The All-Rounder That Doesn't Overcomplicate Things

    The All-Rounder That Doesn't Overcomplicate Things.

    I’ve always believed that if a tool is too complicated to use, it’s a bad tool. The Fujifilm X-S20 follows that philosophy quite well. It strikes a fine balance between high-end specifications and a user interface that doesn’t require a computer science degree to navigate. The color science is also quite impressive right out of the box, meaning you won’t spend hours hunched over a monitor trying to fix colors that look unnatural.

    Compact Power Without the Fluff

    Sometimes you just want something that fits in a jacket pocket but doesn’t sacrifice the ability to produce a decent image. The Sony ZV-1 II is a bit of a specialized beast, but for pure vlogging, it’s hard to argue with its efficiency. It’s a fixed-lens setup, which means you lose the ability to swap glass, but for a lot of people, that’s actually a feature, not a bug. You don’t have to worry about dust getting on a sensor or carrying a heavy bag of lenses.

    The Professional's Choice for High Stakes

    If you are moving into the territory where you are filming clients and your reputation is on the line, you look at the Canon EOS R7. This is a serious piece of hardware with a robust build quality that suggests it can take a bit of a beating. The autofocus tracking is incredibly snappy, and it handles changing light conditions with a grace that most consumer gear lacks.

    The Bottom Line: Don't Get Fooled by the Spec Sheet

    Stop chasing every single megapixel or fancy software feature; if the build quality is flimsy and the mounting points feel like cheap plastic, the camera will fail you long before you get the perfect shot.

    Prioritize reliability in the basics—you need a solid grip, a screen that actually works in sunlight, and an autofocus system that doesn’t hunt like a nervous dog every time you move.

    Buy for the long haul by looking at the ecosystem, not just the body; a camera is useless if you can’t find decent, durable lenses that don’t cost more than a used car.

    The Engineer's Bottom Line

    I don’t care how many megapixels or fancy AI features a manufacturer throws at you in their marketing brochures; if the build quality is flimsy and the menu system is a labyrinth, you’re just buying a very expensive paperweight that’s going to fail you when the light gets low or the weather turns sour.

    Roland Delacroix

    The Bottom Line

    At the end of the day, choosing a camera shouldn’t feel like you’re trying to decode a manual for a jet engine. Whether you went with the rugged build of a Sony or the intuitive interface of a Fujifilm, the goal is the same: you want a tool that stays out of your way so you can actually do the work. I’ve seen too many folks get caught up in chasing every single spec on a datasheet, only to realize they bought a piece of gear that’s too delicate for real-world use. Remember, you aren’t just buying a sensor and a lens; you are investing in reliable hardware that needs to perform when the light is fading and the pressure is on. Don’t let the marketing fluff distract you from the build quality and the ergonomics.

    Once you’ve made your choice and tucked that camera into your bag, stop worrying about the gear and start focusing on the story. A camera is just a machine, and no amount of expensive glass is going to make up for a lack of vision. I spent my career making sure systems ran smoothly so the end product would be flawless, and it’s the same principle here. Get yourself a device that you can trust, keep it well-maintained, and then get out there and create something. The best camera in the world is useless if it’s sitting on a shelf gathering dust.

    Frequently Asked Questions

    Do I really need to spend extra money on a dedicated external microphone, or will the built-in ones suffice for a basic setup?

    Look, I’ve spent enough time around manufacturing plants to know that if the input is garbage, the output is garbage. Your camera’s built-in mic is fine for capturing the sound of a breeze, but for actual talking? It’s flimsy. It picks up every handling noise and wind gust, making your footage sound amateur. If you want to sound like a professional instead of a hobbyist, buy a dedicated mic. It’s not an extra; it’s a necessity.

    How much does lens quality actually matter if I'm just filming myself for social media?

    Look, I’ve seen enough cheap glass to know that “good enough” can be a trap. If you’re just filming on a phone for a quick clip, you’re fine. But if you’re serious about a brand, don’t skimp on the lens. A mediocre sensor can be saved by a sharp lens, but no amount of software can fix a blurry, distorted image caused by poor optics. Invest in glass that actually holds focus.

    Will these cameras hold up if I'm filming outdoors in the heat, or am I going to run into overheating issues halfway through a shoot?

    Look, if you’re planning on filming under a midday sun, you need to be realistic. Most of these compact mirrorless units are packed tight with electronics, and heat is the enemy of any circuit board. If you’re pushing 4K video in high temperatures, you’re going to see a thermal warning eventually. Don’t expect a miracle; if you’re working in the heat, keep some shade handy and don’t expect these to run forever.