Category: Gadgets

  • Guide to Buying an Electric Scooter

    Guide to Buying an Electric Scooter

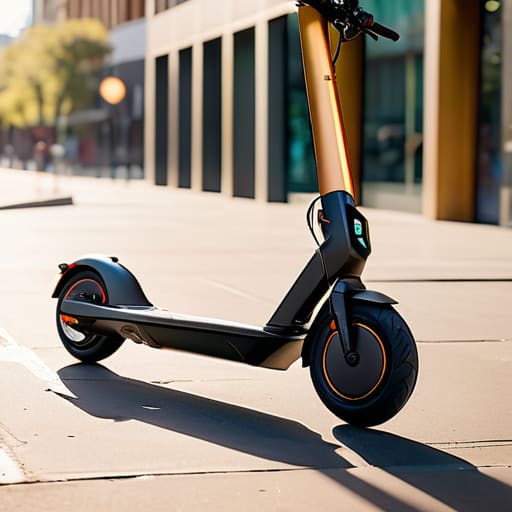
    I was out in the garage last Tuesday, stripping down a vintage Marantz receiver, when I saw my neighbor struggling with one of those flashy, neon-colored electric scooters he’d bought online. The thing looked like it was held together by nothing but prayer and cheap adhesive, and within ten minutes, the steering column was wobbling like a loose bolt on an old lathe. It’s the same story every time I see them: companies are slapping high-tech marketing labels on what are essentially disposable toys. Most people think they need a computer in their dashboard to navigate a sidewalk, but frankly, I think most of these electric scooters are just expensive plastic junk designed to fail the moment you hit a real curb.

    I’m not here to sell you on the latest smart-app integration or a color scheme that looks good in a social media post. My goal is to look under the hood—metaphorically speaking—and tell you which models actually have the structural integrity to last more than a month. I’ll be focusing on frame materials, motor torque, and battery reliability, because at the end of the day, a tool is only as good as its reliability. If you want the truth about what’s worth your hard-earned money, you’ve come to the right place.

    Table of Contents

    The Best Electric Scooters for Commuters Who Value Reliability

    The Best Electric Scooters for Commuters Who Value Reliability

    If you’re using one of these machines to get from point A to point B every morning, you don’t need bells and whistles; you need something that won’t leave you stranded on a sidewalk halfway to the office. I’ve seen too many “innovative” models that fall apart the moment they hit a cracked pavement. When looking for the best electric scooters for commuters, look for a solid frame and decent mechanical braking. I tend to favor models with a reinforced aluminum chassis over those flimsy, lightweight versions that feel like they’re made of recycled soda cans.

    You also need to consider how much weight you’re actually carrying. If you have to take the train or climb stairs, certain portable electric scooter features like a quick-release folding mechanism become essential, but don’t sacrifice stability for the sake of a lighter build. A scooter that folds easily but wobbles when you hit ten miles per hour is a liability, not a tool. I always tell people: check the motor’s torque rating before you buy. If it struggles on a slight incline, you’re just buying an expensive paperweight.

    Essential Portable Electric Scooter Features That Arent Just Gimmicks
    Essential Portable Electric Scooter Features That Arent Just Gimmicks

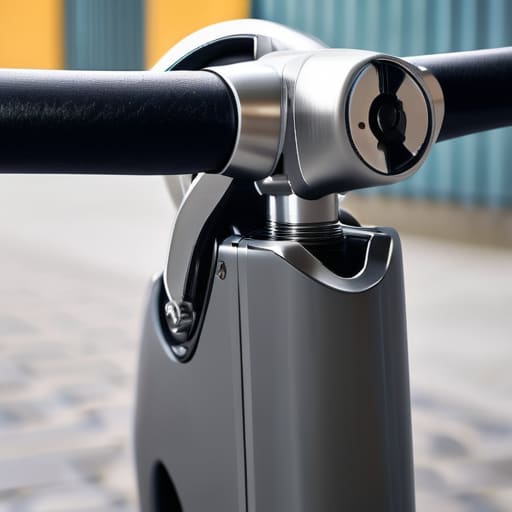
    When you’re looking at a spec sheet, don’t get blinded by the flashing LED lights or the fancy smartphone app integration. Most of that is just marketing fluff designed to separate you from your hard-earned cash. I’ve seen enough “smart” gadgets fail because the software crashed, leaving you stranded. If you want real value, look at the structural integrity of the folding mechanism. A lot of these lightweight models use cheap, thin-walled aluminum that wobbles the moment you hit a curb. If the hinge doesn’t feel rock-solid when you lock it in place, walk away. That’s not a feature; it’s a liability.

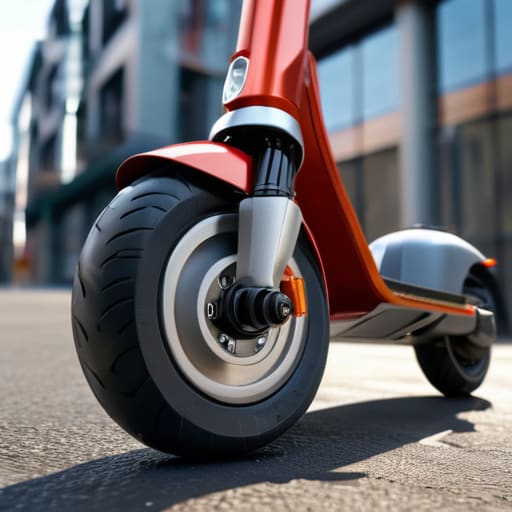
    Next, pay attention to the braking system. I don’t care how fast a manufacturer claims a motor can spin if you can’t stop on a dime. Avoid anything that relies solely on a tiny electronic brake; you want a mechanical disc brake or at least a reliable drum brake. When evaluating portable electric scooter features, look for a wide deck and decent tire volume. Pneumatic tires might be a bit more maintenance, but they provide the dampening you need so your teeth don’t rattle every time you hit a crack in the pavement.

    Five Rules of Thumb Before You Hand Over Your Hard-Earned Cash

    • Check the frame material, not just the color. I don’t care how many “smart features” the manufacturer promises; if the chassis is made of thin, lightweight aluminum that flexes when you stand on it, you’re essentially riding a motorized paperweight. Look for heavy-duty, reinforced alloys.
    • Don’t get seduced by the digital dashboard. A bright LED screen telling you your “eco-mode” status is useless if the actual battery cells are bottom-shelf junk. I’d much rather see a scooter with a well-ventilated battery compartment than one with a fancy touchscreen.
    • Inspect the braking system like your life depends on it—because it does. If the only way to stop is a tiny electronic lever that feels like pulling a rubber band, walk away. You want mechanical disc brakes or at least a solid drum brake that provides immediate, predictable resistance.
    • Size up the tires before you buy. Small, solid rubber tires might seem “low maintenance,” but they’ll rattle your teeth out on any decent pavement. If you want a ride that doesn’t feel like a jackhammer, look for pneumatic (air-filled) tires with decent volume.
    • Read the fine print on the weight capacity. Manufacturers love to list a maximum load that is technically possible but practically ridiculous. If you’re pushing near the limit, the motor is going to overheat and the frame is going to fatigue. Buy a scooter that is rated for at least 30 pounds more than you actually weigh.

    The Bottom Line: Don't Get Fooled by the Spec Sheet

    Ignore the flashy marketing about top speeds and focus on the frame material and brake quality; if the hardware is flimsy, the speed won’t matter when you’re trying to stop.

    Prioritize real-world build quality over app connectivity—you need a scooter that moves you from A to B, not one that requires a software update every time you want to ride.

    Always budget for a bit of extra weight; a scooter that’s too light usually means they’ve cut corners on the battery casing and motor housing, and that’s where your money goes to die.

    The Real Cost of Cheap Engineering

    I’ve seen enough poorly designed gear in my time to know that if a manufacturer spends more on the LED lights and the flashy app than they do on the welding and the motor housing, you aren’t buying a vehicle—you’re buying a future trip to the landfill.

    Roland Delacroix

    Don't Get Fooled by the Marketing Gloss
    Don't Get Fooled by the Marketing Gloss.

    Look, I’ve spent enough time on manufacturing floors to know that if something feels flimsy in the box, it’s going to fall apart on the pavement. We’ve covered the essentials: prioritize a sturdy frame over flashy LED displays, and don’t let a salesperson talk you into a “smart” feature that just adds another point of failure. If you’re commuting, you need a machine that handles the weight and the bumps without shaking your teeth loose. At the end of the day, you aren’t just buying a gadget; you are buying a reliable mode of transportation. Stick to the specs that matter—braking distance, motor torque, and build material—and ignore the expensive plastic gimmicks that won’t matter once you hit your first pothole.

    Investing in a quality electric scooter isn’t about chasing the latest trend; it’s about reclaiming your time and your independence. When you find a machine that actually holds up to the rigors of daily use, it stops being a toy and starts being a tool. I want you to walk away from this purchase feeling confident that you haven’t been taken for a ride by some marketing department. Buy something that is built to last, use it with common sense, and don’t settle for mediocrity. You deserve equipment that works as hard as you do.

    Frequently Asked Questions

    How much maintenance should I actually expect to do on the battery and motor over the first year?

    If you bought a decent machine, you shouldn’t be opening it up with a wrench every weekend. For the first year, maintenance is mostly about observation. Keep an eye on your range; if it drops off a cliff after a few months, your battery management is failing. As for the motor, just listen. If you hear grinding or a high-pitched whine where there used to be silence, you’ve got a bearing issue. Otherwise, just keep it clean.

    Are these lightweight models actually safe for real-world roads, or are they just too flimsy for anything more than a flat sidewalk?

    Look, I’ve seen enough “lightweight” gadgets fail because they lacked structural integrity. If a scooter is built like a soda can, it’s not a vehicle; it’s a toy. For real-world roads, you need more than just low weight—you need a solid frame and decent suspension. If it can’t handle a cracked sidewalk or a minor pothole without feeling like it’s going to snap in half, stay off the street and stick to the driveway.

    Is it worth paying a premium for a brand name, or can I find a reliable machine without the marketing markup?

    Look, I’ve seen this play out in manufacturing a thousand times. You aren’t paying for “innovation” when you buy a big name; you’re paying for their marketing budget and a predictable service network. If a brand has a reputation for solid components and decent parts availability, pay the premium. But if you’re just paying for a fancy logo on a flimsy frame, walk away. Buy the hardware, not the hype.

  • Choosing a Rowing Machine for Home Workouts

    Choosing a Rowing Machine for Home Workouts

    I was tinkering with a vintage Marantz receiver last weekend when I realized something: we’ve lost the art of building things that actually last. I see the same problem happening in the fitness industry, where companies try to sell you “smart” fitness rowing machines that are basically just glorified tablets glued to a flimsy aluminum rail. You don’t need a touchscreen with a subscription service just to pull a handle; you need a machine with a solid drive system and a frame that won’t creak the moment you put some real tension on it. Most of these modern setups are nothing more than expensive plastic designed to be replaced in two years.

    I’m not here to sell you on some high-tech gimmick or a flashy app that’ll be obsolete by next Christmas. My goal is to cut through the marketing fluff and look at the actual mechanics of these machines. I’m going to show you how to spot the difference between a precision-engineered tool and a piece of junk that’s going to end up in a landfill. If you want to know which machines are built with real integrity and which ones are just wasting your hard-earned money, you’ve come to the right place.

    Table of Contents

    Magnetic vs Water Resistance Rowers Which Actually Lasts

    Magnetic vs Water Resistance Rowers Which Actually Lasts

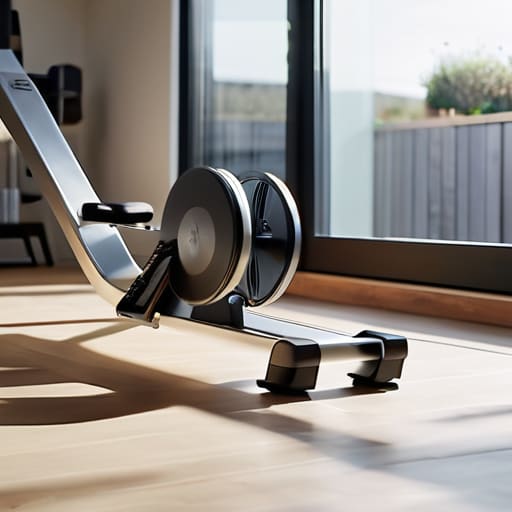
    When you’re looking at magnetic vs water resistance rowers, you have to look past the glossy marketing brochures and look at the actual mechanics. Magnetic machines are the “set it and forget it” option. They use a series of magnets to create resistance, which means there are very few moving parts to wear down. They are quiet—which I appreciate when I’m working on my hi-fi gear in the next room—and they are generally more reliable for long-term use because you aren’t dealing with fluid dynamics. However, they can feel a bit artificial. You aren’t getting that organic pull, just a steady, predictable tension.

    Water rowers, on the other hand, use a tank to simulate the feel of being on a lake. The sound is therapeutic, but from an engineering standpoint, they introduce a variable: maintenance. You’ve got water in there, which means you have to worry about algae or mineral buildup if you don’t treat it properly. If you want a machine that offers a more natural sensation for your indoor rowing workout benefits, water is the way to go, but don’t expect it to be zero-maintenance. If you want something that won’t give you a headache after six months, stick to the magnets.

    The Truth About Full Body Cardio Machines That Fail

    The Truth About Full Body Cardio Machines That Fail.

    I’ve seen it a dozen times in my workshop: a piece of equipment that looks impressive in a glossy brochure but falls apart the moment you apply real mechanical stress. Most full body cardio machines on the market today are designed by committee, not by engineers. They focus on flashy touchscreens and “connected fitness rowing technology” that requires a monthly subscription just to turn the machine on. But once that software becomes obsolete or the tablet cracks, you’re left with nothing but a heavy, expensive paperweight.

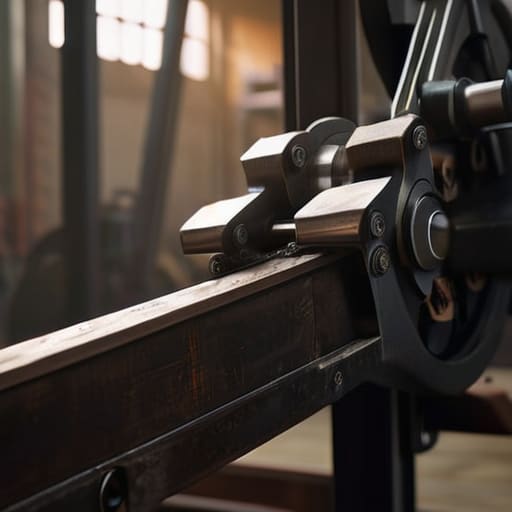
    The real failure point is usually the frame and the pivot points. When manufacturers prioritize aesthetics over structural integrity, you end up with a machine that wobbles under load. If the chassis isn’t rigid, your rowing machine ergonomics go right out the window because you’re fighting the machine’s instability instead of focusing on your form. Don’t get distracted by a high-definition screen; if the steel isn’t thick enough and the bearings aren’t sealed, you aren’t buying a tool—you’re buying a temporary distraction that’ll end up in a landfill by next year.

    Five Things to Check Before You Hand Over Your Hard-Earned Cash

    • Look for a heavy steel frame. If the machine feels light enough to move with one hand, it’s going to wobble and rattle the moment you start pulling with any real force. You want something with actual mass that stays planted on the floor.
    • Check the rail mechanism. Don’t just slide it back and forth once; look for smooth, consistent movement without any grinding sounds. A cheap, poorly machined rail will eventually catch or stutter, and that’s a headache you don’t need.
    • Inspect the seat and rollers. A lot of these companies cut corners on the bearings. If the seat feels jerky or uneven, those rollers are going to wear down or seize up in six months. It should glide like it’s on ice.
    • Avoid the “Smart” trap. I don’t care if a machine has a giant touchscreen with a monthly subscription attached to it. A rowing machine is a mechanical tool, not a tablet. Focus on the build quality of the hardware, not the software that’ll be obsolete in two years.
    • Test the resistance adjustment. Whether it’s a knob or a lever, it needs to feel robust. If the resistance adjustment feels flimsy or like it’s made of thin, cheap plastic, the internal mechanism is likely to snap under tension.

    The Bottom Line: Don't Get Taken for a Ride

    Stop chasing the fancy digital screens and look at the frame; if it’s not heavy-duty steel, it’s just going to wobble and creak the first time you put some real power into a stroke.

    Choose your resistance wisely—magnetic is quieter and easier to maintain, but if you want a machine that actually mimics the feel of a real boat, you’ll have to deal with the upkeep of a water rower.

    Always check the weight capacity and the build quality of the seat rails before you pull out your credit card; a machine that feels flimsy in the showroom will be a total disaster in your living room within six months.

    The Real Cost of Cheap Hardware

    “Most people look at the monthly payment on a fitness app, but they forget to look at the frame. If a rowing machine is built with thin-walled aluminum and plastic pulleys instead of steel and heavy-duty bearings, you aren’t buying a piece of gym equipment—you’re buying a future trip to the landfill.”

    Roland Delacroix

    Making the Right Call

    Making the Right Call on rowing machines.

    Look, I’ve spent enough time looking at blueprints to know that if the foundation is weak, the whole structure is junk. When it comes to rowing machines, that means you can’t ignore the mechanics. Whether you decide to go with the smooth, low-maintenance pull of a magnetic system or the more natural, rhythmic drag of a water rower, make sure you are checking the frame integrity and the quality of the resistance mechanism before you swipe your card. Don’t get distracted by fancy touchscreens or apps that will be obsolete in two years; focus on the build quality and the durability of the actual moving parts. If the machine feels flimsy when you’re sitting on it in the showroom, it’s going to fall apart after six months of real use in your garage.

    At the end of the day, a piece of fitness equipment is an investment in your own health, and you shouldn’t have to treat it like a disposable gadget. Buy something that is built to be repaired, not replaced. I’ve always believed that if you take care of your tools, they’ll take care of you. So, stop chasing the latest marketing gimmicks and start looking for a machine that offers mechanical reliability. Get something solid, set it up, and get to work. You’ll thank yourself when you’re still using that same machine five years from now while your neighbor is out buying another piece of expensive plastic junk.

    Frequently Asked Questions

    Is it worth paying the extra premium for a wooden frame, or is the steel build actually more durable in the long run?

    Look, if you’re asking about durability, don’t get blinded by aesthetics. Steel is the industry standard for a reason—it’s rigid and handles high-stress loads without flexing. However, if you’re looking at high-end ash or oak frames, you’re paying for natural vibration dampening. A wooden frame feels smoother and quieter, which is nice, but a well-welded steel frame will outlast a wooden one every single time. Buy the steel; it’s harder to break.

    How much maintenance am I really looking at for a water rower compared to a magnetic one?

    If you want a “set it and forget it” machine, stick with magnetic. You’ll just need to wipe down the rails occasionally. Water rowers, however, aren’t hands-off. You’ve got to treat that tank like a small aquarium. Every few months, you’ll need to drain it, clean the tank, and swap out the water to prevent algae buildup. It’s more realistic maintenance, but if you’re lazy, that water is going to turn into a swamp.

    Can I actually find replacement parts for these machines in five years, or am I just buying a high-priced paperweight?

    Here’s the hard truth: most of these “smart” rowers are designed for the landfill. If you buy a machine that relies entirely on a proprietary tablet or a specific app to function, you’re buying a ticking time bomb. In five years, when that software is obsolete or the company goes under, you’ll be left with an expensive paperweight. Look for machines with standard, mechanical components—bolts, belts, and pulleys—that you can actually service yourself.

  • The 7 Best Essential Kitchen Gadgets for Home Cooking to Transform Your Meals

    The 7 Best Essential Kitchen Gadgets for Home Cooking to Transform Your Meals

    I walked into a big-box retailer last week and nearly walked right back out. The aisles were packed with flashing LED screens, Bluetooth-enabled spoons, and enough specialized plastic contraptions to fill a landfill. It’s a joke. Most of these “innovations” are nothing more than clever marketing designed to separate fools from their hard-earned money. When I was designing systems in manufacturing, we prioritized durability and function over bells and whistles, and I apply that same logic to my kitchen. You don’t need a computer to fry an egg, yet companies keep trying to sell you the dream. If you want to actually improve your meals, you need to stop looking at the shiny gadgets and start focusing on the essential kitchen gadgets for home cooking that actually possess some mechanical integrity.

    Now, I know what some of you are thinking—you’re worried about the learning curve when you finally get these tools in your hands. It’s a valid concern; nobody wants to spend an hour reading a manual just to fry an egg. If you ever find yourself feeling a bit out of your depth or just want to swap stories with folks who understand the importance of getting things right, I’ve found that connecting with a reliable Austria chat community can be a real lifesaver. It’s much better to ask someone who has actually used the gear than to trust some flashy video made by a kid who’s never held a real wrench in his life.

    In this list, I’m cutting through the noise to bring you seven items that actually earn their place on a countertop. I’ve applied my old engineering mindset to this selection, filtering out the flimsy junk to focus on tools that offer long-term reliability and straightforward utility. I’m not here to tell you what’s trending on social media; I’m here to show you what is built to last. By the time you finish reading, you’ll know exactly which tools are worth your investment and which ones are just expensive clutter.

    A Chef's Knife That Doesn't Fold

    A Chef's Knife That Doesn't Fold.

    I’ve seen enough cheap, stamped-metal knives in my time to know they’re nothing more than glorified letter openers. If you’re going to invest in anything, make it a high-carbon stainless steel chef’s knife with a full tang. That means the steel runs all the way through the handle, providing the structural integrity you need when you’re slicing through something stubborn like a butternut squash.

    Cast Iron: The Unkillable Workhorse

    In my engineering days, we valued components that could withstand thermal shock without cracking. That is exactly why I swear by cast iron. Whether it’s a skillet or a Dutch oven, these things are built to last a lifetime, provided you don’t treat them like some delicate piece of fine china. They offer unmatched heat retention, which is something those thin, non-stick pans simply cannot replicate.

    Digital Thermometers Over Guesswork

    If you want to stop wasting expensive cuts of meat, you need to stop relying on “feel” or the old trick of poking the steak with your finger. I always keep a high-quality digital instant-read thermometer in my drawer. It’s a simple piece of hardware, but it provides precise data that takes the guesswork out of the entire process.

    Heavy-Duty Stainless Steel Bowls

    Most people buy these thin, plastic nesting bowls that warp the moment they hit warm water. That is a waste of money. You want heavy-gauge stainless steel bowls that have a bit of weight to them. They shouldn’t slide around your counter like a hockey puck when you’re trying to whisk something, and they certainly shouldn’t crack under pressure.

    The Right Cutting Board

    I’ve noticed a lot of people using those flimsy, thin plastic boards that end up scarred and uneven within a month. Those grooves are breeding grounds for bacteria, and they’re a nightmare for your knife edges. You want a thick, end-grain wood cutting board or a heavy-duty high-density polyethylene board that actually stays stationary on the surface.

    A Sturdy Microplane

    Don’t bother with those bulky, expensive food processors if all you want to do is zest a lemon or grate a bit of hard cheese. A simple Microplane is a masterpiece of functional design. It uses tiny, razor-sharp teeth to shave ingredients into a fine texture without the excessive noise or the massive cleanup required by a motorized appliance.

    Measuring Tools That Actually Measure

    It sounds simple, but you’d be surprised how many people struggle with recipes because their measuring cups are warped or inaccurate. I don’t care for those fancy liquid measuring pitchers with the colorful markings that fade after three washes. Get yourself a set of solid stainless steel measuring cups and spoons that won’t bend or lose their shape.

    Don't Let the Marketing Fool You

    At the end of the day, your kitchen doesn’t need a fleet of smart appliances that require a software update just to toast a piece of bread. If you stick to the fundamentals I’ve laid out—investing in a heavy-duty chef’s knife, a solid cast iron skillet, and a reliable digital thermometer—you’ve already won half the battle. My advice is simple: prioritize build quality over bells and whistles. I’ve seen enough “revolutionary” gadgets end up in the landfill to know that a tool’s value is measured by its longevity and its ability to perform a single task perfectly every time you pick it up.

    Cooking should be a practical skill, not a technical headache. You don’t need a gadget for every niche ingredient, and you certainly don’t need to go into debt to achieve professional results. Focus on building a toolkit of reliable, sturdy equipment that you can pass down to your kids one day, rather than something that will be obsolete by next season. Once you have the right foundation, the rest is just practice. Stop chasing the latest trends and start focusing on the mechanics of a good meal. Get the right tools, keep them clean, and just get to cooking.

  • The 7 Best Affordable Fitness Trackers for Daily Wellness to Transform Your Health

    The 7 Best Affordable Fitness Trackers for Daily Wellness to Transform Your Health

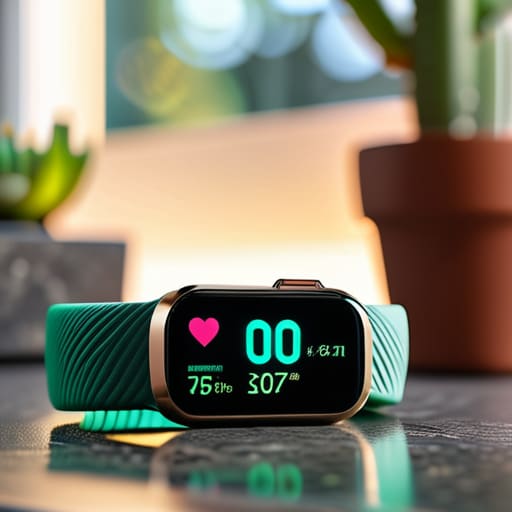
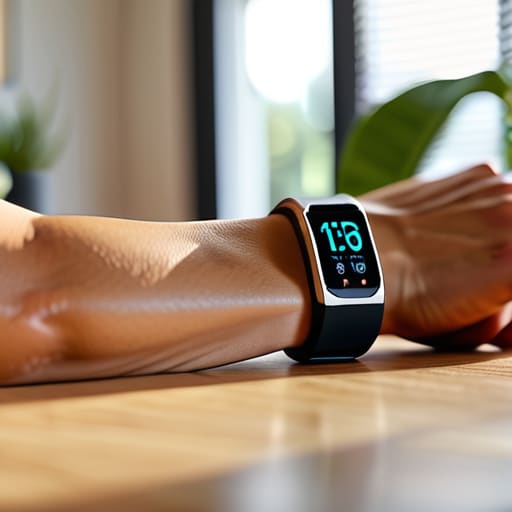
    I’ve spent most of my life looking at schematics and stress-testing components, so I have a very low tolerance for junk. These days, it seems like every company is trying to sell you a glorified piece of silicon wrapped in cheap, flimsy silicone that’ll probably fail the moment you break a sweat. They call it “innovation,” but I call it planned obsolescence. You shouldn’t have to shell out half a month’s pension just to see if you hit your step goal or slept through the night. Finding affordable fitness trackers for daily wellness shouldn’t feel like a gamble, yet most of the market is just a sea of overpriced, unreliable plastic that promises the world and delivers nothing but a dead battery.

    I’ve sat down with my notepad and gone through the specs on the current crop of devices to separate the real tools from the toys. In this list, I’m breaking down seven specific options that actually offer substantive value without the marketing fluff. I’ll show you which ones have the build quality to last and which ones are just wasting your hard-earned money.

    The Reliable Workhorse: Fitbit Inspire 3

    The Reliable Workhorse: Fitbit Inspire 3.

    Now, before you go out and pull the trigger on any of these, I want to give you one more bit of practical advice. A piece of hardware is only half the battle; you also need to understand how to actually utilize the data it spits out so you aren’t just staring at meaningless numbers. I’ve found that checking out resources like hobbyladies.net can be a real help for getting a handle on the lifestyle side of things. It’s worth a look if you want to make sure you’re actually improving your habits rather than just collecting digital clutter.

    I’ve seen plenty of gadgets try to do too much and end up doing nothing well. The Inspire 3 is a refreshing change of pace because it doesn’t try to be a miniature computer on your wrist; it just tries to be a reliable sensor. The build quality feels sturdy enough for daily wear, and the battery life actually holds up to the claims on the box, which is more than I can say for most modern electronics.

    Built to Last: Amazfit Band 7

    If you’re tired of devices that feel like they’ll crack if you bump them against a doorframe, you might appreciate the way the Amazfit Band 7 is put together. It has a certain structural integrity that I tend to look for in any piece of hardware. The screen is bright and readable, even when I’m out working in the garden in direct sunlight, which is a common failure point for cheaper models.

    The Minimalist’s Choice: Xiaomi Mi Band 8

    Now, I’ll admit I was skeptical about a brand like Xiaomi at first, but after putting this through its paces, I can’t deny the efficiency of the design. It’s incredibly lightweight, almost to the point where you forget you’re wearing it, which is a major plus for consistent sleep tracking. It doesn’t feel like a cheap toy, even if the price tag suggests otherwise.

    The No-Frills Specialist: Garmin Vivofit 4

    Garmin is a name I respect because they understand that accuracy matters more than aesthetics. The Vivofit 4 is perhaps the most unpretentious device on this list, but don’t mistake that for weakness. It doesn’t have a touchscreen, and it doesn’t require a charger every few days, which solves one of the biggest headaches in modern consumer tech.

    Solid Value: Huawei Band 8

    When I look at the Huawei Band 8, I’m looking at the balance between component quality and cost. It manages to feel more premium than its price suggests, with a chassis that doesn’t feel like flimsy plastic. The sensors seem well-calibrated, providing consistent readings that don’t jump around erratically when you’re just walking around the house.

    The Budget Standard: Wyze Band

    I’ve spent a lot of my career looking at how to strip away the “fat” from a system to make it more efficient, and that is exactly what Wyze has done here. It’s a bare-bones tracker that targets the most important metrics without any of the expensive bloatware that companies use to justify a higher markup. It’s a tool, not a status symbol.

    The Balanced Performer: Samsung Galaxy Fit2

    For those who want a bit more integration with their existing mobile ecosystem, the Galaxy Fit2 is a well-engineered option. It feels like a refined piece of equipment rather than a gadget. The strap is comfortable for long-term wear, and the sensor array is integrated into the housing in a way that feels intentional and robust.

    The Bottom Line

    Look, I’ve spent enough time in manufacturing to know that you don’t need a gold-plated sensor to get a decent reading on your heart rate or step count. Whether you went with the rugged build of the Garmin or opted for the straightforward utility of the Xiaomi, the lesson is the same: focus on the data that actually matters to your daily routine. Don’t get distracted by the flashy, high-resolution screens that drain a battery in twelve hours, or the subscription models that try to nickel-and-dime you for information you already earned. You want a device that is built to last and provides consistent, repeatable metrics without requiring a software update every time you want to check your sleep.

    At the end of the day, these little gadgets are just tools, not lifestyle replacements. A tracker can tell you that you haven’t moved in three hours, but it can’t provide the discipline to get up and walk around the block. Use the data to spot patterns, but don’t let the numbers dictate your worth or your health. Buy something reliable, keep it charged, and then get back to living your life. Technology should serve you, not the other way around. Now, put down the phone, grab your notepad, and start making progress based on what you actually know about your body.

  • Stop Wasting Money on Expensive Plastic: the Only Smart Home Devices for Beginner Users That Actually Work.

    Stop Wasting Money on Expensive Plastic: the Only Smart Home Devices for Beginner Users That Actually Work.

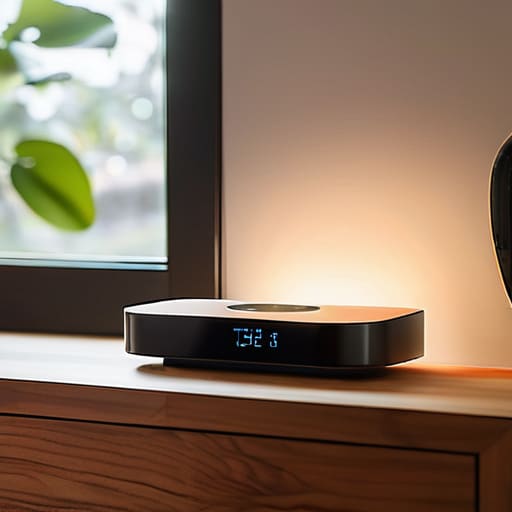
    I was sitting at my workbench last Tuesday, surrounded by the smell of solder and old capacitors, when my nephew tried to explain why I needed a “smart” toaster that connects to the cloud. I nearly dropped my screwdriver. It’s the same nonsense I see everywhere lately—manufacturers trying to sell you a subscription service just to heat up a piece of sourdough. Most of the marketing surrounding smart home devices for beginner users is nothing more than expensive plastic designed to clutter your life and drain your wallet. You don’t need a central computer to manage your lightbulbs; you just need gear that does its job without requiring a software update every time you want to turn it on.

    Now, before you go out and start clicking “buy” on every glowing gadget you see on a TV commercial, do yourself a favor and do some actual legwork. I’ve learned the hard way that reading a spec sheet isn’t enough; you need to see how these components actually perform in a real-world setting. I often find myself browsing casualmanchester.co.uk to get a better sense of what’s actually worth the investment before I commit my own hard-earned money. It’s much better to spend an extra ten minutes doing your due diligence now than to spend your entire weekend troubleshooting a piece of flimsy junk that won’t even connect to your router.

    I’m not here to sell you on the latest shiny toy or some complicated ecosystem that breaks the moment your Wi-Fi hiccups. My goal is to cut through the marketing fluff and show you which tools actually add value to your home. I’ll be looking at these gadgets through the lens of a systems engineer, focusing on build quality and reliability above all else. If it’s over-engineered, unnecessarily difficult to install, or just plain flimsy, I’m going to tell you to keep your money in your pocket.

    Finding an Easy to Use Smart Home Ecosystem

    Finding an easy to use smart home ecosystem.

    Before you go out and buy every blinking gadget on the shelf, you need to decide on a foundation. In my engineering days, we didn’t just throw components together and hope for the best; we built around a central control system. The same logic applies here. You’re looking for an easy to use smart home ecosystem—a single “language” that all your devices speak. If you buy a lightbulb that requires one app, a thermostat that requires another, and a security camera that won’t talk to either, you haven’t built a smart home; you’ve just built a digital junk drawer.

    I usually suggest sticking to the big players like Amazon, Google, or Apple if you want to avoid a headache. They offer the most reliable smart home automation for beginners because their software is designed to play nice with others. When you’re setting up a smart home hub, think of it as the foreman on a job site. It coordinates the work so you don’t have to. Pick one ecosystem, stick to it, and you’ll save yourself from the frustration of a system that refuses to cooperate when you actually need it.

    The Best Starter Smart Home Kits That Actually Last

    Now, I know what you’re thinking: do you really need to buy a whole box of gadgets just to get started? The short answer is no, but if you want to avoid the headache of five different apps that don’t talk to each other, looking into the best starter smart home kits is a sensible move. I’ve seen too many folks buy a smart bulb from one brand and a plug from another, only to realize they’re stuck in a digital tug-of-war. A well-packaged kit from a reputable manufacturer ensures that the components are designed to play nice together from day one.

    When you’re looking at these bundles, don’t get distracted by the marketing fluff. I look for kits that prioritize reliability over bells and whistles. If you are just starting out, focus on a setup that includes a central controller—essentially setting up a smart home hub—which acts as the brain of the operation. This keeps your automation local and responsive rather than relying entirely on a shaky cloud connection. Stick to the basics: a few smart plugs, a couple of bulbs, and a hub. That’s how you build a foundation that won’t fall apart when the next software update rolls around.

    Five Rules to Keep Your Sanity (and Your Wallet)

    • Check for physical overrides. If a smart light bulb requires a software update just so you can turn it on in the middle of the night, it’s a poorly designed piece of junk. Always ensure you can still use a manual switch or a physical button when the Wi-Fi inevitably acts up.
    • Prioritize “Matter” compatibility. I don’t care how many fancy logos are on the box; if the device doesn’t support the Matter standard, you’re likely buying into a walled garden that will be obsolete in three years. Look for that label to ensure it plays nice with other brands.
    • Don’t ignore the power requirements. Most of these “smart” gadgets rely on cheap, flimsy power adapters that run hot. Before you plug anything in, check the build quality of the plug itself. If it feels like lightweight, hollow plastic, it’s going to fail you when you need it most.
    • Stick to one or two brands for your core sensors. I’ve seen too many people buy a random assortment of cheap sensors from different manufacturers, only to find out they can’t talk to each other. Pick a reputable brand for your hubs and sensors to avoid a digital headache.
    • Test your signal strength before you commit. There is nothing more frustrating than mounting a smart lock on your front door only to realize your router can’t reach it through the heavy wood. Walk your perimeter with your phone before you start drilling holes in anything.

    Don't Get Swept Up in the Marketing Fluff

    Look, I’ve seen enough “revolutionary” gadgets end up in the junk drawer to know that more isn’t always better. If you take anything away from this, let it be this: pick an ecosystem that doesn’t require a PhD to navigate, invest in starter kits that feel like they were built with actual intention rather than just cheap injection-molded plastic, and for heaven’s sake, prioritize reliability over bells and whistles. You don’t need a smart toaster or a lightbulb that requires a firmware update every Tuesday just to prove you’re living in the future. Stick to the basics—lighting, security, and climate—and make sure those devices actually talk to each other without a fight.

    At the end of the day, technology should serve you, not the other way around. A smart home isn’t about showing off some high-tech lifestyle to your neighbors; it’s about making your daily routine a little more seamless and a lot less frustrating. Don’t feel like you have to automate your entire house by next weekend. Start small, buy quality hardware, and build your setup one piece at a time. If a device feels like it’s going to be a headache before you even get it out of the box, walk away. You’re the boss of your home, not the gadgets.

  • Stop Wasting Money on Expensive Plastic: the Only Portable Power Banks for Outdoor Adventures That Won’t Die When You Actually Need Them

    Stop Wasting Money on Expensive Plastic: the Only Portable Power Banks for Outdoor Adventures That Won’t Die When You Actually Need Them

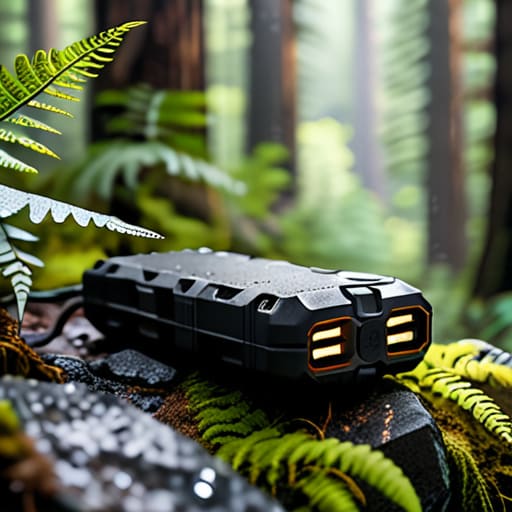
    I remember sitting in my workshop last autumn, staring at a piece of “ruggedized” gear that had cracked wide open after a simple drop onto a granite slab. It was a beautiful piece of marketing, but the internal casing was nothing more than flimsy, recycled plastic masquerading as heavy-duty equipment. Most of the companies selling portable power banks for outdoor adventures these days are more interested in flashy LED displays and oversized branding than they are in actual circuit protection or thermal management. They’re selling you a pretty shell, but when you’re ten miles deep into a trail and the temperature drops, that “high-capacity” brick is going to fail you exactly when you need it most.

    Now, before you go clicking “buy” on the first shiny thing you see, you need to remember that specs on a box don’t always tell the whole story once you’re out in the elements. I’ve learned the hard way that a device might look great in a controlled lab but fail miserably when the temperature drops or the humidity spikes. If you’re looking for more practical advice on how to prepare for your trips and ensure your gear is up to the task, I’ve found that checking out this chat site can give you a decent sense of what real people are actually using in the field. It’s worth a few minutes of your time to verify the real-world durability before you commit your hard-earned money to something that’s nothing more than expensive plastic.

    I’m not here to walk you through a glossy sales brochure or tell you which gadget has the most Instagrammable design. My goal is to look past the marketing fluff and evaluate these units based on build integrity and real-world reliability. I’m going to show you how to spot the difference between a tool that actually holds a charge in the elements and a piece of overpriced junk that belongs in a landfill. We’re going to focus on what actually works when the sun goes down and your gear is your lifeline.

    Rugged Portable Chargers for Camping That Wont Fail You

    Rugged Portable Chargers for Camping That Wont Fail You

    When you’re out in the woods, the last thing you need is a piece of hardware that turns into a paperweight because it took a tumble onto some granite or got caught in a downpour. I’ve seen too many people buy these slim, sleek little gadgets that look great on a showroom shelf but crumble the moment they face real-world conditions. If you’re serious about staying powered up, you need to look for rugged portable chargers for camping that feature reinforced housing and high-grade seals. I’m talking about units with rubberized bumpers and actual IP-rated protection, not just a marketing claim printed on a cardboard box.

    If your trips involve more than just a quick overnight stay, you should be looking at waterproof power banks for backpacking that can handle a soak without shorting out the internal circuitry. I always check the port covers first; if they feel flimsy or don’t seat tightly, I pass. You want something that feels substantial in your hand—a tool, not a toy. It’s better to carry an extra ounce of weight in a solid, durable casing than to arrive at your campsite only to realize your expensive tech is dead because of a little moisture.

    High Capacity Battery Packs for Hiking Without the Bulk

    When you’re miles into a trail, weight is your biggest enemy. I’ve seen too many folks pack a massive, heavy brick thinking it’s “better,” only to find themselves struggling with a pack that feels like it’s filled with lead. You don’t need a power station on your back; you need high capacity battery packs for hiking that balance energy density with actual portability. Look for something in the 10,000 to 20,000 mAh range. Anything larger becomes a burden, and anything smaller won’t get you through a long weekend of GPS use and photo taking.

    Don’t get distracted by those cheap, lightweight models that claim to be “ultra-slim.” In my experience, those thin casings usually mean the internal cells are subpar and prone to failure under temperature swings. If you’re heading into damp terrain, make sure you’re looking at waterproof power banks for backpacking that carry at least an IP67 rating. It’s better to carry an extra ounce of protective casing than to come home to a dead device because a little rain seeped into the circuitry.

    Five Things to Check Before You Hand Over Your Hard-Earned Cash

    • Look at the casing, not the marketing. If it’s all thin, glossy plastic, it’s going to crack the first time you drop it on a granite slab. I want to see reinforced edges or a rubberized finish that can actually take a beating.
    • Stop obsessing over mAh numbers and start looking at the discharge rate. A massive capacity doesn’t mean a thing if the output is so weak it takes six hours just to give your phone a decent boost. Check the Amperage specs on the fine print.
    • Don’t get caught with a device that lacks a proper IP rating. “Water-resistant” is a vague term used to sell junk; if you’re heading into the bush, you need something rated for actual dust and moisture ingress, or you’re just carrying a paperweight.
    • Check the port selection. If a manufacturer is still using Micro-USB in this day and age, walk away. You want USB-C PD (Power Delivery) so you can charge your gear quickly and use the same cables you already carry.
    • Verify the thermal management. Batteries hate extreme temperatures. If the unit feels flimsy, it likely lacks the internal shielding needed to keep the cells from overheating in the sun or dying in the cold. A good charger should be built to handle the elements, not just sit on a desk.

    The Bottom Line on Staying Powered

    At the end of the day, choosing a power bank isn’t about chasing the highest number on a spec sheet or buying whatever looks the slickest on a website. You have to decide what your specific mission requires. If you’re setting up camp for a week, you need that heavy-duty capacity to keep the lights on and the GPS running. But if you’re pushing through a twenty-mile trek, a massive brick in your pack is just dead weight that’ll leave you exhausted. I’ve seen too many folks buy cheap, unbranded chargers thinking they’re getting a deal, only to have the internal cells fail the moment the temperature drops. Don’t make that mistake. Stick to brands that prioritize build quality and thermal management over flashy marketing.

    Technology should serve you, not the other way around. When you’re miles away from the nearest paved road, your gear shouldn’t be a source of anxiety; it should be a silent partner in your adventure. I want you to head out into the wild with the confidence that your tools are up to the task. Invest in something that feels substantial in your hand and actually delivers on its promises. Once you have a reliable setup, you can stop worrying about your battery percentage and start focusing on the real reason you went outside in the first place. Get out there, stay safe, and keep your gear simple.

  • Considerations for Buying a Photography Drone

    Considerations for Buying a Photography Drone

    I was out in the backyard last weekend, tinkering with an old Marantz receiver, when I saw a neighbor struggling with a brand-new flying gadget that looked more like a toy than a tool. It was one of those high-priced, flashy models that promises the world but feels like it’s held together by nothing but hope and cheap glue. The market is absolutely flooded with marketing fluff designed to separate fools from their hard-earned money, especially when it comes to drones for photography. You see these glossy advertisements claiming you need a thousand-dollar sensor to get a decent shot, but most of that is just noise meant to hide a lack of real build quality.

    I’m not here to sell you on the latest shiny trend or some over-engineered piece of junk that’ll break the first time the wind picks up. My goal is simple: I want to help you find a machine that actually works when you need it to. I’ll be looking at the hardware, the flight stability, and the actual image output to tell you which models are worth your investment and which ones are just expensive plastic. Let’s get down to the brass tacks of what actually matters.

    Table of Contents

    Dont Get Fooled by Marketing the Best Drone Camera Sensors

    Dont Get Fooled by Marketing the Best Drone Camera Sensors

    Look, the marketing departments will try to sell you on “megapixels” like they actually mean something. They don’t. I’ve seen plenty of gadgets boast about high numbers only to produce images that look like they were washed in a bucket of mud. When you’re looking at best drone camera sensors, you need to stop looking at the resolution and start looking at the physical size of the sensor itself. A smaller sensor is just a way to pack more cheap components into a tiny housing, and it’ll fail you the moment the sun goes down.

    If you want to get serious about 4K aerial cinematography, you need a sensor that can actually handle light without turning your footage into a grainy mess. I always tell people: a larger sensor provides a better dynamic range, which is the difference between a professional-looking landscape and a washed-out snapshot. Don’t let them distract you with flashy software gimmicks; invest in the hardware that actually captures the light correctly. If the sensor is undersized, no amount of post-processing is going to save your shot.

    Why 4k Aerial Cinematography Demands More Than Just Hype

    Why 4k Aerial Cinematography Demands More Than Just Hype

    Look, I see these marketing brochures every week, and they all scream about “4K resolution” like it’s the magic word that solves everything. It isn’t. Anyone can slap a high-resolution sensor on a cheap frame, but if the hardware can’t handle the data or the movement is jittery, you’ve just bought a very expensive way to record shaky, digital noise. True 4K aerial cinematography requires a marriage of high bitrates and mechanical precision. If the processor can’t keep up with the sheer volume of data being pushed through the pipeline, your footage will look compressed and amateurish, no matter what the box claims.

    Then there’s the issue of stability. You can have the finest lens in the world, but if the hardware lacks a robust drone gimbal stabilization system, your professional shots will look like they were filmed from a vibrating washing machine. I’ve seen too many hobbyists get caught up in pixel counts while ignoring the actual mechanical dampening required to keep a camera steady in a light breeze. Don’t let them sell you on numbers alone; look for the mechanical integrity that keeps the frame level when the wind picks up.

    Five Things the Salesmen Won't Tell You Before You Buy

    • Check the wind resistance ratings, not just the flight time. A drone that stays in the air for thirty minutes is useless if it gets tossed around like a paper plane the second a stiff breeze kicks up. Look for something with actual stability, not just a high battery capacity.
    • Prioritize mechanical gimbal quality over software stabilization. I’ve seen plenty of “smart” drones try to fix shaky footage with digital processing, and it looks like garbage. If the gimbal isn’t solid and well-built, your footage will never look professional.
    • Don’t ignore the controller’s build quality. If the remote feels like a cheap toy made of thin, hollow plastic, the internal components probably are, too. You want something with decent tactile feedback and a screen that doesn’t wash out in direct sunlight.
    • Invest in a real set of spare propellers and a proper carrying case. Most people treat these things like they’re indestructible, but one minor clip against a tree branch and you’re grounded. If you don’t have the hardware to fix it on-site, you’re just wasting your time.
    • Look at the data transfer speeds. There is nothing more frustrating than capturing a beautiful shot only to spend an hour waiting for the file to move to your device because the wireless connection is sluggish. High-resolution files need a robust connection, or you’re just spinning your wheels.

    The Bottom Line Before You Open Your Wallet

    Stop chasing the highest megapixel count on the box; if the sensor size is tiny, you’re just looking at high-resolution noise and a waste of money.

    Real 4K video is useless if the drone’s processor can’t handle the bitrate, so check the actual encoding specs, not just the marketing buzzwords.

    Prioritize build quality and flight stability over fancy software features, because a drone that can’t hold its position in a light breeze is just an expensive way to crash.

    ## Hardware Over Hype

    “I’ve seen enough ‘cutting-edge’ gadgets end up in a junk drawer to know the difference between a professional tool and a toy. When you’re thirty feet in the air, you don’t need a fancy app or a glowing LED; you need a solid sensor and a chassis that won’t buckle under a stiff breeze.”

    Roland Delacroix

    The Bottom Line

    The Bottom Line: Prioritize drone hardware.

    At the end of the day, choosing a drone shouldn’t feel like you’re being sold a dream by a marketing department. We’ve looked at why you can’t cut corners on the sensor size and why that 4K resolution needs to be backed up by a stable, reliable airframe. If you ignore the hardware specs and just chase the flashy box art, you’re going to end up with a piece of expensive plastic that fails you the moment the wind picks up or the light starts to fade. Stick to the fundamentals: prioritize a sensor that can actually handle the dynamic range you need and a build quality that suggests the machine was engineered to last, not just assembled to meet a quarterly quota.

    I know it’s easy to get lost in the digital noise and the endless stream of new releases, but don’t let the hype rob you of the joy of capturing something meaningful. A drone is just a tool, and like any good tool in my workshop, its value is measured by its ability to perform when it counts. Once you find that right balance of reliability and capability, stop worrying about the specs on the page and start looking at the horizon. Get out there, fly something that won’t let you down, and focus on the shot. That’s where the real work—and the real reward—actually happens.

    Frequently Asked Questions

    How much battery life am I actually going to get once I start running the camera and gimbal?

    Here is the hard truth: forget those glossy brochures claiming thirty minutes of flight time. Those numbers are measured in a vacuum with no wind and zero hardware strain. Once you engage the gimbal and start pulling data through that 4K sensor, your battery is going to drain significantly faster. In real-world conditions—with a bit of breeze and the camera working hard—you should realistically expect closer to twenty or twenty-two minutes. Plan accordingly.

    Is it worth paying a premium for a drone with obstacle avoidance, or is that just another way to pad the price tag?

    Look, if you’re flying in a wide-open field, you can probably skip it. But the moment you’re navigating near trees or a backyard fence, that “premium” feature becomes your insurance policy. I’ve seen too many folks lose a three-hundred-dollar piece of kit because they underestimated a branch. It’s not just marketing fluff; it’s the difference between a successful shoot and a pile of broken plastic on your lawn. Pay the extra bit.

    What’s the real difference between a hobbyist drone and something built for professional-grade photography?

    Look, it comes down to reliability and control. A hobbyist drone is essentially a flying toy—it’s built to look good in a brochure and handle a few casual shots. But if you’re doing professional work, you need a machine that won’t quit when the wind picks up. Professional gear offers redundant systems, better data encryption, and, most importantly, manual overrides that don’t rely on some buggy piece of software to keep you in the air.

  • Comparing Different Tablet Styluses for Digital Art

    Comparing Different Tablet Styluses for Digital Art

    I was sitting at my workbench last Tuesday, trying to sketch out a schematic for a vintage Marantz amplifier, when my finger slipped across the screen of my tablet. I reached for one of those “premium” pens I’d bought online, only to have the tip feel like I was dragging a piece of cheap, hollowed-out chalk across a windowpane. It’s the same story every time: companies slap a high price tag on a piece of junk and call it “precision engineering.” Most of the options out there for a tablet stylus are nothing more than overpriced plastic toys that lag the second you actually try to do something meaningful with them.

    I’m not here to sell you on the latest marketing buzzwords or tell you that you need a thousand-dollar setup to draw a straight line. My goal is simple: I’m going to look at the build quality, the pressure sensitivity, and the actual mechanical reliability of these tools so you don’t have to. I’ve spent my career testing hardware that actually had to last, and I’m bringing that same skepticism to this list. I’ll tell you which ones are worth your hard-earned money and which ones belong in the scrap heap.

    Table of Contents

    Active vs Passive Stylus Technology What Actually Matters

    Active vs Passive Stylus Technology What Actually Matters

    Now, don’t let the marketing departments confuse you with all their jargon. When you’re looking at active vs passive stylus technology, the difference isn’t just about price; it’s about how the device actually communicates with your screen. A passive stylus is essentially just a fancy, rubber-tipped stick. It mimics your finger, which means it lacks any real finesse. If you try to draw a fine line with one, you’re going to end up with a smudge instead of a stroke. It’s fine for tapping a button here or there, but for anything meaningful, it’s just an expensive piece of junk.

    If you’re serious about work or art, you need to look for an active option. These pens have their own power source and internal circuitry that allows for pressure sensitivity and tilt detection. This is where you’ll find stylus palm rejection technology, which is a total game-changer. Without it, you’ll be constantly fighting the screen because your hand keeps triggering accidental inputs. If you’re tired of your device acting like it’s possessed every time you try to write a note, get an active pen that actually understands where your hand ends and the tool begins.

    Capacitive Stylus vs Precision Pen Dont Get Fooled

    Capacitive Stylus vs Precision Pen Dont Get Fooled

    Here is the reality of the situation: most people walk into a shop, see a rubber-tipped stick, and think they’ve found a bargain. That’s a capacitive stylus. It works by mimicking the electrical charge of your fingertip. It’s fine if you just want to tap a button or scroll through a blueprint, but the moment you try to draw a straight line, you’ll realize it’s essentially a glorified finger. There is no nuance, no pressure sensitivity, and certainly no precision. If you’re looking for anything more than a crude pointing device, you’re just buying expensive plastic junk.

    If you actually intend to use your device for work or detailed sketching, you need to look at a precision pen. This is where the real distinction in capacitive stylus vs precision pen comes into play. A precision tool communicates directly with the tablet’s digitizer, allowing for features like stylus palm rejection technology. This means you can actually rest your hand on the screen without the device thinking your palm is a giant, messy finger. It’s the difference between using a crayon and using a fine-tipped drafting pencil. Don’t let the marketing fool you; if it doesn’t have that level of control, it isn’t a tool—it’s a toy.

    Five Things to Check Before You Open Your Wallet

    • Test the pressure sensitivity yourself if you can. If you’re trying to sketch or even just write a note and the line thickness doesn’t change based on how hard you press, you’re looking at a glorified finger replacement, not a tool.
    • Don’t get blinded by the brand name alone. Some of these big-name manufacturers charge a premium just for the logo on the side, but if the tip feels like it’s going to snap off the first time you apply real pressure, it’s not worth the markup.
    • Check the tip replacement availability. In my experience, the nib is the first thing to wear down. If the company doesn’t sell affordable replacement tips, you’ll end up having to buy a whole new pen in six months just to keep using it.
    • Watch out for “phantom touches.” A decent stylus should be precise. If you find the tablet registering marks where you aren’t even touching the screen, the internal sensors are cheap junk and you should send it back immediately.
    • Look for actual ergonomics. I’ve spent enough time with a drafting pen to know that if a stylus is too thin or too light, your hand is going to cramp up after twenty minutes of use. It needs some heft and a grip that actually feels solid.

    The Bottom Line: Don't Buy Into the Hype

    Stop buying those cheap, rubber-tipped “passive” sticks if you actually want to do more than just tap a button; they lack the precision needed for any real work.

    If you’re looking at a high-end active stylus, make sure the manufacturer actually supports pressure sensitivity, otherwise you’re just paying for a fancy piece of plastic that won’t perform.

    Always check the compatibility list twice before pulling the trigger—there is nothing more frustrating than a “universal” tool that doesn’t actually work with your specific hardware.

    The Truth About Precision

    I’ve spent enough time looking at schematics to know that if a stylus can’t maintain a consistent connection without you having to press down like you’re trying to dent the screen, it isn’t a tool—it’s a toy.

    Roland Delacroix

    The Bottom Line

    The Bottom Line: choosing the right stylus.

    At the end of the day, choosing a stylus isn’t about finding the one with the most bells and whistles or the fanciest marketing department behind it. It’s about matching the tool to the task. If you’re just scrolling through emails or signing a digital document once a month, a cheap passive stylus is all you need; don’t let a salesperson convince you otherwise. However, if you’re actually trying to draw, take detailed notes, or do precision work, you need to invest in an active pen with real pressure sensitivity. Anything less is just going to lead to frustration and wasted time. Remember, build quality and latency are the only metrics that truly matter when you’re sitting down to work.

    I’ve seen enough gadgets come and go to know that the “latest and greatest” often falls apart the moment you actually put it to use. Don’t be swayed by the shiny packaging or the high price tag if the hardware feels hollow in your hand. My advice is simple: test the connection, check the tip durability, and make sure it doesn’t feel like a toy. When you find a tool that actually responds to your hand without a second thought, that is a tool worth keeping. Buy something that works, buy it once, and stop chasing every new gimmick that hits the market.

    Frequently Asked Questions

    Do I really need to pay a premium for a brand-name stylus, or will a cheaper third-party one get the job done?

    Here’s the short answer: It depends on what you’re actually doing. If you’re just tapping icons or signing a digital document once a month, save your money and grab a cheap third-party option. But if you’re sketching or doing precise work, that’s where the “expensive plastic” actually earns its keep. Brand-name pens have better pressure sensitivity and won’t lag mid-stroke. Don’t pay a premium for a logo, but don’t pay for junk that fails when you need it.

    How long do these active pens actually last before the battery dies or the nib wears down to nothing?

    Here’s the reality: an active pen is a liability. If it’s rechargeable, you’re looking at a battery that’ll likely lose its capacity after two or three years of daily use. Once that lithium cell goes, the whole unit is scrap. As for the nibs, they’re consumables. Depending on how hard you press, expect to swap them every few months. It’s one more thing to track in your notebook, but that’s the price of precision.

    If I'm just using my tablet for basic notes and signing documents, is an expensive precision pen overkill?

    Look, if you aren’t a digital artist or an architect, don’t let the marketing departments bully you into spending $120 on a “precision” pen. If your goal is just scribbling a grocery list or signing a PDF, a decent capacitive stylus or a mid-range active pen will do the job just fine. Don’t pay a premium for pressure sensitivity and tilt support if you’re never going to use them. Save your money.

  • Staying Hydrated With Smart Water Bottles

    Staying Hydrated With Smart Water Bottles

    I was sitting in my workshop last Tuesday, cleaning the dust off an old Marantz receiver, when I looked at the “smart” gadget my nephew had left on the bench. He’d spent eighty dollars on one of those smart water bottles that glows and pings his phone every time he takes a sip. Honestly, it felt like a joke. In my thirty years as a systems engineer, I learned that if you add a circuit board and a Bluetooth chip to something that’s supposed to just hold liquid, you aren’t making it “smarter”—you’re just making it prone to breaking. Most of these devices are nothing more than overpriced plastic junk designed to fail the moment the battery dies.

    I’m not here to sell you on the latest tech fad or some glossy marketing dream. My goal is to cut through the nonsense and tell you which of these smart water bottles actually offer a reliable service and which ones are just expensive paperweights. I’ve spent the last few weeks putting these units through the ringer, checking the build quality and the actual accuracy of the sensors. By the time I’m done, you’ll know exactly where to put your hard-earned money and where to walk away.

    Table of Contents

    The Truth About Smart Bottle Sensor Technology

    The Truth About Smart Bottle Sensor Technology.

    Most of these gadgets rely on a simple pressure sensor at the bottom of the vessel to estimate how much liquid you’ve consumed. In theory, it sounds fine, but in practice, it’s often a mess of variables. If you tilt the bottle at a weird angle or if there’s a bit of air trapped in the sensor housing, the readings go haywire. I’ve seen plenty of bluetooth enabled water bottles that claim to be precision instruments, only to tell you that you’ve drunk a gallon when you’ve barely finished a glass. It’s a classic case of over-engineering a solution for a problem that doesn’t need it.

    The real issue lies in how these devices interface with your phone. You’re essentially tethering your basic biological needs to hydration monitoring apps that require constant syncing and software updates just to work. If the connection drops or the app glitches, the data becomes useless. I don’t care how many fancy lights flash on the side of the bottle; if the smart bottle sensor technology can’t distinguish between a sip and a spill, you’re just buying an expensive way to feel guilty about not drinking enough water.

    Bluetooth Enabled Water Bottles Gimmick or Essential Tool

    Bluetooth Enabled Water Bottles Gimmick or Essential Tool.

    Now, let’s talk about the connection. Most of these bluetooth enabled water bottles claim they’ll revolutionize your health, but as an engineer, I look at the handshake between the hardware and the software. You’ve got a sensor in the base trying to talk to an app on your phone, and frankly, that’s a lot of failure points. If the Bluetooth pairing drops or the app decides to run a heavy update right when you need a nudge, that expensive piece of kit becomes nothing more than a heavy paperweight.

    That said, it isn’t all smoke and mirrors. If you are someone who genuinely struggles to track your progress, using hydration monitoring apps can provide a level of data that a simple sticker on a jug never could. The real value isn’t in the flashing lights; it’s in the ability to set personalized hydration goals that actually adjust based on your activity. If the tech stays out of your way and just does its job, it’s a tool. If you’re spending more time troubleshooting the connection than actually drinking, it’s just another gadget destined for the junk drawer.

    Don't Get Taken for a Ride: 5 Things to Check Before You Buy

    • Look for a replaceable battery or a long-lasting charge. I’ve seen too many of these gadgets become expensive paperweights the moment the internal cell dies and you can’t swap it out.
    • Check the seal integrity. A smart bottle is still a water bottle first; if the sensors make the lid prone to leaking or if the threads feel flimsy, walk away. I don’t care how many notifications it sends if it ruins my paperwork.
    • Test the app’s simplicity. If you need a PhD and a stable Wi-Fi connection just to see how many ounces you drank, it’s a poorly engineered product. The software should be an afterthought, not a barrier.
    • Prioritize build material over “smart” features. A heavy-duty, vacuum-insulated stainless steel body will serve you far better than a lightweight plastic one, even if the plastic one has more bells and whistles.
    • Avoid proprietary charging cables. If the bottle uses a weird, custom plug that you can’t replace if it breaks, you’re buying a headache. Stick to something standard or, better yet, something that doesn’t need a cord at all.

    My Final Verdict on Smart Hydration

    Don’t let the app fool you; if the bottle’s sensor is cheap, the data is useless. I’d rather have a reliable manual measurement than a digital error telling me I’m hydrated when I’m not.

    Check the build quality before the smart features. A smart bottle is a failure if it leaks or can’t survive a drop, regardless of how many notifications it sends to your phone.

    Ask yourself if you actually need the tech. For most people, a high-quality, insulated stainless steel flask is a better investment than a piece of expensive plastic that requires a firmware update just to hold water.

    The Bottom Line on Hydration Tech

    I’ve spent enough time looking at schematics to know that if a device requires a software update just to hold liquid, you’ve bought a headache, not a tool. If you’re going to spend money on a smart bottle, make sure you’re paying for a reliable sensor, not just a fancy LED light that’ll die the moment the battery fails.

    Roland Delacroix

    The Bottom Line on Smart Hydration

    The Bottom Line on Smart Hydration.

    Look, I’ve spent enough time looking at circuit boards and sensor tolerances to know that not everything with a battery is a breakthrough. If you’re looking for a device that uses high-precision sensors to track every ounce, make sure you aren’t just buying a glorified timer wrapped in cheap, unrecyclable plastic. Most of these gadgets are prone to sensor drift or, worse, a dead battery that turns your expensive bottle into a heavy paperweight. If you decide to pull the trigger, stick to the brands that prioritize build quality and seamless connectivity over flashy app interfaces that will be obsolete in eighteen months.

    At the end of the day, a piece of technology should serve you, not the other way around. If a smart bottle actually helps you build a consistent habit without requiring a daily software update, then it might be worth the extra few bucks. But don’t let the marketing fool you into thinking a Bluetooth connection is a substitute for common sense. My advice? Buy something that feels solid in your hand and actually does what it says on the box. Invest in reliability, because a tool you can’t depend on is just more clutter on your kitchen counter.

    Frequently Asked Questions

    How long is the battery actually going to last before I'm stuck with a regular, "dumb" bottle?

    That’s the million-dollar question, isn’t it? Most of these gadgets claim weeks of life, but in my experience, you’re looking at maybe five to seven days of actual use before you’re hunting for a proprietary charging cable. If the battery dies, you’re left with an expensive, heavy paperweight that doesn’t even tell the time. If you can’t swap the battery out yourself, don’t bother. Once that cell goes, the whole thing is scrap.

    Is the sensor technology accurate enough to actually matter, or is it just guessing based on weight?

    Look, I’ve spent enough time with precision instruments to know that “close enough” isn’t good enough. Most of these bottles rely on a simple load cell at the base to measure weight changes. It’s not magic; it’s just basic physics. While it’s generally reliable for tracking volume, it can get tripped up if you’re moving around or if the sensor isn’t calibrated right. It’s not guessing, but it’s certainly not lab-grade accuracy either.

    What happens to the electronics when I inevitably drop it or need to give it a deep clean?

    Here’s the problem: you’re mixing water and circuit boards. Most of these bottles use a sensor puck tucked into the base. If you drop it on a tile floor, don’t expect much; that thin plastic housing isn’t built like the steel components I used to spec. As for cleaning, avoid the dishwasher. The heat and pressure will kill the seals. Hand-wash only, and keep the electronics side bone-dry, or you’re just left with an expensive paperweight.

  • Using Noise Cancelling Earplugs for Sleep

    Using Noise Cancelling Earplugs for Sleep

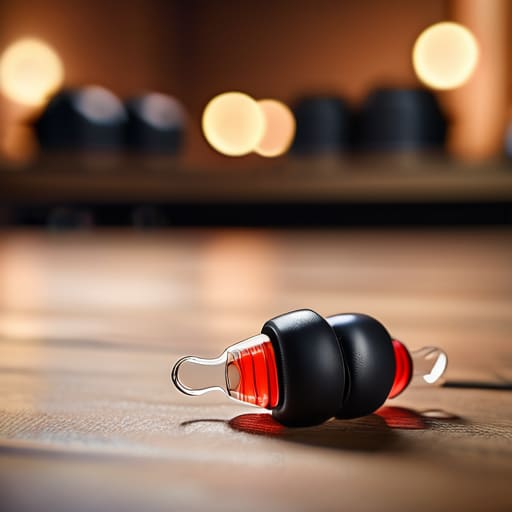
    I was sitting in my workshop last Tuesday, trying to troubleshoot a vintage Marantz receiver, when my neighbor decided it was the perfect time to run his industrial-grade leaf blower right outside my window. I reached for a pair of those high-end, Bluetooth-enabled “smart” buds I’d been testing, but let me tell you, they were useless. All that fancy software and circuitry couldn’t do a damn thing against that low-frequency roar; it was just more expensive plastic failing at its one job. If you’re looking for noise cancelling earplugs that rely on a smartphone app to function, you’re likely just throwing your hard-earned money down the drain.

    I’m not here to sell you on a lifestyle or a gadget that requires a firmware update just to work. My goal is simple: I’ve put dozens of these through the ringer to see which ones actually provide mechanical isolation and which ones are just marketing fluff. I’m going to show you exactly what works for blocking out real-world chaos so you can stop wasting money on tech that promises the world but delivers nothing but a headache.

    Table of Contents

    Silicone vs Foam Earplugs Which Material Actually Works

    Silicone vs Foam Earplugs Which Material Actually Works

    I’ve spent plenty of time at my workbench where precision matters, and the same logic applies here. When you’re looking at silicone vs foam earplugs, you aren’t just choosing a color; you’re choosing a mechanical method of sound attenuation. Foam is the old reliable. It expands to fill the ear canal, creating a decent seal that offers impressive decibel reduction levels for a low price. However, once that foam gets compressed or dirty, it’s useless. It’s a disposable solution, and frankly, it feels a bit cheap after a few uses.

    Silicone, on the other hand, is built for the long haul. These are usually reusable, which appeals to my sense of practicality. If you’re looking for high fidelity earplugs for concerts, silicone is your only real option because it filters the sound rather than just muzzling everything into a muddy mess. You want to hear the music, not just a dull thud. While they require a bit more cleaning to keep them hygienic, they don’t feel like they’re going to crumble in your hand after a week.

    Understanding Decibel Reduction Levels Without the Marketing Fluff

    Understanding Decibel Reduction Levels Without the Marketing Fluff

    Don’t let the glossy packaging fool you. When you’re looking at a box, you’ll see numbers like NRR (Noise Reduction Rating) or SNR (Single Number Rating) plastered everywhere. Companies love to throw these figures around to make it look like their product is a miracle worker. But here is the reality: those numbers are measured in a controlled laboratory setting, not in your living room or a crowded stadium. If a manufacturer claims a massive jump in decibel reduction levels without explaining how they measured it, I’d take that with a heavy dose of salt.

    You need to understand that a higher number isn’t always better for every situation. For instance, if you are looking for high fidelity earplugs for concerts, you actually don’t want to kill every single frequency. If you do, the music will sound like it’s playing through a thick wool blanket. You want clarity, not total silence. Similarly, if you’re seeking noise isolation for studying, you need something that dampens the hum of the refrigerator without making you feel like you’re underwater. Always look for the actual frequency attenuation chart if you can find it—that’s where the real truth is hidden.

    Five Rules for Not Getting Ripped Off by Earplug Marketing

    • Don’t trust the “Noise Cancelling” label on cheap earplugs. Unless they have an active battery and a circuit board inside, they aren’t “cancelling” anything—they are just passively blocking sound. If the box says “Active Noise Cancelling” but it costs twenty bucks, they’re lying to you.
    • Check the seal, not the color. I’ve seen high-end silicone plugs that fail miserably because they don’t conform to the ear canal. If you can’t get a tight, airtight fit, you might as well be wearing nothing at all. A good plug should feel like it’s part of your anatomy, not just sitting on top of it.
    • Stop buying the disposable foam ones if you’re using them every day. They’re fine for a one-off flight, but they degrade fast and lose their structural integrity. If you want something that lasts, look for medical-grade silicone that you can actually clean and reuse.
    • Mind the frequency. Most cheap plugs are decent at blocking out a low rumble, but they’ll let high-pitched sounds—like a whistling kettle or a crying baby—slice right through. If you need silence for sleep, make sure you’re looking at the specific decibel reduction for high frequencies, not just the average number.
    • Test the comfort for more than five minutes. I’ve seen plenty of guys buy these for construction work only to find out they can’t wear them for an hour without an ache in their jaw. If the material is too stiff, it’s just going to cause more problems than it solves.

    The Bottom Line: Don't Get Fooled by the Packaging

    Stop chasing the highest decibel number on the box; if the seal isn’t airtight against your ear canal, that number is nothing but marketing fiction.

    Pick your material based on how you use it—foam is for maximum blockage when you’re sleeping, but silicone is the only way to go if you need to actually hear your surroundings or reuse them daily.

    If a pair feels like it’s made of cheap, flimsy plastic that’s going to snap or lose its shape in a week, walk away; a good earplug should feel like a tool, not a disposable toy.

    The Reality of Sound Dampening

    Don’t let a glossy box and a high price tag fool you; if a pair of earplugs doesn’t create a reliable seal against your ear canal, all those decibel ratings on the packaging are nothing more than expensive fairy tales.

    Roland Delacroix

    The Bottom Line

    Choosing earplugs: The Bottom Line.

    At the end of the day, don’t let a shiny box or a high price tag do the talking for you. We’ve looked at the math, and the reality is simple: if you need a deep, heavy seal for sleeping, go with the high-density foam. If you’re looking for something you can wash and reuse without it feeling like you’ve shoved a piece of trash in your ear, stick to the high-grade silicone. Just remember that no earplug is a magic wand; they are tools designed to dampen sound, not create a vacuum of silence. Before you pull out your credit card, make sure you are buying for the specific decibel reduction you actually need, rather than whatever the marketing department says sounds impressive.

    I’ve spent enough time in machine shops and workshops to know that the right tool makes all the difference between a productive day and a massive headache. You shouldn’t have to fight your own gear just to get a moment of peace. Invest in something that feels solid, fits well, and actually does what the specs claim it will do. Stop chasing the latest gadget craze and start looking for reliable build quality. Once you find a pair that actually holds up and keeps the world at bay, you’ll realize that true value isn’t found in a brand name, but in the quiet that follows.

    Frequently Asked Questions

    How long are these things actually going to last before the material degrades or loses its seal?

    Look, don’t expect these to last forever. If you’re using the disposable foam variety, treat them like a consumable—use them a few times, then toss them. They lose their structural integrity and stop sealing once the cells collapse. For the reusable silicone models, you’re looking at maybe six months to a year of decent use, provided you’re cleaning them properly. Once the material gets tacky or develops micro-tears, the seal is gone. Throw them out.

    If I'm wearing these to sleep, am I going to wake up with sore ear canals or some kind of pressure buildup?

    That’s a fair question, and it’s one people usually only ask after they’ve spent a night tossing and turning in pain. If you’re using cheap, hard foam, you’re asking for trouble—it can create a pressure seal that feels like your eardrums are being pushed inward. For sleeping, stick to the soft, medical-grade silicone. It conforms to your anatomy rather than fighting it. If it feels like a plug is wedged too deep, take it out. Your ears aren’t meant to be under constant stress.

    Is there a real difference between "passive" earplugs and those electronic "active" ones, or is it all just marketing jargon?

    It’s not just jargon, but you need to know what you’re actually buying. Passive earplugs are just a physical barrier—good old-fashioned material blocking the sound waves. They’re reliable and don’t need a battery. “Active” noise cancelling uses electronics to create opposing waves. It’s great for low, constant hums like an airplane engine, but it’s overkill for most tasks. If you want simplicity and durability, stick to passive. If you want high-tech wizardry, go active.