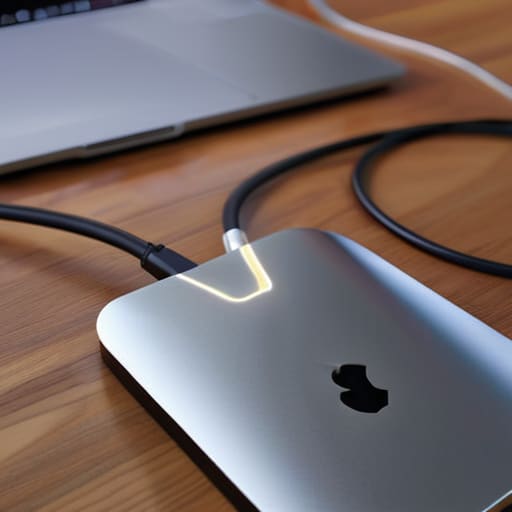
Blog

  • Using a Portable Monitor for Extra Screen Space

    Using a Portable Monitor for Extra Screen Space

    I was sitting at my workbench last Tuesday, surrounded by the heavy, reliable brass components of a 1970s amplifier, when I looked over at the new portable monitor my nephew had brought home. He was complaining about how the screen flickered every time he bumped his laptop, and honestly, it made my blood boil. These days, manufacturers seem more interested in making things thin and “sleek” than making them functional. They pack these devices with flashy marketing jargon, but the moment you actually try to use them for real work, you realize you’ve just bought a glorified piece of expensive plastic that won’t survive a single trip in a backpack.

    I didn’t spend thirty years as a systems engineer to listen to sales pitches, and I’m not going to let you do it either. In this guide, I’m going to cut through the nonsense and tell you which displays actually have the build quality to last and which ones are destined for the junk drawer. I’ll be looking at the connection stability, the chassis integrity, and the actual usability of every portable monitor I test. You aren’t going to get a list of “top trends” here; you’re getting a straightforward assessment of what is worth your hard-earned money.

    Table of Contents

    Ips Panel vs Tn Panel Dont Get Sold Junk

    Ips Panel vs Tn Panel Dont Get Sold Junk

    When you’re looking at spec sheets, the manufacturers love to bury the most important detail in fine print. Most of these companies will try to sell you a cheap unit with a TN panel just to keep the price point low, but I’m telling you now: don’t fall for it. A TN panel might be fast, but the color accuracy is garbage and the viewing angles are pathetic. If you tilt your head even slightly, the whole image shifts and washes out. It’s a frustrating experience that makes any attempt at a mobile workstation setup feel like a chore.

    You want an IPS panel. Period. An IPS panel offers much wider viewing angles and far more consistent color reproduction. If you are setting up lightweight external displays to help with your workflow, you need to see what is actually on the screen without squinting or repositioning your entire desk. It might cost a few extra dollars upfront, but it’s the difference between a tool that aids your productivity and a piece of junk that gives you a headache after twenty minutes. Don’t let them sell you expensive plastic masquerading as a real display.

    Usb C Connectivity Options That Actually Save You Hassle

    Usb C Connectivity Options That Actually Save You Hassle

    Most of these manufacturers love to throw around technical jargon to justify a premium price tag, but when it comes to getting your gear running, I only care about one thing: how many cables I have to wrestle with. If you’re trying to build a mobile workstation setup on the fly, you don’t want to be digging through a bag for a proprietary power brick and a separate HDMI lead. You want a single cable that handles both the data and the juice.

    I’ve spent far too many afternoons troubleshooting why a screen won’t wake up, and usually, it comes down to poor USB-C connectivity options. Look for a unit that supports “DisplayPort Alt Mode” over USB-C. This ensures you get true plug and play external screens that draw power directly from your laptop. If the manual doesn’t explicitly state that it can run on a single cable, put it back on the shelf. It’s just more unnecessary clutter, and in my experience, more points of failure for you to deal with later.

    Five Things to Check Before You Open Your Wallet

    • Check the stand design. Most of these things come with a flimsy “origami” style cover that acts as a stand, but they tip over if you even breathe on them. I’d rather see a solid, integrated kickstand or a sturdy built-in hinge that actually holds its position.
    • Look at the power requirements. Don’t get caught with a screen that requires a dedicated wall outlet just to stay lit. You want something that can draw enough juice through a single cable from your laptop, or you’ll end up with a mess of wires tangling up your desk.
    • Verify the brightness levels. Manufacturers love to hide the “nits” rating in the fine print. If it’s under 300 nits, you aren’t going to see a damn thing if you’re sitting near a window or working in a well-lit cafe.
    • Inspect the build material. If the casing feels like a cheap toy, it’s going to crack the first time it shifts in your laptop bag. Look for aluminum frames or high-density plastics that feel substantial in your hand.
    • Watch out for “Resolution Inflation.” A 4K portable monitor sounds impressive on paper, but on a screen that small, your eyes won’t even tell the difference from 1080p. Save your money and buy a high-quality 1080p panel with good color accuracy instead of paying for pixels you can’t actually use.

    The Bottom Line: Don't Get Fooled by the Spec Sheet

    Stop chasing the lowest price tag; if the panel is a TN type, you’re just buying a screen that looks like garbage the moment you tilt your head.

    Check your ports twice before you hit ‘buy’—if it doesn’t have a reliable USB-C connection that handles both power and video, you’re going to end up with a tangled mess of cables on your desk.

    Look for build quality over flashy branding; a monitor that feels like a toy will likely fail you when you actually need to rely on it for work.

    The Real Test of a Portable Monitor

    I don’t care how many lumens they claim it has on the box; if the chassis feels like a cheap toy and the connection ports wiggle the moment you plug them in, you aren’t buying a tool—you’re buying a headache.

    Roland Delacroix

    The Bottom Line

    The Bottom Line for portable monitor quality.

    Look, I’ve spent enough time with a multimeter and a blueprint to know that if the foundation is weak, the whole system fails. When you’re shopping for a portable monitor, don’t let the marketing department distract you with flashy buzzwords. Stick to what we discussed: demand an IPS panel so you aren’t squinting at a washed-out mess, and ensure the USB-C implementation is robust enough to handle a single-cable setup without overheating. If the build quality feels like a cheap toy and the connections feel flimsy, walk away. You aren’t just buying a screen; you’re buying a reliable tool that needs to perform every time you pull it out of your bag.

    At the end of the day, technology should serve you, not the other way around. I don’t care how many megapixels or “ultra-slim” gimmicks they throw at you; if the device makes your life more complicated or breaks within six months, it’s a failure of engineering. My advice is to stop chasing the latest trend and start looking for durability and simplicity. Invest your hard-earned money in hardware that respects your time and your intelligence. Buy something that actually works, and you won’t find yourself needing to replace it every time a new model hits the shelf.

    Frequently Asked Questions

    How do I know if my laptop's USB-C port actually has enough juice to power the monitor, or am I going to be tethered to a wall outlet all day?

    Check your laptop’s manual or the manufacturer’s spec sheet for “Power Delivery” (PD) support. If it just says “Data Transfer,” you’re in trouble. You’re looking for a port that supports DisplayPort Alt Mode and carries enough wattage to pass through to peripherals. If your laptop’s port is only meant for moving files, it won’t have the juice. Don’t assume it works just because the plug fits; verify the power output first.

    Are these thin, lightweight screens actually durable enough to survive being tossed in a laptop bag, or is the build quality too flimsy for real travel?

    Look, I’ve seen enough “ultrathin” gadgets fail because they lacked structural integrity. Most of these portable monitors are little more than glass sandwiches held together by hope and cheap plastic. If you’re tossing one into a packed bag, a slim profile isn’t your friend—it’s a liability. Unless the manufacturer specifies a reinforced chassis or a high-quality metal frame, don’t trust it. Buy a rugged hard shell case; otherwise, you’re just buying expensive scrap metal.

    If I'm looking at a high resolution like 4K, is it actually worth the extra money, or is it just more marketing fluff that's hard to see on a small screen?

    Look, I’ve spent enough time with a magnifying glass to know when a spec is just window dressing. On a small portable screen, 4K is mostly marketing fluff. The pixels are so packed together that your eyes won’t even tell the difference between 1080p and 4K unless you’re sitting an inch away. Save your cash. Stick to a solid 1080p or 1440p panel; you’ll get better battery life and more money in your pocket.


  • Choosing a Usb C Hub

    Choosing a Usb C Hub

    I was sitting at my workbench last Tuesday, trying to interface a vintage DAC with my new laptop, when a cheap, $15 dongle I’d picked up decided to quit the job entirely. It didn’t just fail; it overheated so badly it nearly scorched my desk. It’s the same story I see every week: manufacturers are stripping ports off perfectly good machines and then selling you a flimsy, glorified piece of plastic to compensate. Most of the advice you’ll find online is just a marketing shell game, but if you’re looking for a real usb c hub guide that focuses on electrical stability rather than flashy RGB lights, you’ve come to the right place.

    I’m not here to sell you on the latest “lifestyle” gadget or some overhyped ecosystem. My goal is to look under the hood and tell you which hubs have the proper thermal management and build quality to actually last more than a month. I’ll walk you through the specs that actually matter—like power delivery and data throughput—so you can stop throwing money down the drain. This is about finding tools that work, plain and simple.

    Table of Contents

    Thunderbolt vs Usb C Compatibility Dont Get Tricked

    Thunderbolt vs Usb C Compatibility Dont Get Tricked

    Now, this is where most people trip up and throw their hard-earned money down the drain. You’ll see these small, rectangular ports on your laptop and assume anything that fits will work perfectly. That’s a dangerous assumption. There is a massive difference between a standard USB-C port and a Thunderbolt port, and if you don’t understand thunderbolt vs usb-c compatibility, you’re going to end up with a hub that can’t drive your high-resolution screen or move files at a decent clip.

    Think of it like this: the port is the doorway, but the protocol is the bandwidth of the hallway behind it. A standard USB-C hub might be fine for a mouse or a thumb drive, but if you’re looking for serious external monitor support via usb-c or high-speed data, a basic hub will choke. If you’ve invested in a high-end machine like a MacBook Pro, you likely have Thunderbolt ports. Buying a cheap, non-Thunderbolt multiport adapter is like putting budget tires on a luxury sedan; it’ll move, but you’ll never get the performance you actually paid for. Don’t let the marketing fool you.

    Usb C Hub Power Delivery Reliable Juice or Total Junk

    Usb C Hub Power Delivery Reliable Juice or Total Junk

    Here is where most people trip up and end up with a dead laptop right when they need it most. When you’re looking at usb-c hub power delivery specs, don’t just look at the big number on the box. If a manufacturer claims 100W delivery, that doesn’t mean your laptop is getting all 100W. The hub itself is a piece of hardware that needs its own electricity to run the ports, the chips, and the cooling. Usually, the hub “steals” about 15W for itself, leaving you with less than advertised. If you’re using a high-drain device like a usb-c hub for macbook pro while running external drives, that power drop is even more significant.

    I’ve seen too many folks buy a cheap, unbranded adapter only to find their battery draining even while plugged in. That’s a recipe for hardware failure. You want a unit that handles the handshake between the charger and your computer without overheating. If the hub feels hot to the touch, it’s struggling to manage the load. Buy a unit with a solid casing—aluminum is your friend here—because heat is the silent killer of reliable electronics.

    Five Things to Check Before You Open Your Wallet

    • Look at the casing material. If it’s lightweight, hollow-feeling plastic, put it back on the shelf. I want to see aluminum or a heavy-duty alloy that can actually dissipate heat when you’re running multiple peripherals.
    • Count the ports, but don’t just look at the number. Make sure they aren’t all crowded together. There’s nothing more frustrating than a hub where a standard thumb drive blocks the port right next to it.
    • Check the data transfer speeds on the spec sheet. If they don’t explicitly state whether it’s USB 3.0, 3.1, or 3.2, they’re hiding something. Don’t buy a hub that turns your high-speed external drive into a snail.
    • Verify the HDMI output resolution. A lot of these cheap units claim to be “4K compatible” but they actually top out at a stuttering 30Hz. You want 60Hz, or you’ll be staring at a laggy screen all day.
    • Read the fine print on the power requirements. If you’re planning to plug in a hard drive and a keyboard, ensure the hub has enough overhead to handle the draw without dropping the connection halfway through a file transfer.

    The Bottom Line: What to Look for Before You Buy

    Check the build quality first; if the casing feels like a cheap toy, the internal circuitry probably is too. Look for aluminum housings that can actually dissipate heat.

    Don’t get blinded by the number of ports. A hub with ten flimsy connections is useless if the data speeds crawl or the connection drops every time you bump your desk.

    Verify the specific power requirements of your peripherals. If you’re plugging in a hard drive and a monitor, make sure the hub’s power delivery can actually handle the load without crashing.

    The Real Cost of Cutting Corners

    “I’ve seen enough cheap components fail in my time to know that a hub isn’t just a bridge between your laptop and your peripherals; it’s a single point of failure. If you buy the cheapest plastic dongle on the market just to save twenty bucks, you’re going to end up losing much more in fried data cables and lost productivity.”

    Roland Delacroix

    The Bottom Line

    The Bottom Line: USB-C hub quality.

    Look, I’ve seen enough cheap components fail in my time to know that a USB-C hub isn’t just a convenience; it’s the backbone of your workstation. If you don’t pay attention to the distinction between Thunderbolt and standard USB-C, or if you ignore the actual wattage being passed through the Power Delivery ports, you’re essentially asking for trouble. Don’t let a shiny marketing campaign fool you into buying a device that can’t handle a steady data stream or, worse, one that overheats and shuts down your peripherals mid-task. Stick to the specs, check the build quality, and make sure the hub is rated for the specific load you intend to put on it. If it feels like a hollow piece of plastic in your hand, it’ll likely act like one on your desk.

    At the end of the day, my goal is to make sure you walk away with a tool that stays out of your way and just does its job. Technology should serve you, not become another source of frustration that requires a troubleshooting manual every single morning. Invest your hard-earned money in reliability over flashiness, and you’ll find that a well-built hub is one of the few things in this modern tech landscape that actually lives up to the hype. Buy it once, buy it right, and then get back to your actual work.

    Frequently Asked Questions

    Will plugging a bunch of peripherals into this hub make my laptop run hotter or drain the battery faster?

    Look, I’ve seen this happen more times than I’d like. If you’re running a dozen peripherals through one tiny hub, yes, you’re going to see some heat. That hub is working overtime to manage data and power, and that energy has to go somewhere. As for the battery, it’s a mathematical certainty: more devices mean more draw. If you aren’t plugged into a wall, don’t expect your laptop to stay topped up for long.

    I’ve seen hubs that claim to support 4K video, but how do I know if it’ll actually work with my specific monitor without flickering?

    Look, “4K support” is a marketing term that’s way too broad for my liking. Most of these cheap hubs claim 4K, but they’re only pushing 30Hz. That’s why your screen flickers or feels laggy—it’s like trying to run a high-speed turbine through a garden hose. You need to check the refresh rate. If it doesn’t explicitly say 4K at 60Hz, walk away. Don’t settle for anything less if you want a stable image.

    If I use a hub with a built-in power adapter, do I still need to plug my original charger into the laptop?

    Look, here’s the short answer: It depends on the hub’s wattage, but don’t take the manufacturer’s word for it. If your laptop needs 90W to run properly and that hub only passes through 45W, you’re going to see that dreaded “slow charger” warning. If you want to be safe and avoid draining your battery while working, plug your original charger directly into the laptop. Don’t trust a single point of failure.

  • Portable Smart Lock Options for Renters

    Portable Smart Lock Options for Renters

    I spent thirty years in manufacturing, where if a component didn’t meet the tolerance specs, it went straight into the scrap bin. That’s why it drives me up the wall when I see these tech companies marketing smart locks for renters as some kind of revolutionary lifestyle upgrade. Most of what you see online is just expensive plastic designed to fail the moment you actually need it. You don’t need a device that requires a firmware update just to let you into your own apartment; you need a piece of hardware that performs its one job without making your life complicated.

    I’m not here to sell you on the latest shiny gadget or some subscription-based security nonsense. My goal is to help you separate the reliable tools from the overhyped junk by looking at the actual build quality and installation requirements. I’ll be walking you through what works, what breaks, and which models you can actually install without losing your security deposit. If you want the straight truth on what’s worth your hard-earned money, you’ve come to the right place.

    Table of Contents

    The Truth About Reliable Non Permanent Smart Locks

    The Truth About Reliable Non Permanent Smart Locks

    The truth about reliable non-permanent smart locks is that most of them are built like toys. I’ve spent enough time looking at schematics to know when a manufacturer is cutting corners with cheap plastic gears just to keep the price low. If you’re looking for no-drill smart locks, you have to be careful. Many of these devices claim to be “renter-friendly,” but they often rely on flimsy adhesive strips or thin metal clamps that won’t hold up if someone actually puts weight on the door. If the mechanism feels light and hollow in your hand, it’s going to fail you when it matters most.

    When I’m evaluating keyless entry for leased properties, I look for mechanical integrity first. A good option should feel substantial, even if it doesn’t require permanent hardware changes. You want something that uses a secure, physical connection to the existing deadbolt rather than just slapping a motorized gadget onto the surface of the wood. Don’t get distracted by flashy apps or touchscreens; if the internal motor isn’t robust, you’re just buying an expensive paperweight that will jam the moment the temperature drops.

    Why Most Keyless Entry for Leased Properties Fails

    Why Most Keyless Entry for Leased Properties Fails

    The problem with most keyless entry for leased properties is that they are designed by software engineers, not people who actually have to live with them. Most of these gadgets rely on cheap, thin plastic components that can’t handle the daily mechanical stress of a door being slammed or a heavy wind catching it. I’ve seen too many people buy a “convenient” device only to find out the internal motor burns out within six months because it wasn’t built to handle the torque of a standard deadbolt.

    Then there is the issue of the installation. Most companies market no-drill smart locks as the perfect solution, but they often fail to account for the specific tolerances of apartment-grade hardware. If the alignment is off by even a fraction of a millimeter, the motor will struggle, drain your batteries in a week, and eventually leave you locked out in the rain. You aren’t just paying for a gadget; you’re paying for the risk of mechanical failure. If you can’t find a way to ensure a solid, seamless fit without damaging the door, you’re better off sticking to a traditional brass key.

    Five Rules of Thumb Before You Buy

    • Check the mounting requirements first. Most of these gadgets require you to drill holes or replace the entire deadbolt assembly, which is a one-way ticket to losing your security deposit. Look for “retrofit” models that only replace the interior thumbturn.
    • Don’t ignore the power source. I’ve seen too many people get locked out of their own apartments because a cheap smart lock ran through four AA batteries in a month. If it doesn’t have a reliable emergency power jump or a physical key backup, walk away.
    • Test the connectivity in your specific unit. Apartment walls are often thick concrete or reinforced steel that eats Wi-Fi signals for breakfast. If the lock can’t talk to your router without a dedicated bridge, it’s just a glorified paperweight.
    • Verify the “non-destructive” claim. Before you click ‘buy,’ read the fine print. If the manual says you need to remove the strike plate or modify the door frame, it isn’t for renters—it’s for homeowners.
    • Keep your original hardware in a labeled box. You’re going to have to put the old lock back on when you move out, and nothing is more frustrating than hunting through a junk drawer for a single, tiny screw while you’re trying to clear out your apartment.

    The Bottom Line: What You Actually Need to Know

    Prioritize mechanical reliability over “smart” bells and whistles; if the physical deadbolt doesn’t throw smoothly, the app won’t save you when you’re locked out.

    Check your lease for “no-drill” requirements before buying, because a $200 lock isn’t worth a $500 repair bill from your landlord.

    Look for hardware with physical key backups or external battery terminals, because even the best systems can fail when the power runs dry.

    The Renters' Dilemma

    “Most manufacturers design these gadgets for homeowners who can drill holes in their front doors without a second thought; for a renter, you need a lock that offers real security without turning your security deposit into a repair bill.”

    Roland Delacroix

    The Bottom Line

    The Bottom Line: reliable smart lock choice.

    At the end of the day, choosing a smart lock for a rental property isn’t about having the flashiest gadget on the market; it’s about finding a balance between convenience and mechanical reliability. I’ve seen too many people get caught out by “smart” devices that rely entirely on a shaky Wi-Fi connection or a proprietary app that crashes when you’re standing in the rain. If you’re going to invest your hard-earned money, make sure you choose a model that offers a physical backup—like a standard keyway—and one that doesn’t require you to drill holes into your landlord’s expensive door. Stick to the brands that prioritize solid build quality over fancy software bells and whistles.

    Don’t let the marketing departments convince you that you need a high-tech security system just to feel safe in your own apartment. Technology should serve you, not add another layer of frustration to your daily routine. My advice? Keep it simple, keep it sturdy, and always test your hardware thoroughly before you rely on it for your primary entry point. A good tool should make your life easier, not turn your front door into a troubleshooting project. Buy something that works, and more importantly, buy something that lasts.

    Frequently Asked Questions

    Will installing one of these locks actually cost me my security deposit if I can't get it back on the door exactly how it was?

    Look, I’ve seen enough property damage to know that landlords can be sticklers. If you drill new holes or strip the screws, you’re looking at a deduction, plain and simple. My advice? Don’t touch the hardware. Stick to locks that replace only the existing deadbolt or use a keypad that sits over the existing cylinder. Keep the original hardware in a labeled baggie. If you can’t put the door back to factory specs, don’t touch it.

    How am I supposed to let a guest or a repairman in if the app decides to go offline or the batteries die?

    That’s the million-dollar question, and it’s exactly why I’m skeptical of these “all-in-one” gadgets. If you’re buying one, do not—and I mean do not—get a model that relies solely on a cloud connection. You need a lock with a physical keyway as a failsafe. If the app crashes or the batteries hit zero, a piece of metal is the only thing that’ll actually open your door. Don’t get locked out by your own tech.

    Is it worth paying a premium for a "renter-friendly" brand, or can I just use a standard deadbolt and a clever mounting trick?

    Look, I’ve seen enough “clever hacks” fail to know that a workaround is usually just a future headache. You could try to rig a standard deadbolt with some shim or a temporary bracket, but you’re asking for a mechanical failure when you’re trying to get into your own house. Don’t risk it. Pay the premium for a brand specifically engineered for non-permanent installation. It’s better to pay for a proper design than to spend your weekend fixing a jammed door.

  • Using Noise Cancelling Earplugs for Sleep

    Using Noise Cancelling Earplugs for Sleep

    I was sitting in my workshop last Tuesday, trying to troubleshoot a vintage Marantz receiver, when my neighbor decided it was the perfect time to run his industrial-grade leaf blower right outside my window. I reached for a pair of those high-end, Bluetooth-enabled “smart” buds I’d been testing, but let me tell you, they were useless. All that fancy software and circuitry couldn’t do a damn thing against that low-frequency roar; it was just more expensive plastic failing at its one job. If you’re looking for noise cancelling earplugs that rely on a smartphone app to function, you’re likely just throwing your hard-earned money down the drain.

    I’m not here to sell you on a lifestyle or a gadget that requires a firmware update just to work. My goal is simple: I’ve put dozens of these through the ringer to see which ones actually provide mechanical isolation and which ones are just marketing fluff. I’m going to show you exactly what works for blocking out real-world chaos so you can stop wasting money on tech that promises the world but delivers nothing but a headache.

    Table of Contents

    Silicone vs Foam Earplugs Which Material Actually Works

    Silicone vs Foam Earplugs Which Material Actually Works

    I’ve spent plenty of time at my workbench where precision matters, and the same logic applies here. When you’re looking at silicone vs foam earplugs, you aren’t just choosing a color; you’re choosing a mechanical method of sound attenuation. Foam is the old reliable. It expands to fill the ear canal, creating a decent seal that offers impressive decibel reduction levels for a low price. However, once that foam gets compressed or dirty, it’s useless. It’s a disposable solution, and frankly, it feels a bit cheap after a few uses.

    Silicone, on the other hand, is built for the long haul. These are usually reusable, which appeals to my sense of practicality. If you’re looking for high fidelity earplugs for concerts, silicone is your only real option because it filters the sound rather than just muzzling everything into a muddy mess. You want to hear the music, not just a dull thud. While they require a bit more cleaning to keep them hygienic, they don’t feel like they’re going to crumble in your hand after a week.

    Understanding Decibel Reduction Levels Without the Marketing Fluff

    Understanding Decibel Reduction Levels Without the Marketing Fluff

    Don’t let the glossy packaging fool you. When you’re looking at a box, you’ll see numbers like NRR (Noise Reduction Rating) or SNR (Single Number Rating) plastered everywhere. Companies love to throw these figures around to make it look like their product is a miracle worker. But here is the reality: those numbers are measured in a controlled laboratory setting, not in your living room or a crowded stadium. If a manufacturer claims a massive jump in decibel reduction levels without explaining how they measured it, I’d take that with a heavy dose of salt.

    You need to understand that a higher number isn’t always better for every situation. For instance, if you are looking for high fidelity earplugs for concerts, you actually don’t want to kill every single frequency. If you do, the music will sound like it’s playing through a thick wool blanket. You want clarity, not total silence. Similarly, if you’re seeking noise isolation for studying, you need something that dampens the hum of the refrigerator without making you feel like you’re underwater. Always look for the actual frequency attenuation chart if you can find it—that’s where the real truth is hidden.

    Five Rules for Not Getting Ripped Off by Earplug Marketing

    • Don’t trust the “Noise Cancelling” label on cheap earplugs. Unless they have an active battery and a circuit board inside, they aren’t “cancelling” anything—they are just passively blocking sound. If the box says “Active Noise Cancelling” but it costs twenty bucks, they’re lying to you.
    • Check the seal, not the color. I’ve seen high-end silicone plugs that fail miserably because they don’t conform to the ear canal. If you can’t get a tight, airtight fit, you might as well be wearing nothing at all. A good plug should feel like it’s part of your anatomy, not just sitting on top of it.
    • Stop buying the disposable foam ones if you’re using them every day. They’re fine for a one-off flight, but they degrade fast and lose their structural integrity. If you want something that lasts, look for medical-grade silicone that you can actually clean and reuse.
    • Mind the frequency. Most cheap plugs are decent at blocking out a low rumble, but they’ll let high-pitched sounds—like a whistling kettle or a crying baby—slice right through. If you need silence for sleep, make sure you’re looking at the specific decibel reduction for high frequencies, not just the average number.
    • Test the comfort for more than five minutes. I’ve seen plenty of guys buy these for construction work only to find out they can’t wear them for an hour without an ache in their jaw. If the material is too stiff, it’s just going to cause more problems than it solves.

    The Bottom Line: Don't Get Fooled by the Packaging

    Stop chasing the highest decibel number on the box; if the seal isn’t airtight against your ear canal, that number is nothing but marketing fiction.

    Pick your material based on how you use it—foam is for maximum blockage when you’re sleeping, but silicone is the only way to go if you need to actually hear your surroundings or reuse them daily.

    If a pair feels like it’s made of cheap, flimsy plastic that’s going to snap or lose its shape in a week, walk away; a good earplug should feel like a tool, not a disposable toy.

    The Reality of Sound Dampening

    Don’t let a glossy box and a high price tag fool you; if a pair of earplugs doesn’t create a reliable seal against your ear canal, all those decibel ratings on the packaging are nothing more than expensive fairy tales.

    Roland Delacroix

    The Bottom Line

    Choosing earplugs: The Bottom Line.

    At the end of the day, don’t let a shiny box or a high price tag do the talking for you. We’ve looked at the math, and the reality is simple: if you need a deep, heavy seal for sleeping, go with the high-density foam. If you’re looking for something you can wash and reuse without it feeling like you’ve shoved a piece of trash in your ear, stick to the high-grade silicone. Just remember that no earplug is a magic wand; they are tools designed to dampen sound, not create a vacuum of silence. Before you pull out your credit card, make sure you are buying for the specific decibel reduction you actually need, rather than whatever the marketing department says sounds impressive.

    I’ve spent enough time in machine shops and workshops to know that the right tool makes all the difference between a productive day and a massive headache. You shouldn’t have to fight your own gear just to get a moment of peace. Invest in something that feels solid, fits well, and actually does what the specs claim it will do. Stop chasing the latest gadget craze and start looking for reliable build quality. Once you find a pair that actually holds up and keeps the world at bay, you’ll realize that true value isn’t found in a brand name, but in the quiet that follows.

    Frequently Asked Questions

    How long are these things actually going to last before the material degrades or loses its seal?

    Look, don’t expect these to last forever. If you’re using the disposable foam variety, treat them like a consumable—use them a few times, then toss them. They lose their structural integrity and stop sealing once the cells collapse. For the reusable silicone models, you’re looking at maybe six months to a year of decent use, provided you’re cleaning them properly. Once the material gets tacky or develops micro-tears, the seal is gone. Throw them out.

    If I'm wearing these to sleep, am I going to wake up with sore ear canals or some kind of pressure buildup?

    That’s a fair question, and it’s one people usually only ask after they’ve spent a night tossing and turning in pain. If you’re using cheap, hard foam, you’re asking for trouble—it can create a pressure seal that feels like your eardrums are being pushed inward. For sleeping, stick to the soft, medical-grade silicone. It conforms to your anatomy rather than fighting it. If it feels like a plug is wedged too deep, take it out. Your ears aren’t meant to be under constant stress.

    Is there a real difference between "passive" earplugs and those electronic "active" ones, or is it all just marketing jargon?

    It’s not just jargon, but you need to know what you’re actually buying. Passive earplugs are just a physical barrier—good old-fashioned material blocking the sound waves. They’re reliable and don’t need a battery. “Active” noise cancelling uses electronics to create opposing waves. It’s great for low, constant hums like an airplane engine, but it’s overkill for most tasks. If you want simplicity and durability, stick to passive. If you want high-tech wizardry, go active.

  • Choosing the Best Security Cameras for Your Home

    Choosing the Best Security Cameras for Your Home

    I was sitting in my workshop last Tuesday, tinkering with a 1970s Marantz receiver, when I realized just how much the industry has shifted from building things to last toward selling us planned obsolescence. I saw a neighbor struggling with his new setup, cursing at a notification on his phone because his smart home security cameras had decided to go offline for the third time that week. It’s infuriating. We’ve reached a point where you’re expected to pay a premium for a device that’s essentially just a glorified, fragile piece of plastic that relies entirely on a shaky Wi-Fi signal to do its one job.

    I didn’t spend thirty years as a systems engineer to be fooled by colorful marketing slides and “AI-driven” buzzwords that don’t mean a lick of difference when someone is actually at your front door. In this guide, I’m going to cut through the noise and tell you which systems actually have the build quality to survive a rainstorm and a connection that won’t drop the moment you need it most. I’ll show you how to spot the junk before you open your wallet, focusing on reliability over hype.

    Table of Contents

    Indoor vs Outdoor Security Cameras Real Durability Matters

    Indoor vs Outdoor Security Cameras Real Durability Matters

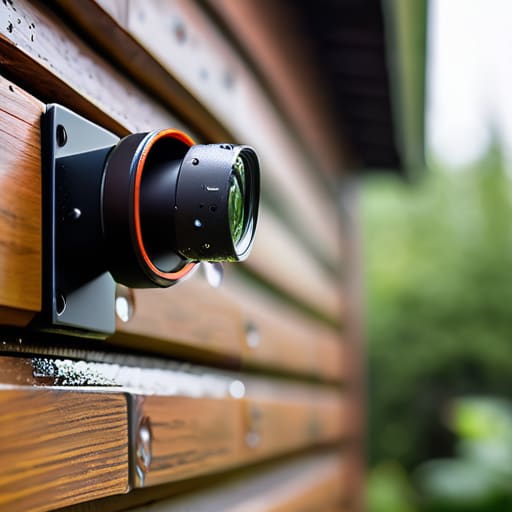
    Now, don’t make the mistake of thinking a camera is just a camera. If you take a device meant for your living room and slap it on a porch, you’re asking for a headache. When comparing indoor vs outdoor security cameras, the first thing I look at isn’t the software—it’s the housing. An indoor unit is usually just thin, lightweight plastic that’ll crack the first time the temperature drops below freezing. For anything outside, you need a chassis that can actually handle the elements. I’ve seen too many people buy a cheap unit only to have the lens fog up after the first rainstorm because the seal integrity was non-existent.

    If you’re looking at battery powered security systems for your perimeter, you also have to consider the workload. Outdoor units work much harder; they’re fighting sunlight, wind, and shadows, which drains power faster than a camera sitting in a climate-controlled hallway. You want something with decent night vision capabilities that doesn’t wash out the image the moment a moth flies past the infrared sensor. If the hardware isn’t built to withstand the environment, all that fancy software in the world won’t save you.

    The Truth About Battery Powered Security Systems and Reliability

    The Truth About Battery Powered Security Systems and Reliability

    I’ll be blunt: if you’re looking for a system that’s “set it and forget it,” you might want to rethink your approach to battery powered security systems. On paper, they look like a dream—no wires to fish through your drywall and no professional installation required. But from an engineering standpoint, you’re trading reliability for convenience. These units are designed to “sleep” to save power, meaning there is often a slight lag between a motion event and the actual recording. If a thief is fast, you might just end up with a high-definition video of the back of their jacket.

    Furthermore, you have to consider the maintenance cycle. I’ve seen too many folks buy a sleek setup only to realize they’re climbing a ladder every three months to swap out cells or run a charging cable. If you want something truly dependable, you need to look closely at the night vision capabilities and how much power they draw during those dark hours. If you can run a wire, do it. A hardwired connection is a mechanical certainty; a battery is just a ticking clock.

    Five Things the Marketing Brochures Won't Tell You

    • Check the mounting hardware before you buy. A lot of these companies ship you a flimsy piece of plastic that’ll snap in a stiff breeze or a heavy frost. If it doesn’t feel substantial in your hand, it isn’t going to stay on your eaves for long.
    • Don’t get trapped in a “subscription loop.” I’ve seen too many people buy a perfectly good camera only to realize they can’t even see their own recorded footage without paying a monthly fee. Look for local storage options like an SD card or an NVR so you actually own your data.
    • Verify the field of view and the “dead zones.” A high-resolution sensor is useless if the lens is positioned so poorly that a thief can walk right past the camera without being caught on film. Map out your entry points and make sure the coverage actually overlaps.
    • Test the connection stability before you drill any holes. If your Wi-Fi signal is weak at the edge of your property, that expensive camera is going to be nothing more than a paperweight. Get a signal extender or run a hardwired ethernet cable if you want something that actually works when it counts.
    • Look for real-world weather ratings, not just vague promises. If you’re putting a unit outside, I want to see an IP65 or IP66 rating in the spec sheet. Anything less is just an invitation for moisture to seep into the circuitry and kill the device within a single season.

    Bottom Line: What to Look for Before You Buy

    Prioritize hardwired connections over battery-operated ones whenever your home layout allows; if you don’t want to be climbing a ladder every three months to swap out cells, stick to a stable power source.

    Check the build materials, not just the spec sheet—if the housing feels like a cheap toy in your hand, it’s certainly not going to survive a summer heatwave or a heavy rainstorm.

    Don’t let a flashy app distract you from the fundamentals; a camera is useless if the connection drops every time the wind blows or if the software is too convoluted to actually check a live feed.

    ## The Bottom Line on Security Tech

    “I don’t care how many megapixels a company promises on the box; if the housing is made of cheap, sun-bleached plastic and the connection drops every time a cloud passes by, you haven’t bought a security system—you’ve bought an expensive paperweight.”

    Roland Delacroix

    The Bottom Line

    Prioritizing reliability is The Bottom Line.

    Look, I’ve spent enough time staring at schematics to know that a gadget is only as good as its weakest link. If you choose a camera that can’t handle a bit of rain or a battery that dies the moment the temperature drops, you aren’t buying security—you’re buying a headache. Don’t get blinded by a high megapixel count if the housing is made of cheap, sun-brittle plastic, and for heaven’s sake, don’t ignore the connection stability just because the box looked pretty on the shelf. You need to prioritize wired reliability and weather-rated builds over whatever flashy software gimmick the marketing team is pushing this week.

    At the end of the day, your home is your sanctuary, and the tech you put around it should serve you, not the other way around. You shouldn’t have to fight with an app every time you want to see who is at the front door. Buy something that is built to last, something that does its job without requiring a constant software update or a specialized engineering degree to troubleshoot. Invest in quality hardware that offers peace of mind, and remember that true security is found in consistency, not in the latest expensive trend.

    Frequently Asked Questions

    If I want to avoid monthly subscription fees, how do I find a camera that actually saves video locally without a headache?

    Look for cameras that support local storage via a microSD card slot or, better yet, an NVR (Network Video Recorder) system. Avoid anything that says “cloud-only” in the fine print; that’s just a trap to get you paying monthly. I prefer systems that allow me to plug a hard drive directly into the setup. It’s more work upfront, sure, but once it’s wired in, you own your footage—not some company in Silicon Valley.

    Are these wireless cameras really going to hold up against a heavy rainstorm or extreme temperature swings over time?

    Look, if you’re expecting a plastic shell to survive a real storm, you’re dreaming. Most of these wireless units are built for convenience, not longevity. If you live somewhere with heavy rain or freezing winters, check the IP rating—and don’t just take their word for it. I’ve seen too many “weatherproof” cameras crack at the seams after one bad season. If it isn’t rated for high moisture and temperature swings, it’s just expensive junk.

    How much of this "smart" AI detection is actually useful, and how much of it is just going to send my phone useless notifications every time a leaf blows by?

    Look, most of this “AI detection” is just marketing fluff designed to make you feel like you’re buying a piece of the future. In reality, it’s a double-edged sword. If the software is tuned correctly, it can distinguish between a stray cat and a person, which is helpful. But more often than not, you’ll find yourself getting a notification every time a tree branch moves or a shadow shifts. If you can’t fine-tune the sensitivity, it’s just an expensive way to annoy you.

  • Fitness Bands Versus Smartwatches

    Fitness Bands Versus Smartwatches

    I was sitting in my workshop last Tuesday, cleaning the dust off an old Marantz receiver, when my nephew tried to sell me on this new “essential” wearable. He kept droning on about apps and cellular connectivity, but all I saw was a glorified, fragile computer strapped to a wrist. It got me thinking about how much money people throw away trying to keep up with every shiny new gadget that hits the shelf. When you’re staring down the choice between a fitness band vs smartwatch, it’s easy to get lost in the marketing fluff and end up with a piece of expensive plastic that dies before dinner.

    I’m not here to sell you on the latest trend or tell you that you need a miniature supercomputer just to count your steps. My goal is simple: I want to help you figure out which device is actually built to last and do its job without constant tinkering. I’ve spent my career looking at how things are put together, and I’m going to tell you exactly what’s worth your hard-earned cash and what is just overpriced junk. Let’s get down to the brass tacks.

    Table of Contents

    The Fitness Band

    Minimalist health monitoring with The Fitness Band.

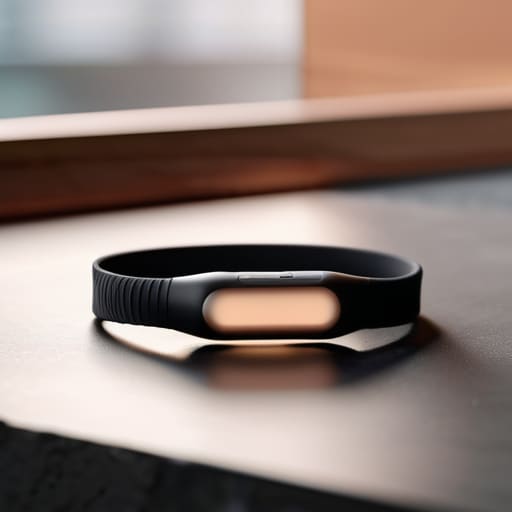
    A fitness band is a streamlined wearable device designed primarily to monitor physical activity through specialized sensors. These units focus on tracking metrics like heart rate, sleep patterns, and step counts, offering a minimalist approach to health monitoring without the clutter of extra features.

    I’ve spent enough time looking at schematics to know that sometimes, less is actually more. When you’re out on a walk or just trying to keep an eye on your vitals, you don’t need a miniature computer strapped to your wrist screaming at you with notifications. A fitness band works because it does one job well without draining a battery in six hours. It’s about getting the data you need to stay healthy without the unnecessary overhead of a complex operating system that’s bound to glitch.

    The Smartwatch

    The Smartwatch performing complex digital tasks.

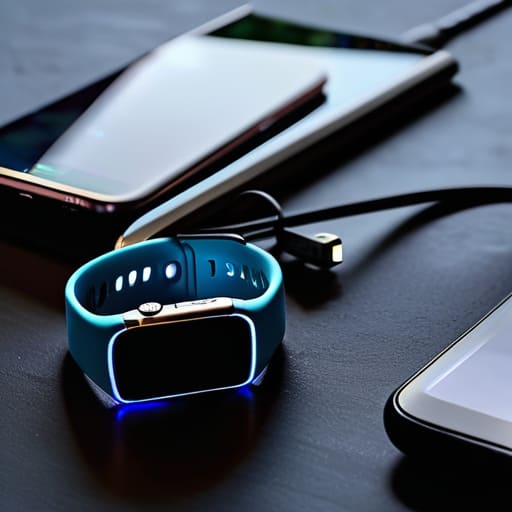
    A smartwatch is essentially a high-performance computer housed in a wrist-worn chassis, capable of running complex applications and managing digital communications. Its main selling point is its unmatched versatility, acting as an extension of your smartphone by handling everything from GPS navigation to mobile payments.

    Now, don’t get me wrong, the engineering behind these little powerhouses is impressive, but they can be a bit much. A smartwatch is for the person who wants their entire digital life accessible at a glance, but it comes at a cost of constant maintenance. You aren’t just wearing a tool; you’re managing a device that requires regular charging and software updates just to keep it functional. It’s a powerful piece of hardware, provided you have the patience to deal with the complexity that comes with it.

    Comparison of Wearable Devices

    Feature Fitness Band Smartwatch
    Primary Purpose Activity & health tracking Multifunctional connectivity N/A
    Display Type Small, simple LED/OLED Large, high-res touchscreen N/A
    Battery Life Long (7-14+ days) Short (1-3 days) N/A
    Smart Features Limited notifications Full apps, calls, & texts N/A
    Price Point Budget-friendly Premium/Expensive N/A
    Form Factor Slim & lightweight Bulky & substantial N/A
    Best For Dedicated athletes/minimalists Tech enthusiasts/productivity N/A

    Smartwatch vs Fitness Tracker Features What Actually Matters

    Smartwatch vs Fitness Tracker Features What Actually Matters

    When you’re looking at these two, you have to look past the shiny marketing and ask one question: do you actually need all those bells and whistles? It’s easy to get distracted by a screen that looks like a miniature smartphone, but if you’re just trying to monitor your heart rate or sleep cycles, half those features are nothing more than expensive distractions that will end up draining your battery before lunch.

    A smartwatch is essentially a computer strapped to your wrist. It’ll handle your emails, take calls, and run third-party apps, but that complexity comes at a cost. You’re trading longevity and simplicity for unnecessary processing power. On the other hand, a fitness band is a single-purpose tool. It does one job—tracking your vitals—and it does it with a level of reliability that these over-engineered smartwatches often lack.

    If you want a digital assistant that constantly pings you with notifications, the smartwatch wins. But if you want a device that actually stays out of your way while you’re living your life, the fitness band is the clear winner for pure utility.

    Health Monitoring Capabilities Separating Science From Gimmicks

    Look, I’ve spent enough time looking at schematics to know that a sensor is only as good as the math behind it. When you’re looking at these gadgets, you aren’t just buying a shiny screen; you’re buying a piece of equipment that claims to monitor your vitals. If you can’t trust the data, you’re essentially paying for a high-tech paperweight that gives you nothing but false peace of mind.

    Smartwatches are the heavy hitters here. Because they have more processing power and better sensor arrays, they can handle complex tasks like ECG readings or blood oxygen monitoring with decent accuracy. They are built for the person who wants a comprehensive health dashboard on their wrist. On the other hand, most fitness bands are stripped-down versions. They’ll give you your heart rate and steps, but don’t expect them to perform any sophisticated medical-grade analysis. They are fine for general trends, but they lack the depth required for serious monitoring.

    If you want a device that actually attempts to understand what’s happening inside your body, the smartwatch is the clear winner. Just don’t treat it like a doctor.

    The Bottom Line: Don't Get Sold a Gimmick

    If you just want to track your steps and sleep without a device constantly buzzing your wrist and demanding a daily charge, buy a fitness band. It’s simple, it works, and it doesn’t try to be more than it is.

    Only spring for a smartwatch if you actually need the connectivity—like answering calls or checking texts on the fly. If you aren’t going to use those features, you’re just paying extra for a fragile screen that’ll be obsolete in two years.

    Look past the marketing jargon and check the sensor reliability. A device that gives you a hundred different “wellness scores” is useless if the basic heart rate and step data are inconsistent; stick to the hardware that prioritizes accuracy over flashy animations.

    ## The Bottom Line on Value

    “Most people think they need a miniature computer strapped to their wrist just to count their steps, but half the time, you’re just paying a premium for a glorified notification center that’ll be obsolete in two years. If you want data that works, buy a tool; if you want a distraction, buy a smartwatch.”

    Roland Delacroix

    The Bottom Line

    At the end of the day, you have to decide if you want a Swiss Army knife or a dedicated screwdriver. If you’re looking for a device that stays out of your way and simply does its job—tracking steps, heart rate, and sleep without requiring a daily recharge—get a fitness band. It’s a tool, plain and simple. But, if you find yourself needing to manage calls, respond to emails, or navigate menus on a bright screen, you’re going to need that smartwatch. Just don’t forget that the more “features” they cram into a tiny piece of hardware, the more likely you are to deal with software glitches and a battery that dies before your workday is even finished. Don’t buy into the hype; buy based on your actual daily requirements.

    I’ve spent enough time looking at blueprints to know that complexity often leads to failure. My advice? Don’t let the marketing departments convince you that you need every bell and whistle just to stay healthy. Whether you choose a rugged tracker or a high-end smartwatch, make sure it’s something you’ll actually wear every single day. A piece of technology is only useful if it’s reliable enough to become a part of your routine. Buy something that works, keep it simple, and stop overpaying for features you’ll never use.

    Frequently Asked Questions

    If I'm just looking to track my heart rate and sleep, is there any real reason to pay the premium for a smartwatch?

    Look, if your only goal is monitoring your heart rate and sleep patterns, then no—there is absolutely no reason to pay that smartwatch premium. Most of those extra features are just bells and whistles designed to pad the manufacturer’s margins. You’re paying for a miniature computer on your wrist that you don’t need. Get a dedicated fitness band. It’ll do the job more reliably, the battery will last longer, and you won’t be throwing money away on expensive plastic.

    How much longer is a simple fitness band actually going to last before the battery or the strap gives out?

    Look, if you’re buying a basic fitness band, you’re looking at two to three years of solid service before the hardware starts to fatigue. The battery is usually the first thing to go—once it loses its capacity to hold a charge, the device is essentially paperweight. As for the strap, if it’s cheap silicone, expect some cracking after eighteen months of sweat and friction. Buy something with replaceable bands; don’t let a broken strap kill a perfectly good sensor.

    Will a smartwatch actually stay connected to my phone reliably, or is it just going to be another device that constantly glitches out?

    Look, if you’re expecting seamless magic, you’re going to be disappointed. Most smartwatches rely on a finicky Bluetooth handshake that can drop the second you walk into the next room or put your phone in a heavy jacket pocket. It’s a software headache waiting to happen. If you just want data that stays put, a fitness band is more reliable because it has less to “sync.” Don’t buy the hype; expect glitches.

  • Choosing an Ergonomic Gaming Chair

    Choosing an Ergonomic Gaming Chair

    I spent thirty years in manufacturing, where if a part was made of cheap, thin-walled plastic, it didn’t just fail—it failed spectacularly and loudly. Lately, I’ve been looking at the “gaming chair” market, and frankly, it makes my blood boil. You see these kids spending five hundred dollars on a seat that looks like it was designed by a teenager with a neon obsession, only to find out the foam collapses in three months and the “ergonomic” lumbar support is nothing more than a useless piece of scrap. They’re selling you a lifestyle wrapped in faux leather that peels off like a bad sunburn, and I’m tired of seeing people throw hard-earned money down the drain for nothing but aesthetic hype.

    I’m not here to show you which chair looks best on a Twitch stream or which one comes in the flashiest colors. My goal is to strip away the marketing nonsense and look at the structural integrity of what you’re actually sitting on. I’ll be looking at frame materials, cylinder ratings, and stitch density—the things that actually matter if you want a piece of equipment that lasts. I promise to tell you exactly what is a solid investment and what is just more expensive, overpriced junk.

    Table of Contents

    High Density Foam Cushioning vs Cheap Spongy Fluff

    High Density Foam Cushioning vs Cheap Spongy Fluff

    Most manufacturers will try to sell you on the “plushness” of a seat, but in my experience, soft is often a synonym for “cheap.” When you sit in one of those racing style gaming seats that feels like a marshmallow right out of the box, you’re usually just feeling low-grade polyurethane foam. It feels great for twenty minutes, but once that air escapes, you’re bottoming out against the hard frame. I’ve seen this a dozen times: a product that looks impressive in a showroom but loses its structural integrity within six months.

    If you want something that actually holds up, you need to look for high density foam cushioning. This isn’t just marketing fluff; it’s about the cellular structure of the material. High-density foam provides the necessary resistance to distribute your weight evenly, which is a critical component when searching for the best gaming chairs for back pain. Instead of the foam collapsing under your weight, it pushes back, maintaining your shape and support for years rather than weeks. Don’t let a soft initial feel fool you; buy for the density, not the squish.

    A No Nonsense Gaming Chair Material Comparison

    A No Nonsense Gaming Chair Material Comparison

    When you look at these racing style gaming seats, don’t let the flashy colors and aggressive bolsters fool you. Most of them are wrapped in low-grade PU leather that’s going to peel and flake off within eighteen months. I’ve seen it a dozen times. If you want something that actually holds up, you need to look for high-quality fabric or even genuine leather. Fabric breathes better, which means you won’t be sweating through your shirt by the end of a session, and it tends to be much more durable over long-term use.

    Beyond the outer skin, you have to consider the structural integrity of the components. I’ve spent a lot of time looking into adjustable armrest ergonomics, and frankly, most of the cheap stuff feels like it’s held together by prayer and thin plastic. You want metal-on-metal contact where possible. If the armrests wobble like a loose table leg, they aren’t going to help with posture correction for gamers; they’re just going to frustrate you. A real piece of equipment should feel solid, not like a toy.

    5 Things to Check Before You Drop Your Hard-Earned Cash

    • Check the base material. If it’s made of thin, molded plastic, it’s going to crack under pressure within a year. Look for a heavy-duty aluminum or reinforced steel base that won’t wobble every time you shift your weight.
    • Don’t trust “adjustable” claims at face value. I’ve seen too many chairs with cheap plastic levers that snap off after a month. Test the tension on the tilt mechanism; it should feel smooth and substantial, not loose and flimsy.
    • Look for real lumbar support, not just a cheap, shapeless pillow tied on with strings. A decent chair should have an integrated mechanism that actually follows the curve of your spine, rather than just shoving a piece of foam against your back.
    • Verify the gas lift rating. Most of these companies hide the specs, but you want a Class 4 hydraulic piston. Anything less is a gamble that you’ll be sitting on the floor by next Christmas when the cylinder fails.
    • Inspect the armrests. If they are “4D” but feel like they’re made of hollow toy plastic, skip them. You want armrests that are bolted securely and can actually handle the weight of your arms without sliding around like they’re on ice.

    The Bottom Line: What to Look for Before You Pull the Trigger

    Stop looking at the flashy colors and LED lights; they won’t help your posture. Focus on the density of the foam and the structural integrity of the frame.

    If the material feels like cheap, thin polyester that breathes poorly, put it back on the shelf. You want heavy-duty fabric or high-grade leather that won’t peel after six months.

    Check the base and the adjustment levers. If the components feel lightweight and flimsy, the chair is just expensive plastic that’s going to fail you when you need it most.

    The Truth About Your Seat

    Most of these manufacturers will try to sell you on “ergonomic curves” and flashy RGB lighting, but if the base is cheap nylon and the padding bottoms out after three months, you haven’t bought a chair—you’ve just bought an expensive way to ruin your posture.

    Roland Delacroix

    The Bottom Line on Your Next Seat

    The Bottom Line on Your Next Seat.

    At the end of the day, choosing a chair shouldn’t feel like a gamble. We’ve looked at why you need to demand high-density foam instead of that cheap, spongy fluff that collapses after three months, and why the fabric or leather you choose matters just as much as the frame underneath. If the manufacturer is hiding the technical specs behind flashy RGB lights and marketing jargon, that’s a massive red flag. You aren’t just buying a piece of furniture; you are investing in a tool that supports your body through hours of use. Don’t let them sell you a glorified bucket seat made of flimsy, overpriced plastic that’ll leave you with a sore back before the year is out.

    I’ve spent enough years in manufacturing to know that if a company cuts corners on the internal components, they aren’t going to be generous with the longevity of the finished product. Take your time, check the weight ratings, and look for real mechanical substance. You deserve equipment that works as hard as you do, without needing a manual just to sit down. Buy something that is built to last, not something designed to be replaced in next year’s sale. Stick to the specs, trust your gut, and buy it once, buy it right.

    Frequently Asked Questions

    How do I tell if the hydraulic gas lift is actually high-quality or just some cheap component that's going to fail in six months?

    Look, the gas lift is the heart of the chair. If it’s junk, you’ll be sinking to the floor by Christmas. First, check the cylinder specs; you want something rated for Class 4. Don’t settle for less. When you inspect it, look for a heavy, seamless steel casing rather than thin, painted aluminum. If the piston feels loose or wobbles when you sit, walk away. A quality lift should feel solid, not springy.

    Is there any real difference between genuine leather and those "breathable" synthetic fabrics when it comes to long-term durability?

    Look, if you want something that lasts a decade, genuine leather is the winner, hands down. It develops a patina and handles the wear and tear of daily use without cracking. Those “breathable” synthetics? They’re mostly just fancy marketing for polyurethane. They feel fine for the first six months, but once that top coating starts peeling off in little flakes, you’re looking at a piece of junk you can’t repair. Buy real leather or don’t bother.

    What should I be looking for in the base and casters to ensure the chair doesn't wobble or buckle under weight?

    Don’t let them sell you on “stylish” nylon bases. If you want something that won’t buckle when you lean back, look for a heavy-duty aluminum or steel five-star base. Nylon is just glorified plastic that cracks over time. As for the casters, make sure they’re dual-wheel and rated for your weight. If they feel flimsy or jittery on your floor now, they’re going to fail you in six months. Get metal, get stability.

  • Automating Your Coffee Maker With Smart Plugs

    Automating Your Coffee Maker With Smart Plugs

    I spent thirty years in manufacturing, where if a component didn’t do exactly what the schematic promised, it was scrap. Nowadays, I see people throwing fifty bucks at some “smart” gadget that promises to revolutionize their morning, only to find out it’s nothing more than overpriced plastic that loses connection the second the microwave turns on. If you’re looking into smart plugs for coffee makers, don’t let the flashy marketing fool you into thinking you need a complicated ecosystem just to get a hot cup of joe. You don’t need a degree in computer science to automate a kitchen appliance; you just need something that actually stays connected when it matters most.

    I’m not here to sell you on the latest tech hype or some subscription-based nonsense. My goal is simple: I’ve tested the hardware, poked at the build quality, and sat through the connectivity headaches so you don’t have to. I’m going to show you which models actually have the mechanical reliability to handle a heating element and which ones are destined for the junk drawer. We’re going to find you a tool that works every single morning, without the tech-induced migraine.

    Table of Contents

    Testing Smart Plug Compatibility With Drip Coffee Makers

    Testing Smart Plug Compatibility With Drip Coffee Makers

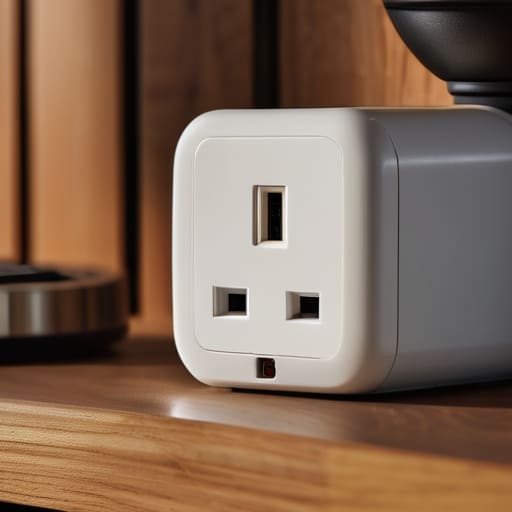
    When I sat down at my workbench to test these units, I wasn’t looking at the flashy apps or the colorful LED rings. I was looking at the mechanical switch on the back of my old drip machine. Here is the reality: a smart plug can only do so much. If your coffee maker has a digital clock or a “soft” power button that requires a finger press to start a cycle, a smart plug is nothing more than an expensive paperweight. For this to work, you need a machine with a physical, mechanical on/off toggle that stays in the “on” position even when the power is cut.

    I ran several tests to ensure smart plug compatibility with drip coffee makers wasn’t just marketing fluff. I checked how the relays handled the initial surge when the heating element kicked in. You don’t want a device that clicks and dies after a week of heavy use. I also spent some time scheduling coffee with Alexa or Google Home to see if the timing stayed consistent. If the automation skips a beat because of a minor Wi-Fi hiccup, you’re left staring at an empty mug. You need hardware that stays reliable, not just “smart.”

    The Real Truth About Energy Saving Smart Kitchen Devices

    The Real Truth About Energy Saving Smart Kitchen Devices

    Now, let’s get one thing straight: most of the marketing fluff surrounding energy saving smart kitchen devices is nothing more than a way to justify a higher price tag. Manufacturers love to claim that these gadgets will slash your utility bills, but if you’re just using a smart plug to turn off a device that’s already drawing negligible phantom power, you aren’t saving money—you’re just spending money to save pennies. I’ve seen enough circuit boards in my time to know that unless you’re managing a high-draw appliance, the “savings” are often negligible compared to the initial cost of the hardware.

    The real value isn’t in the electricity bill; it’s in the reliability of the routine. If you’re setting up an automated coffee brewing schedule, you aren’t doing it to be “green,” you’re doing it so you don’t have to stumble around a dark kitchen in the morning. Don’t get distracted by the bells and whistles of fancy apps if the core mechanism—the physical relay inside the plug—is cheap. If the hardware can’t handle the repetitive cycling of a heating element, it’s just more electronic waste headed for a landfill.

    Five Things to Check Before You Plug In

    • Check your coffee maker’s physical switch first. If you have to push a button to start a brew, a smart plug won’t do a lick of good; it only works if the machine has a mechanical “on” toggle that stays in place when the power is cut.
    • Don’t ignore the wattage rating on the plug’s label. Most coffee makers draw a heavy current when heating water, so if you buy a cheap, low-amperage plug meant for a bedside lamp, you’re asking for melted plastic and a tripped breaker.
    • Look for a local control option. I don’t care how “smart” a device is if it won’t work when your internet goes down; you want a plug that responds to a physical button or a local hub, not one that turns into a paperweight the moment the Wi-Fi hiccups.
    • Verify the app’s reliability before you commit. I’ve seen too many “smart” gadgets that require a ridiculous, bloated app just to perform a simple timer function; if the software is clunky, the hardware is useless.
    • Prioritize a “Schedule” feature over “Voice Control.” Being able to yell at a speaker to make coffee is a novelty, but a reliable, hard-coded schedule that runs locally is what actually ensures your caffeine is ready when you walk into the kitchen.

    What I Learned from the Bench

    Check your coffee maker’s switch first; if it’s a digital button that needs a press to start, a smart plug won’t do a lick of good without a mechanical workaround.

    Don’t get blinded by fancy apps and “smart home ecosystems”—if the plug can’t maintain a steady connection to your router, you’ll be waking up to a cold pot every single morning.

    Look for a heavy-duty rating on the specs; these devices pull a decent amount of current, and I’ve seen enough cheap, flimsy plastic melt to know that build quality matters more than a sleek design.

    ## The Bottom Line on Automation

    “I’ve spent enough time looking at circuit boards to know that if a smart plug can’t handle the initial surge of a heating element without dropping its connection, it’s nothing more than an overpriced paperweight. You aren’t buying ‘convenience’ if you have to reset your Wi-Fi every morning just to get a decent cup of joe.”

    Roland Delacroix

    The Bottom Line on Your Morning Brew

    The Bottom Line on Your Morning Brew

    Look, I’ve spent enough time looking at circuit boards to know that a smart plug is just a middleman between you and your caffeine. If you’re going to do this, do it right. Don’t buy the cheapest, unbranded junk you find on a discount site; those things are nothing more than expensive plastic that’ll fail the moment your router updates. You need a plug with a solid physical relay and a connection that doesn’t drop every time the microwave runs. Make sure the wattage rating actually accounts for the heating element in your brewer, or you’re just asking for a blown fuse. Stick to the brands that prioritize build quality over flashy apps, and you’ll actually have your coffee ready when you walk into the kitchen.

    At the end of the day, technology should serve you, not the other way around. I didn’t spend thirty years in systems engineering to spend my retirement troubleshooting a coffee maker that won’t turn on because of a software glitch. If a smart plug makes your morning smoother without adding a layer of digital headache, it’s a tool worth owning. But if it feels like you’re fighting the machine just to get a decent cup of joe, toss it in the bin and go back to a manual switch. Invest in gear that works, keep your setup simple, and stop letting gadgets complicate your life.

    Frequently Asked Questions

    Will a smart plug actually turn on my coffee maker if it has a digital clock or a physical "on" switch?

    Here is the hard truth: if your coffee maker has a digital clock or a physical toggle switch that stays in the “on” position, a smart plug will work just fine. You’re essentially just cutting and restoring the flow of electricity to the machine. However, if your machine requires you to press a “Start” button every single time you plug it in, a smart plug is nothing more than an expensive paperweight. Test it before you buy.

    Is there a risk of the smart plug overheating if my machine pulls a lot of wattage during the brewing cycle?

    Look, this is exactly why I carry my notepad. You have to check the math before you plug anything in. Most coffee makers—especially those high-end espresso machines—pull a massive amount of current during the heating cycle. If you use a cheap, flimsy smart plug rated for only 10 amps when your machine pulls 15, you’re asking for melted plastic or, worse, a fire. Always match the plug’s amperage rating to your machine’s peak draw. Don’t cut corners on safety.

    Do I really need a dedicated hub for this, or can I just run it off my home Wi-Fi without everything crashing?

    Look, if you’re just plugging in one or two devices, your Wi-Fi can handle it. But if you start adding smart lights, plugs, and sensors all at once, you’re going to clog up your router’s bandwidth like a bad pipe. A dedicated hub takes that heavy lifting off your Wi-Fi, keeping your internet stable for actual work. If you want reliability and not a constant headache, get a hub. Don’t crowd your signal.

  • Controlling Home Scents With Smart Diffusers

    Controlling Home Scents With Smart Diffusers

    I was sitting in my workshop last Tuesday, trying to recalibrate an old Marantz receiver, when I realized my living room smelled like a chemical factory because of a “smart” device I’d picked up on a whim. I’ve spent thirty years in systems engineering, and if there is one thing I can’t stand, it’s a gadget that adds complexity without adding value. Most people marketing smart fragrance diffusers these days are trying to sell you a glorified Wi-Fi chip wrapped in cheap, translucent plastic. They want you to believe you need a smartphone app and a stable internet connection just to make your house smell like lavender, but frankly, if the device requires a firmware update just to spray a mist, it’s a broken system.

    I’m not here to sell you on the “lifestyle” or the flashy app interfaces that look good in a commercial. My goal is to help you separate the reliable hardware from the overhyped junk that will end up in a landfill by next Christmas. I’ve put my notepad to use testing these units to see which ones actually hold a scent and which ones are just expensive paperweights. I’ll tell you exactly what to look for in terms of build quality and ease of use, so you can spend your money on something that actually works.

    Table of Contents

    The Truth About Flaky App Controlled Scent Machines

    The Truth About Flaky App Controlled Scent Machines

    I’ve spent enough time troubleshooting faulty control boards in industrial settings to know a bad connection when I see one. Most of these app-controlled scent machines suffer from the same fundamental flaw: they rely on a cloud server that’s often more fragile than the plastic housing itself. You buy one because you want smart scent scheduling to make your house smell like sandalwood right before you walk through the door, but instead, you spend your evening staring at a “device offline” notification. If the software is buggy, the hardware is just a paperweight.

    The real headache comes when these iot aromatherapy devices lose their handshake with your router. I’ve seen units that work perfectly fine until a firmware update turns them into useless bricks. You aren’t looking for a tech project; you’re looking for a way to make your living room smell decent. If a manufacturer prioritizes flashy animations in their app over a stable, local connection, they are selling you a headache, not a convenience. Stick to devices that don’t require a constant handshake with a server just to release a bit of mist.

    Why Essential Oil Nebulizers Are Worth the Investment

    Why Essential Oil Nebulizers Are Worth the Investment

    Now, if you’re tired of those cheap ultrasonic units that just spit out a lukewarm mist, you need to look at essential oil nebulizers. Unlike the plastic junk that relies on water to create a cloud, a nebulizer uses pressurized air to break the oil down into a fine, pure mist. It’s a mechanical process, simple and effective. Because there’s no water involved, you aren’t dealing with mold buildup or a diluted scent that disappears the moment you walk into the next room.

    When you integrate these into automated home fragrance systems, you’re finally getting something that behaves like a piece of real equipment. A decent nebulizer paired with a reliable timer means you get a consistent scent profile without having to babysit the device. I’ve spent enough time fixing broken gears to know that simplicity wins every time. You want a machine that uses physics to do its job, not one that relies on a buggy software update just to keep a scent in the air.

    Five Things to Check Before You Hand Over Your Credit Card

    • Prioritize local control over cloud dependence. If the manufacturer’s server goes down or they decide to stop supporting the app, you don’t want a $150 paperweight sitting on your shelf. Look for devices that can be scheduled or operated without needing a constant handshake from a server halfway across the world.
    • Check the tank material. I’ve seen too many “smart” units using cheap, thin plastics that react poorly to essential oils over time. You want something robust—ideally glass or high-grade, oil-resistant polymers—that won’t degrade or leach chemicals into your scent.
    • Don’t get distracted by “Smart Home” buzzwords. A diffuser that integrates with your lights is a novelty, not a necessity. Focus instead on the reliability of the timer and the sensor. If the device can’t accurately follow a simple “on at 6 PM, off at 8 PM” command, the smart features are just window dressing.
    • Look for easy maintenance. If a device has a complex internal mechanism that requires a specialized brush or a proprietary cleaning solution just to prevent clogging, walk away. You want something you can wipe down with a bit of isopropyl alcohol without needing a degree in micro-mechanics.
    • Evaluate the power source. A smart diffuser that relies solely on a tiny, non-replaceable battery is a recipe for frustration. I prefer units that have a reliable plug-in option but perhaps a backup battery for short outages. Stability is everything when it comes to consistent output.

    The Bottom Line on Scent Technology

    Don’t get blinded by fancy app features; if the device can’t maintain a steady connection to your Wi-Fi, it’s just a paperweight that won’t scent your room when you actually need it to.

    Prioritize nebulizers over cheap ultrasonic models if you want real results; they use actual pressure to disperse oil rather than just spitting out watered-down mist.

    Before you pull the trigger on any purchase, check the build quality and the availability of replacement parts—if you can’t fix it or find more oil for it, you’re just buying future landfill.

    The Bottom Line on Connectivity

    I don’t care if a diffuser can sync with your smart home ecosystem or change colors via an app; if the hardware can’t maintain a consistent mist without a firmware update or a Wi-Fi reset, it’s not a tool—it’s a paperweight.

    Roland Delacroix

    The Bottom Line

    The Bottom Line: prioritizing reliable nebulizer mechanisms.

    At the end of the day, don’t let a fancy marketing department talk you into buying a paperweight. I’ve seen enough “smart” gadgets fail because they rely too heavily on a buggy app rather than a solid mechanical foundation. If you’re going to spend your hard-earned money, make sure you’re prioritizing a reliable nebulizer mechanism over a sleek touchscreen that’ll be obsolete in two years. Check the build quality, ensure the essential oil reservoir is easy to clean, and for heaven’s sake, make sure it actually functions when the Wi-Fi goes down. If the tech is too complicated to operate without a troubleshooting guide, it isn’t a convenience; it’s a chore.

    Technology should serve you, not the other way around. Whether you’re looking to mask the smell of a busy kitchen or just want to unwind after a long day, the goal is a pleasant environment, not a constant battle with your smartphone. Stick to the basics: find a machine that uses high-quality components and delivers a consistent scent without a fuss. Invest in something that is built to last, not just to look good on a showroom floor. Buy once, buy right, and keep your home smelling great without the unnecessary headache.

    Frequently Asked Questions

    Is it worth paying a premium for a Wi-Fi-enabled model when a simple mechanical timer does the same thing?

    Look, if you just want a scent in the room at 6:00 PM, a mechanical timer is more reliable and half the price. I’ve seen too many “smart” devices fail because of a firmware update or a dropped signal. You only pay the premium for Wi-Fi if you actually need to trigger a scent while you’re away from home or want to sync it with a complex routine. Otherwise, don’t pay for the connectivity.

    How much maintenance is actually involved in cleaning these machines to prevent the oils from gumming up the internal parts?

    If you aren’t cleaning your diffuser, you’re essentially building a clog. Since essential oils are viscous, they’ll eventually gum up the nozzle or the ultrasonic plate. I recommend a quick wipe-down with isopropyl alcohol once a week. If you’re using a nebulizer, you’ll need to run a cleaning cycle with a bit of high-proof alcohol every few uses to keep the internal pathways clear. It’s a small price to pay to avoid buying a new one.

    Can I use my own high-quality essential oils, or am I forced to buy the brand's expensive proprietary refills?

    This is where most companies try to pull a fast one on you. They sell you a decent machine, then trap you in a subscription loop with proprietary pods that cost a fortune. If you’re looking at a device that only accepts their specific cartridges, walk away—that’s just bad engineering designed to bleed your wallet dry. Look for an open-system nebulizer. That way, you can use the high-quality oils you already trust without paying a “brand tax.”

  • Selecting a Digital Drawing Tablet

    Selecting a Digital Drawing Tablet

    I spent thirty years in manufacturing, where if a part didn’t meet the spec, it went in the scrap bin. It’s the same way with modern tech, yet I see people dropping a month’s rent on a digital drawing tablet just because some flashy advertisement promised them “unlimited creative potential.” Let me tell you something: most of those high-end models are nothing more than expensive plastic wrapped in marketing jargon. You don’t need a device that requires a software engineering degree just to get a line on the screen; you need something with a decent pressure sensor and a build quality that doesn’t feel like a toy.

    I’m not here to sell you on the latest trend or some overpriced brand name that’s mostly hype. My goal is to look under the hood and tell you what actually holds up under real-world use. I’m going to break down which tablets offer genuine reliability and which ones are just going to end up gathering dust in a drawer. I’ll focus on the specs that actually matter—the stylus latency, the surface friction, and the connection stability—so you can spend your hard-earned money on a tool that actually works.

    Table of Contents

    Pen Display vs Graphics Tablet Which Actually Works

    Pen Display vs Graphics Tablet Which Actually Works

    Now, let’s get down to brass tacks. People often use these terms interchangeably, but from an engineering standpoint, they are two completely different beasts. A standard graphics tablet is essentially a high-precision input device; you’re moving a pen on a black slab while looking up at your computer monitor. It’s a bit of a learning curve, similar to learning to drive a manual transmission, but it’s built to last and won’t clutter your desk with extra cables.

    On the other hand, a pen display is a monitor you can actually draw on. It feels more natural, almost like putting pen to paper, but you’re paying a premium for that screen. When you’re weighing pen display vs graphics tablet, you have to decide if you actually need that direct visual feedback or if you’re just buying into the hype. If you’re just starting out, don’t feel pressured to buy the most expensive screen right away. I’ve seen plenty of folks blow their budget on a high-end display only to realize they actually needed a sturdy, reliable input surface that doesn’t require a constant software update just to function.

    Wacom Alternatives for Beginners That Wont Break the Bank

    Wacom Alternatives for Beginners That Wont Break the Bank

    Now, I know what you’re thinking. You’ve seen the price tags on the high-end Wacom units and thought you’d need a second mortgage just to start sketching. I get it. Back in my engineering days, we used to say if you can’t afford the premium tool, you look for the one that’s built with the same tolerances. For those just starting out, you don’t need a professional studio setup; you need wacom alternatives for beginners that won’t fall apart after six months of heavy use.

    Brands like Huion and XP-Pen have come a long way from the flimsy junk they used to sell. They’ve managed to get their pressure sensitivity levels high enough that you won’t feel like you’re dragging a crayon across a windowpane. When I’m testing these, I look at the build quality of the stylus first. If the pen feels like a cheap piece of hollow plastic, I pass. You want something with a bit of weight to it—something that feels like a real tool. Just make sure you check if they offer easy stylus nib replacement, because you’re going to wear those tips down faster than you think.

    Five Things to Check Before You Open the Box

    • Don’t get blinded by the resolution specs. A 4K screen sounds impressive on a marketing flyer, but if the pen lag is high, you’ll be fighting the device instead of drawing. Look for low latency, not just high pixel counts.
    • Check the build quality of the stylus. If the pen feels like a hollow piece of cheap plastic in your hand, your wrist is going to pay for it after an hour of work. It needs weight and a decent grip.
    • Verify the connection type. I’ve seen too many people buy a high-end tablet only to realize it requires three different proprietary adapters just to plug it into a standard laptop. Stick to USB-C whenever possible to keep your desk from looking like a bird’s nest of wires.
    • Look for physical shortcut keys. Relying entirely on on-screen menus is a recipe for frustration. A decent tablet should have a few tactile buttons you can program so you aren’t hunting through software windows every thirty seconds.
    • Make sure the driver software isn’t a nightmare. A tablet is useless if the driver crashes every time you reboot your computer. Read the forums first—if everyone is complaining about buggy software, walk away, no matter how good the hardware looks.

    The Bottom Line: Don't Get Sold a Bill of Goods

    Stop chasing the most expensive screen on the market; if you’re just starting out, a reliable, mid-range graphics tablet with decent pressure sensitivity will serve you far better than a flimsy, overpriced pen display.

    Prioritize build quality and connection stability over flashy software features—if the stylus loses connection or the plastic feels like it’s going to snap under pressure, the “advanced” features won’t matter.

    Do your homework on the pen technology before you pull the trigger; you want a tool that feels like an extension of your hand, not a piece of tech that requires a manual just to draw a straight line.

    ## The Real Test of a Tool

    “I don’t care how many fancy features a marketing brochure promises; if the stylus has a lag that makes your hand feel like it’s fighting the machine, you aren’t holding a tool—you’re holding an expensive paperweight.”

    Roland Delacroix

    Bottom Line: Don't Get Fooled by the Hype

    Bottom Line: Don't Get Fooled by the Hype

    At the end of the day, choosing a digital drawing tablet shouldn’t feel like you’re trying to solve a complex calculus equation. We’ve looked at the difference between a pen display and a standard graphics tablet, and we’ve identified that you don’t need to drop a month’s mortgage on a Wacom just to get started. Whether you go with a budget-friendly alternative or invest in a professional-grade display, the most important thing is that the hardware actually does what it says on the box without glitching out mid-stroke. Don’t get distracted by flashy marketing or unnecessary features that just add more points of failure; focus on build quality and pressure sensitivity that will actually stand the test of time.

    I’ve spent a lifetime looking at how things are put together, and I can tell you that the best tool is the one that stays out of your way so you can actually do your work. A tablet is just a piece of equipment, not a magic wand. Once you have something reliable sitting on your desk, the technology disappears and all that’s left is your own skill and creativity. Stop worrying about whether you have the “latest and greatest” and just get to work with something that works. Real progress comes from practice, not from owning the most expensive plastic on the market.

    Frequently Asked Questions

    Do I really need a screen on my tablet, or is a basic pad enough to get the job done?

    Look, it comes down to how your brain handles spatial coordination. If you’re used to drawing directly on paper, a screen will feel natural, but you’ll pay a premium for that convenience. If you’re on a budget, a basic pad is more than enough—it’s just a matter of learning to look at your monitor while your hand moves below. Don’t buy a screen just because it looks fancy; buy it if you actually need the tactile feedback.

    How do I tell if a stylus is actually going to last, or if it's just more cheap plastic that'll break in six months?

    Look for weight and balance. If a stylus feels like a hollow piece of junk, it’s going to snap the moment you apply real pressure. I always check the nib mechanism; if it feels loose or wobbly, walk away. You want something with a solid internal sensor and a nib that doesn’t feel like it’s grinding against the surface. Don’t be fooled by flashy LED lights—check the build quality first.

    Is it worth paying a premium for a big-name brand, or can I find something reliable without the marketing markup?

    Look, I’ve seen this play out in every industry: you pay for the logo, not the logic. If you’re looking at a Wacom, you’re paying for their driver stability and a decade of industry trust—that’s worth something if you want to get to work without a headache. But for most people? You can pick up a Huion or XP-Pen and get 90% of the performance for half the price. Just check the build quality first. Don’t buy a paperweight.