Blog

  • Understanding Mirrorless Camera Systems

    Understanding Mirrorless Camera Systems

    I was sitting at my workbench last Tuesday, cleaning the dust out of an old Nikon SLR, when I saw a neighbor struggling with a brand-new mirrorless setup. He was staring at a menu screen that looked more like a smartphone interface than a piece of precision machinery, looking completely defeated. It’s the same old story: manufacturers are burying the actual mechanics under layers of flashy software and useless sub-menus. Most people think they need to master a dozen complex digital settings just to get a decent photo, but honestly, they’re just getting lost in the noise. If you want to actually understand mirrorless camera basics, you have to stop looking at the marketing slides and start looking at how the light actually hits the sensor.

    I’m not here to sell you on the latest high-priced gadget or some “revolutionary” sensor technology that won’t matter in three years. My goal is to cut through the fluff and show you which features are actually functional and which ones are just expensive plastic distractions. I’ll walk you through the essential mechanics so you can stop fighting your gear and start using it as a tool. We’re going to focus on reliability and results, not the hype.

    Table of Contents

    Mirrorless vs Dslr Differences Cutting Through the Marketing Fluff
    Mirrorless vs Dslr Differences Cutting Through the Marketing Fluff

    ## Mirrorless vs DSLR Differences: Cutting Through the Marketing Fluff

    When you look at a DSLR, you’re looking at a piece of mechanical engineering that makes sense. There is a physical mirror inside that flips up every time you snap a photo. It’s tactile, it’s reliable, and it’s how cameras worked for decades. Mirrorless systems, however, strip that mechanism away entirely. Instead of looking through a mirror via an optical path, you’re looking at a tiny digital screen inside the eyepiece—what they call an electronic viewfinder explained in most glossy brochures. It’s a massive shift in how the hardware actually functions.

    Now, don’t let the sales reps tell you that mirrorless is “better” just because it’s newer. The truth is that mirrorless cameras are generally lighter and more compact, which is great for your neck, but they tend to chew through batteries much faster because they’re running a constant digital feed. You also need to understand the full frame vs APS-C sensor debate; the sensor size dictates how much light you catch and how much “reach” your lenses have. A bigger sensor isn’t always a better tool—it’s just a different tool. Pick the one that fits your actual workload, not the one with the most blinking lights.

    Interchangeable Lens Systems That Actually Worth Your Money
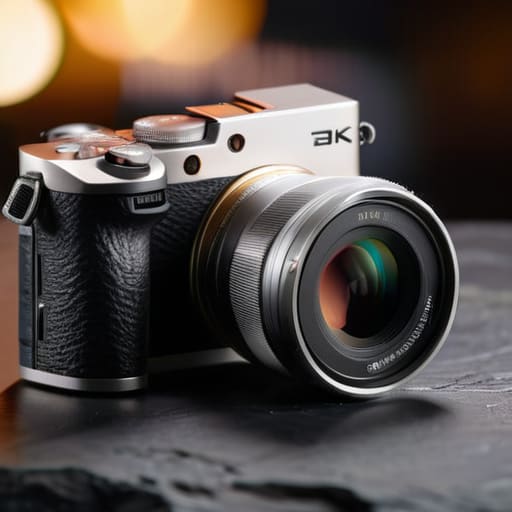
    Interchangeable Lens Systems That Actually Worth Your Money

    Now, let’s talk about the actual hardware. When you’re looking at interchangeable lens systems, don’t just buy into the latest hype because a YouTuber told you to. You need to decide if you’re looking at a full frame vs APS-C sensor setup. A full frame sensor is the gold standard for image quality and low light, but let’s be honest: it’s going to make your kit heavier and your wallet significantly lighter. If you’re just starting out or don’t want to lug a heavy bag around the neighborhood, an APS-C system is more than capable and much more practical for daily use.

    The real trap is getting locked into a proprietary mount that has no future. I’ve seen too many people buy into a niche system only to realize five years later that they can’t find a decent used lens for it. Look for brands with a proven track record of lens availability. You want a system where the glass is as robust as the body. If the manufacturer doesn’t have a deep library of reliable optics, you’re just buying a very expensive paperweight that’s destined for the junk drawer.

    Five Things to Watch Out For Before You Buy

    • Don’t get blinded by megapixel counts. A high resolution doesn’t mean a damn thing if the sensor is tiny or the lens quality is subpar. Focus on sensor size and how the light actually hits it.
    • Check the build quality of the grip and the dials. If the buttons feel mushy or like they’re made of cheap, hollow plastic, you’re going to regret it the first time you try to adjust settings in the field.
    • Look at the battery life, not the marketing brochure. Mirrorless cameras eat power because they’re running a constant electronic feed to that little screen. If you can’t carry two spares, you’re going to be stuck with a paperweight halfway through your shoot.
    • Test the autofocus system in real-world conditions. Manufacturers love to show off tracking in perfect lighting, but I want to know if it can actually find a subject when the sun goes down or things get moving.
    • Make sure the lens ecosystem is robust. There is no point in buying a great camera body if you’re stuck with a handful of mediocre lenses. You want a system that lets you grow without forcing you to buy into a closed, proprietary trap.

    The Bottom Line: What You’re Actually Paying For

    Don’t get blinded by the “mirrorless” label; you’re paying for a more compact design and faster autofocus, but make sure the build quality feels solid in your hand before you pull out your wallet.

    Invest in a lens system with a long track record, not just the newest body, because a high-quality glass lens will outlast three different camera bodies.

    Ignore the spec sheet jargon about megapixels and frame rates unless you actually have a use for them; focus instead on whether the ergonomics and button layout make sense for your hands.

    ## The Bottom Line on Mirrorless Tech

    “Stop looking at the megapixels and the fancy software gimmicks for a second. A camera is a tool, not a toy; if the build quality feels like a cheap remote control and the menu system is a labyrinth, it doesn’t matter how many pixels you’ve got—you’re just going to end up leaving it in the drawer.”

    Roland Delacroix

    The Bottom Line on Mirrorless Systems
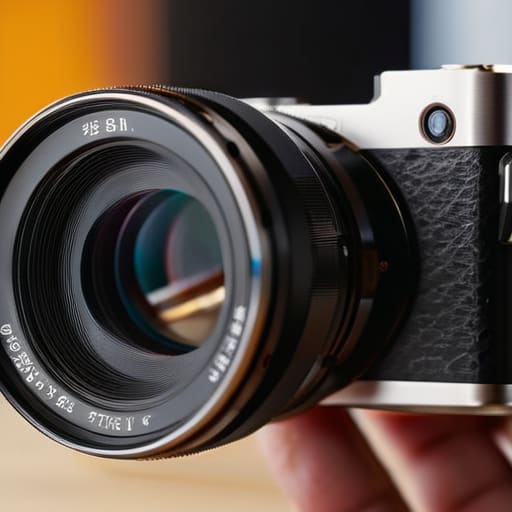
    The Bottom Line on Mirrorless Systems.

    At the end of the day, don’t let the spec sheets intimidate you. We’ve covered how these mirrorless systems strip away the bulky mirror boxes of the old DSLR days to give you something lighter and more direct, and we’ve looked at why you need to invest in a lens system that won’t be obsolete in two years. Remember, a camera is just a collection of sensors and glass; it’s the build quality and the usability of the interface that determine if it’s a tool or a toy. Don’t get caught up in the race for the highest megapixel count if the body feels like a cheap piece of consumer electronics. Focus on the reliability of the mount and the ergonomics of the grip.

    I know it feels like the industry is moving at a breakneck pace, constantly pushing the next “revolutionary” gadget into your hands. It’s enough to make a man want to stick to his vintage film cameras. But if you find a system that feels solid in your hands and actually does what you need it to do without a thousand menus getting in your way, you’ve found a winner. Stop chasing the hype and start looking for the mechanical integrity that lasts. Once you stop worrying about the bells and whistles, you can finally get back to the real work: capturing the moment without the technology getting in your way.

    Frequently Asked Questions

    If there's no mirror inside, aren't these things going to break easier than the old DSLRs I'm used to?

    That’s a fair question, and it’s exactly the kind of skepticism I like to see. Look, removing the mirror mechanism does eliminate one moving part that can fail, which is a win for long-term reliability. However, you’re trading a mechanical issue for electronic ones. You’re relying more heavily on sensors and processors. If you treat these like delicate toys, they’ll break. But if you get a well-built body with proper weather sealing, they’ll hold up just fine.

    Do I really need to spend a fortune on new lenses, or can I just adapt the glass I already have sitting in my cabinet?

    Look, I’ve seen plenty of good glass gathering dust in cabinets, and you don’t always need to go out and buy the latest shiny thing. If you’ve got solid vintage lenses, an adapter can work wonders. But don’t expect miracles; you’ll likely lose autofocus or electronic communication. If you value speed and precision, buy the native glass. If you just want the character of an old lens and don’t mind manual focus, adapt away.

    How much does the battery life actually matter if I'm out shooting all day?

    Look, here’s the reality: if you’re out in the field from sunrise to sunset, a dead camera is just a heavy paperweight. Mirrorless cameras eat batteries for breakfast because those electronic viewfinders are power-hungry. Don’t trust the manufacturer’s “ideal conditions” claims. If you’re serious about shooting all day, you need at least two spares in your bag. It’s not about being paranoid; it’s about ensuring your gear doesn’t quit when the light is perfect.


  • Setting Up a Smart Indoor Garden

    Setting Up a Smart Indoor Garden

    I was out in the backyard last Tuesday, staring at a “smart” soil sensor that had decided to stop communicating with my Wi-Fi for the third time this month. I sat there on my garden bench, notepad in hand, wondering why on earth we’ve reached a point where you need a software update just to check if your hydrangeas are thirsty. Most of these smart gardening tools hitting the market today aren’t actually tools; they are glorified, overpriced plastic toys that rely on a cloud connection that’s about as reliable as a screen door on a submarine. If a piece of equipment requires a degree in computer science and a stable internet connection just to perform a basic task, it’s not an innovation—it’s a headache.

    I’m not here to sell you on the latest shiny gadget or the marketing fluff you’ll find in a glossy catalog. My goal is to help you separate the actual engineering marvels from the expensive junk that will end up in a landfill by next season. I’m going to walk you through the few pieces of gear that actually offer genuine utility and build quality that lasts. We’re going to look at the specs, test the durability, and ensure that when you spend your hard-earned money, you’re buying something that actually works.

    Table of Contents

    Why Most Iot Garden Sensors Are Just Expensive Plastic

    Why Most Iot Garden Sensors Are Just Expensive Plastic.

    I’ve spent enough time looking at schematics to know when a manufacturer is cutting corners. Most of these iot garden sensors hitting the market today are built with the same mindset as a cheap disposable toy. They use thin, injection-molded plastic housings that can’t handle a real season of UV exposure or a heavy rainstorm without cracking. You’ll see these devices advertised as “state-of-the-art,” but once the seal fails and moisture hits the circuit board, you’re left with a useless hunk of junk in your flowerbed.

    The real issue isn’t just the casing, though; it’s the engineering behind the sensors themselves. Many of these smart soil moisture monitors rely on cheap resistive probes that corrode the moment they hit damp earth. In my day, we built things to endure the environment, not fight against it. Instead of providing reliable data, these flimsy gadgets give you erratic readings that lead to more guesswork. If you’re investing in automated plant care systems, you need to demand hardware that’s actually built to last, not just something that looks pretty in a social media ad.

    The Truth About Automated Plant Care Systems

    The Truth About Automated Plant Care Systems.

    I’ve seen enough “set it and forget it” gadgets fail in my own workshop to know that automation is a double-edged sword. When companies market these automated plant care systems, they promise you a lush garden with zero effort. But as an engineer, I look at the failure points. Most of these units rely on cheap solenoid valves and flimsy plastic tubing that’ll crack the moment the temperature shifts. If the software glitches or your Wi-Fi drops out, you aren’t just looking at a notification on your phone; you’re looking at a dead garden because the system failed to trigger a cycle.

    If you’re going to invest, you need to look for mechanical reliability over flashy app interfaces. I’ve tested several smart soil moisture monitors that claim to provide precision, but half of them struggle with calibration errors within a single season. If the sensor can’t tell the difference between damp soil and a clogged probe, the whole system is useless. Don’t buy into the hype of a fully autonomous greenhouse unless the hardware is built to withstand actual moisture and UV exposure.

    Five Rules for Not Getting Screwed by Garden Tech

    • Check the build quality before you click ‘buy.’ If the casing feels like a cheap toy and the sensor housing is thin, unreinforced plastic, it won’t last a single season against UV rays and rain. Look for UV-stabilized materials or metal components.
    • Demand local control, not just cloud dependency. I don’t care how “smart” a tool is if it becomes a paperweight the moment your Wi-Fi hiccups or the manufacturer decides to shut down their servers. If it can’t function on a basic local network, stay away.
    • Prioritize battery life and replacement over “rechargeable” gimmicks. There is nothing more frustrating than a sensor dying in the middle of a heatwave because the internal lithium cell couldn’t handle the temperature swings. I prefer tools that use standard, replaceable cells or long-term solar setups.
    • Read the manual—or at least the technical specs—to see how many “integrations” are actually required. If you need to download three different apps and create an account just to see if your soil is dry, you aren’t buying a tool; you’re buying a part-time job.
    • Don’t let the software replace your own eyes. Use these gadgets as a secondary check, not a primary instructor. A sensor might tell you the moisture is fine, but it won’t tell you if your tomato leaves are curling from a pest infestation. Use your senses first, the tech second.

    The Bottom Line on Smart Gardening

    Stop chasing the latest app-connected gadget; if a tool requires a stable Wi-Fi signal just to tell you your soil is dry, it’s a design failure, not a feature.

    Prioritize build quality over connectivity—look for weather-sealed hardware and physical interfaces that won’t quit the moment the humidity spikes.

    Invest in tools that solve a specific problem rather than those that just collect data; a reliable manual moisture meter will outlast a “smart” sensor every single time.

    The Reliability Gap

    I don’t care how many apps or notifications a gadget promises; if a sensor can’t survive a single season of rain and mud without losing its connection, it isn’t a tool—it’s a paperweight.

    Roland Delacroix

    Don't Let the Marketing Fool You

    Don't Let the Marketing Fool You.

    Look, I’ve spent enough time looking at blueprints to know when a design is fundamentally flawed. We’ve covered a lot today, and the takeaway is simple: most of these “smart” gardening gadgets are built on a foundation of planned obsolescence and flimsy sensors that won’t survive a single season of real weather. If a device requires a constant cloud connection just to tell you your soil is dry, it’s not a tool—it’s a liability. Before you pull out your credit card, ask yourself if the gadget actually solves a mechanical problem or if it’s just adding another layer of digital headache to your weekend chores. Stick to the hardware that offers tangible reliability over flashy app notifications.

    At the end of the day, gardening should be about getting your hands in the dirt, not staring at a smartphone screen while your hydrangeas wilt. Technology should serve the person, not the other way around. If you do decide to automate, do it with intention; choose equipment that feels substantial in your hand and operates with mechanical integrity. You don’t need a high-tech laboratory in your backyard to grow a decent tomato; you just need tools that work as hard as you do. Buy things that are built to last, and you’ll spend much more time enjoying your garden and much less time troubleshooting your tech.

    Frequently Asked Questions

    How long can I actually expect these sensors to last in wet soil before the casing fails or the battery dies?

    Look, if you’re buying the cheap stuff from a big-box retailer, don’t expect more than one season. Most of those plastic housings aren’t truly sealed; moisture eventually finds a way in through the battery compartment or the sensor leads. I’ve seen them fail after three months of heavy rain. If you want something that survives, look for IP68-rated gear with actual gaskets. Otherwise, you’re just throwing money into the mud.

    Is there any way to get reliable data from these gadgets without having to troubleshoot my home Wi-Fi every single morning?

    Look, if you’re constantly fighting your router just to see if your hydrangeas are thirsty, you’ve already lost. Stop buying gadgets that rely solely on Wi-Fi. If you want real data without the headache, look for tools that use LoRaWAN or Zigbee. They operate on different frequencies that penetrate walls and distance much better than your standard home network. It’s about choosing a protocol designed for reliability, not just whatever’s easiest to plug into a wall.

    If I decide to go with an automated system, am I going to be stuck using their specific brand of proprietary refills and parts forever?

    That’s the million-dollar question, and frankly, it’s where most people get burned. Most of these companies design their systems like a printer—they sell you the machine cheap and then hold your wallet hostage with proprietary pods or specialized nutrient cartridges. If you buy into a closed ecosystem, you’re essentially signing a contract to buy their branded refills forever. Before you tap that “buy” button, check if the system uses standard parts. If it doesn’t, walk away.

  • How to Choose a New Graphics Card

    How to Choose a New Graphics Card

    I was sitting at my workbench last Tuesday, cleaning the dust out of an old Marantz receiver, when I realized how much the tech industry has changed for the worse. Nowadays, you go online to look into graphics card upgrades, and you’re immediately hit with a wall of marketing jargon and “revolutionary” benchmarks that mean absolutely nothing in the real world. They want you to believe that if you aren’t spending two months’ mortgage on the latest flagship, you’re somehow failing. It’s all just expensive plastic wrapped in shiny RGB lights designed to separate fools from their hard-earned money.

    I’m not here to sell you on the newest hype cycle or tell you which card has the prettiest lights. My goal is to give you the straight truth based on actual hardware specs and long-term reliability. I’ll show you how to look past the marketing fluff so you can identify which graphics card upgrades actually provide a meaningful boost to your system without blowing your budget. We’re going to focus on build quality and compatibility, ensuring that whatever you plug into your machine is a tool that actually works.

    Table of Contents

    Vram Requirements for Gaming Beyond the Hype

    Vram Requirements for Gaming Beyond the Hype

    Now, let’s talk about something the marketing departments love to gloss over: VRAM. You’ll see these manufacturers slapping massive numbers on the box, but don’t let them dazzle you. When we look at vram requirements for gaming, we aren’t just looking at a bigger number; we are looking at how much data your card can juggle before it starts choking. If you’re running a modern title at 4K, that memory acts like a staging area. If that area is too small, you’ll experience stuttering that no amount of raw processing power can fix.

    I’ve seen too many folks buy a card thinking they’ve hit the jackpot, only to realize they’ve hit a wall because the memory buffer is insufficient for their resolution. It’s a classic case of buying expensive plastic that can’t actually do the heavy lifting. If you want to avoid constant hitching, you need to match your memory capacity to your intended resolution and texture settings. It isn’t about having the most; it’s about having enough to ensure bottlenecking prevention so your hardware actually performs the way it was engineered to.

    Bottlenecking Prevention Making Your Existing Hardware Work

    Bottlenecking Prevention Making Your Existing Hardware Work

    Buying a top-of-the-line card is a useless exercise if you’re just going to choke it with an old processor. I’ve seen too many folks drop a premium on a new GPU only to find their frame rates stuck in the mud because their CPU can’t keep up. This is where bottlenecking prevention becomes your most important task. Before you even unbox the new hardware, look at your CPU and RAM. If you’re pairing a modern beast with a decade-old chip, you aren’t getting your money’s worth; you’re just buying a very expensive paperweight.

    You also need to look under the hood at your power delivery. I can’t stress this enough: check your power supply compatibility before you plug anything in. There is nothing more frustrating—or dangerous—than a system that crashes the moment you try to run a demanding title. Make sure your PSU has the necessary wattage and the correct PCIe connectors to handle the spikes. It’s better to spend an extra fifty bucks on a reliable power unit now than to risk frying your entire rig later.

    Don't Get Burned: 5 Practical Rules for Your Next Upgrade

    • Check your power supply unit (PSU) before you even look at a box. I’ve seen too many folks buy a powerhouse card only to realize their old, dusty power supply can’t handle the wattage spike. If you don’t have the overhead, you’re just asking for a system crash or, worse, fried components.
    • Measure your case dimensions with a real ruler. Manufacturers love to list “compatibility,” but they don’t always mention that a triple-fan card is three inches longer than your chassis allows. Don’t find yourself staring at a piece of expensive plastic that literally won’t fit in your machine.
    • Don’t ignore the driver situation. If you’re switching from an AMD card to an NVIDIA one, don’t just plug it in and pray. Use a tool to completely wipe the old drivers first. Leaving old software fragments lying around is a recipe for stuttering and headaches.
    • Mind the PCIe slot clearance. It’s not just about length; it’s about thickness. Modern cards are getting incredibly bulky, and they can block your other expansion slots or sit too close to your motherboard heatsinks. Make sure you actually have the physical room to breathe.
    • Stop chasing benchmarks and start looking at your monitor. There is zero point in buying a top-of-the-line GPU if you’re still playing on a standard 1080p 60Hz screen. You’re essentially buying a Ferrari to drive in a school zone; match your hardware to what you can actually see.

    The Bottom Line on Your Next Upgrade

    The Bottom Line on Your Next Upgrade

    Don’t go chasing the highest VRAM numbers on a spec sheet if the actual silicon underneath is cheap; focus on the chip’s architecture and your specific resolution needs.

    Before you pull the trigger on a new card, verify your power supply unit can actually handle the wattage spike, or you’ll just be trading one headache for another.

    A high-end GPU is useless if it’s being choked by an outdated CPU; make sure your entire system is balanced so you aren’t throwing money down the drain.

    The Real Cost of a GPU

    “Before you go out and drop a thousand dollars on the latest shiny silicon, take a look at the rest of your machine; there is no point in buying a high-performance engine if you’re still trying to run it through a rusted-out transmission.”

    Roland Delacroix

    The Bottom Line on Your Next Upgrade

    Look, upgrading your graphics card isn’t as simple as just picking the one with the biggest number on the box. If you haven’t checked your power supply’s wattage or made sure your VRAM isn’t going to choke on modern textures, you’re just throwing money into a black hole. I’ve seen too many folks buy a top-tier card only to realize their CPU is holding them back, turning a premium piece of hardware into a glorified paperweight. Before you pull the trigger, make sure your entire system is balanced. You want a machine that works in harmony, not a collection of mismatched parts that waste your hard-earned cash on performance you’ll never actually see on your screen.

    At the end of the day, technology should serve you, not the other way around. Don’t let the marketing departments and flashy benchmarks bully you into buying more than you actually need. A well-built system is about longevity and reliability, not just chasing the latest trend. Take your time, do the math, and buy something that is built to last. When you stop chasing the hype and start focusing on the actual specs, you’ll find that real value isn’t found in the most expensive plastic on the shelf, but in the hardware that actually does its job every single time you turn it on.

    Frequently Asked Questions

    Will this new card actually fit in my current case, or am I going to have to buy a whole new chassis just to make it work?

    Don’t just assume it’ll slide right in. I’ve seen too many folks buy a powerhouse card only to realize it’s nearly as long as their entire chassis. Grab a tape measure—don’t rely on your eyes—and check the clearance between your rear fans and the drive bays. You also need to look at the slot width; some of these modern monsters are three or four slots thick and’ll choke your airflow. Measure twice, buy once.

    Do I need to swap out my power supply unit to handle the wattage, or can I get away with what I already have?

    Don’t play games with your power supply. If you’re upgrading to a beefier card, check your unit’s rated wattage and the actual rail distribution against the new card’s specs. If you’re pushing a budget unit to its absolute limit, you’re asking for a component failure that could take your whole system down with it. If the math doesn’t leave you a comfortable 100-watt buffer, stop being cheap and buy a reliable, high-quality PSU.

    Is it worth buying a mid-range card now, or should I hold out for next year's models to ensure I'm not buying obsolete hardware?

    Look, I’ve seen this cycle a dozen times in manufacturing: the “next big thing” is always just a slightly polished version of what’s already on the shelf. If you need a working tool today, buy a solid mid-range card now. Don’t let the marketing departments trick you into waiting for next year’s models just to chase a 5% spec bump. If the current hardware meets your needs and isn’t built like cheap junk, use it.

  • Best Smartwatches for Long Distance Running

    Best Smartwatches for Long Distance Running

    I was sitting at my workbench last Tuesday, cleaning the oxidation off a set of 1970s Marantz receivers, when I realized how much the tech industry has changed for the worse. Everything today is designed to be disposable. I see these marketing campaigns for the latest smartwatch for runners, promising “revolutionary biometric insights” and “AI-driven coaching,” but all I see is more fragile glass and overpriced sensors wrapped in thin silicone. If a device can’t survive a heavy rainstorm or a few accidental bumps against a curb without the screen cracking or the software hanging, it isn’t a tool—it’s a toy.

    I’m not here to sell you on the bells and whistles that won’t matter after three months of heavy use. My goal is to cut through the digital noise and tell you which devices actually have the build quality and sensor accuracy worth your hard-earned money. I’ve spent my career looking at how things are built, and I’m going to apply that same scrutiny here. We are going to find you a piece of equipment that actually works and stays out of your way while you’re putting in the miles.

    Table of Contents

    Heart Rate Monitoring for Athletes That Actually Works

    Heart Rate Monitoring for Athletes That Actually Works

    Most of these companies will try to sell you on “advanced biometric sensors,” but let’s be honest: if the sensor can’t stay locked onto your wrist during a heavy sweat session, it’s useless. I’ve seen too many devices report a resting heart rate when you’re actually at a sprint, simply because the optical sensor is poorly seated or the software is too slow to compensate for movement. When you’re looking at heart rate monitoring for athletes, you need a sensor that handles the “noise” of a pounding stride without losing the signal.

    I don’t care about flashy color displays if the data is garbage. If you are training for something serious, you need accuracy that translates into meaningful running performance metrics. If the watch tells you that you’re in Zone 2 when your lungs are actually screaming, it’s not a tool—it’s a distraction. I always look for devices that offer high sampling rates and, ideally, the ability to pair with a chest strap if the wrist-based tech starts to slip. Reliability is everything when you’re trying to gauge your actual fitness levels.

    Distance Tracking Technology That Doesnt Lie to You

    Distance Tracking Technology That Doesnt Lie to You

    Most companies love to boast about their “advanced GPS arrays,” but I’ve seen too many devices lose a signal the moment you step under a few trees. If the distance tracking technology is flawed, your entire training log becomes a collection of guesses rather than data. I’ve spent enough time with my notepad in hand to know that a chip that can’t handle a bit of shade or a tall building is a liability. You need a device that locks onto satellites quickly and stays there, providing consistent readings whether you’re on a track or a trail.

    When you’re looking at running performance metrics, the accuracy of your mileage is the foundation for everything else. If the watch thinks you ran six miles when you only did five, your pace and effort calculations are useless. For those of us looking for the best running watches for marathoners, there is no room for “approximate” distances. I look for hardware that prioritizes a stable connection over a flashy touchscreen. If the sensor can’t provide a reliable measurement of the ground you’ve actually covered, it’s nothing more than a glorified pedometer.

    Five Things to Check Before You Hand Over Your Hard-Earned Cash

    • Look for a physical button, not just a touchscreen. When you’re five miles into a run and your hands are sweating or it starts raining, trying to swipe a glass screen is a fool’s errand. You need tactile feedback you can feel without looking.
    • Check the battery life under actual load. Don’t listen to the manufacturer’s claim about “standby time.” Ask yourself how long the GPS stays active while you’re actually moving. If it dies halfway through a long trail run, it’s nothing more than a heavy bracelet.
    • Demand a high-quality sensor array. I’ve seen too many “budget” watches that use cheap optical sensors that lose track the moment your heart rate spikes. If they can’t tell you how hard you’re working, the data is useless.
    • Inspect the strap material. Most of these companies use a flimsy silicone that irritates the skin after thirty minutes of sweat. Look for something durable and breathable that won’t snap the first time you catch it on a branch.
    • Avoid “feature bloat.” You don’t need a watch that tries to manage your calendar and your social media notifications. Every extra bit of software is just another way for the processor to drain the battery and create more points of failure.

    What to Look for Before You Open Your Wallet

    Don’t trust a sensor just because the box looks sleek; if you want real data, prioritize watches with optical sensors that have proven track records for accuracy during high-intensity movement.

    Check the build quality of the casing and the strap material; if it feels like a cheap toy in your hand, it’s going to fail you the moment you hit a heavy sweat or a rainy trail.

    Ignore the flashy, useless “lifestyle” features that clutter the screen and focus on battery life and GPS reliability—you need a tool that stays powered and stays on course, not a distraction.

    The Truth About Your Wrist

    Most of these manufacturers are selling you a digital playground filled with bells and whistles that’ll fail you the moment you actually push your pace; I’m not looking for a computer that plays games, I’m looking for a piece of equipment that gives me a hard, reliable number when my lungs are burning.

    Roland Delacroix

    Don't Get Swayed by the Marketing Fluff

    Don't Get Swayed by the Marketing Fluff.

    At the end of the day, a running watch shouldn’t be a science experiment on your wrist; it should be a reliable tool. We’ve looked at why you need to ignore the flashy interfaces and focus on the guts of the machine—specifically, whether the heart rate sensor can keep up when your pulse spikes and if the GPS actually knows where the road is. If the hardware is built with cheap sensors and flimsy casing, all those extra apps and “smart” features won’t mean a thing once you’re five miles into a rainy trail run. Look for build quality and sensor accuracy over a pretty screen. If it can’t provide consistent, verifiable data, it’s nothing more than an expensive way to track your time.

    I know it’s tempting to throw money at the latest shiny gadget just because a celebrity is wearing it, but I urge you to be smarter than that. Your training deserves better than unreliable electronics. Choose a device that feels like a piece of equipment, not a toy. Once you find a watch that actually does its job without constant recalibration or mid-run glitches, you can finally stop worrying about the tech and get back to what actually matters: the run itself. Don’t let a piece of overhyped plastic stand between you and your progress.

    Frequently Asked Questions

    Is the battery actually going to last through a long weekend trip, or am I going to be tethered to a wall charger every single night?

    Look, I’ve seen enough “cutting-edge” gear die halfway through a task to know that a spec sheet is often just wishful thinking. If you’re heading out for a long weekend, you don’t want to be playing scavenger hunt for a USB cable. Most of these high-res screens drain power like a leaky faucet. Unless you’re looking at a dedicated sports watch with high-capacity cells, expect to carry a charger. Don’t trust the marketing; trust the milliamp hours.

    Can I trust these sensors when I'm sweating heavily, or is the data just going to be a bunch of erratic numbers?

    Look, here’s the truth: optical sensors on your wrist are notoriously finicky once the sweat starts pouring. Moisture and movement create a gap between the sensor and your skin, which is exactly where those erratic numbers come from. If you’re serious about your training, don’t rely solely on the wrist unit. I always recommend pairing your watch with a chest strap. It’s a bit more of a hassle to put on, but the data is actually reliable.

    How much of this "advanced" tech is actually useful for my training, and how much is just marketing fluff designed to hike up the price?

    Look, most of those “lifestyle metrics”—like sleep scores or stress tracking—are just fancy math designed to keep you staring at a screen. For actual training, you only need three things: accurate GPS, a reliable heart rate sensor, and decent battery life. If a watch can’t tell you exactly where you ran or how hard your heart was working without dying halfway through, it’s just an expensive paperweight. Don’t pay for the fluff.

  • Monitoring Indoor Air Quality With Smart Sensors

    Monitoring Indoor Air Quality With Smart Sensors

    I spent thirty years in manufacturing, where if a sensor gave you a false reading, the whole assembly line ground to a halt. You learned quickly that you can’t trust a component just because it has a sleek casing or a glowing LED ring. Lately, I’ve been seeing these flimsy, overpriced smart air quality monitors popping up everywhere, marketed as “must-have” gadgets for the modern home. Most of them are nothing more than glorified mood lights wrapped in cheap, injection-molded plastic that lose their calibration the moment you unplug them. It’s frustrating to see people throwing hard-earned money at tech that promises scientific precision but delivers nothing more than a vague, unreliable guess.

    I’m not here to sell you on the latest lifestyle trend or help you build a “smart home” that requires a software engineer to operate. My goal is to cut through the marketing fluff and tell you which devices actually possess the mechanical integrity to give you data you can trust. I’ve sat down with my notepad, pulled apart the specs, and tested the sensors to see what holds up under scrutiny. I’m going to show you which monitors are genuine tools and which ones are just expensive junk designed to clutter your countertop.

    Table of Contents

    Reliable Pm25 and Pm10 Particle Detection You Can Trust

    Reliable Pm25 and Pm10 Particle Detection You Can Trust

    When you’re looking at the spec sheet, don’t let the marketing jargon distract you. Most of these cheap sensors are glorified toys that can’t tell the difference between a bit of dust and actual smoke. If you want to know what’s actually happening in your lungs, you need a device that prioritizes PM2.5 and PM10 particle detection using a laser scattering sensor. It’s a mechanical reality: if the sensor doesn’t have the precision to count those microscopic particles, the data it gives you is nothing more than a guess. I’ve seen too many “smart” devices provide readings that fluctuate wildly just because someone walked past them, and frankly, that’s a waste of your hard-earned money.

    A decent unit should provide consistent, real-time air quality data tracking without needing a constant software update just to function. You aren’t looking for a gadget that needs a PhD to interpret; you want a tool that tells you, plainly, when the particulate matter is too high. If the sensor can’t handle the grit, it shouldn’t be on your shelf.

    Tracking Voc Levels in Home Environments Without the Fluff

    Tracking Voc Levels in Home Environments Without the Fluff

    Most of these gadgets claim to measure everything under the sun, but when you look closely at how they handle Volatile Organic Compounds, the quality drops off a cliff. You’ll see a lot of manufacturers slapping a sensor in a plastic housing and calling it a day, but if the sensor isn’t calibrated to handle the actual chemical complexity of VOC levels in home environments, you’re just looking at guesswork. I’ve seen too many “smart” devices spike every time someone sprays a bit of hairspray, only to flatline when actual off-gassing from new furniture is occurring. That’s not data; that’s noise.

    If you’re going to invest your hard-earned money, you need a unit that provides consistent, repeatable readings rather than just flashing red lights to scare you. A decent monitor should distinguish between a temporary scent and a genuine buildup of harmful gases. I don’t care about fancy apps or colorful graphs if the underlying hardware can’t maintain accuracy over six months of continuous use. Look for devices that prioritize sensor stability over smart home ecosystem integration; at the end of the day, a connected device is useless if the data it sends to your phone is fundamentally wrong.

    Five Things to Check Before You Open Your Wallet

    • Look for sensor longevity, not just a fancy app. Most of these gadgets use cheap electrochemical sensors that drift or die after a year. If the manufacturer won’t tell you how long those sensors last or if they’re replaceable, walk away.
    • Ignore the “Smart” marketing fluff. I don’t care if the monitor can talk to your toaster; I care if it can give me a consistent reading when I’m cooking or when the heater kicks on. If the software is more complex than the hardware, it’s a gimmick.
    • Demand raw data, not just colored lights. A device that just turns red when the air is bad is useless for troubleshooting. You need to see the actual numbers so you can figure out if the problem is a faulty HVAC filter or just a bit of burnt toast.
    • Check the placement requirements. Some of these units are so sensitive they’ll freak out if you sit next to them, while others are so dull they miss everything. Read the manual to see where they actually expect you to put them—if it requires a lab setting, it’s not for your living room.
    • Verify the calibration method. A good monitor should have a way to calibrate itself to the ambient air or allow for manual adjustments. If it’s a “set it and forget it” black box that you can’t adjust, you’re just buying a very expensive, inaccurate paperweight.

    My Bottom Line on What to Look For

    Don’t get distracted by fancy smartphone apps or colorful LED displays; if the internal sensors can’t provide consistent, stable readings over a week, the device is just a glorified paperweight.

    Look for hardware that specifies the exact sensor type used for particulate matter, because if they won’t tell you what’s inside the casing, they’re likely hiding cheap, unreliable components.

    Prioritize devices that offer data export or logging capabilities so you can actually see trends in your home’s air quality rather than just reacting to a flashing red light when it’s too late.

    The Real Cost of Cheap Sensors

    I’ve seen enough poorly engineered junk to know that a colorful app interface won’t fix a sensor that can’t tell the difference between dust and actual pollutants; if the hardware isn’t built to provide stable, repeatable data, you aren’t buying a monitor, you’re just buying a very expensive paperweight.

    Roland Delacroix

    The Bottom Line on Your Indoor Air

    The Bottom Line on Your Indoor Air.

    Look, at the end of the day, you aren’t buying these monitors to play with a fancy app on your phone; you’re buying them because you want to know what you’re breathing. We’ve talked about why you shouldn’t settle for anything less than accurate PM2.5 detection and why those cheap VOC sensors are often nothing more than expensive, glorified paperweights. If a device can’t give you a consistent reading when you’re actually cooking or cleaning, it’s not a tool—it’s a toy. Stick to the brands that prioritize sensor integrity and build quality over flashy user interfaces and subscription models.

    I know the tech market is designed to make you feel like you’re falling behind if you don’t have the latest, most interconnected gadget in your living room. But don’t let the marketing noise distract you from the fundamental physics of the job. A good air monitor should be a set-it-and-forget-it piece of equipment that earns its place on your shelf through reliability, not through how many notifications it can spam your smartphone with. Buy something that works, buy something that lasts, and then get back to enjoying your home.

    Frequently Asked Questions

    How often do I actually need to calibrate these sensors to make sure the readings aren't drifting?

    Look, I’ve seen enough drifting sensors to know that “set it and forget it” is a lie. Most consumer-grade monitors use low-cost components that lose their edge over time. If you want accuracy, you should check your readings against a known baseline or fresh outdoor air every few months. If the numbers look like they’re climbing even when you’ve opened the windows, it’s time to recalibrate or, frankly, replace the damn thing.

    Is it worth paying a premium for a monitor with a built-in display, or should I just rely on the smartphone app?

    Look, I’ll give it to you straight: pay the extra money for the built-in display. Relying solely on a smartphone app is a recipe for frustration. If you have to pull your phone out, unlock it, and wait for a cloud connection just to see if your air is safe, the device has already failed its primary job. A physical screen gives you instant, reliable data without the digital hoop-jumping. It’s about efficiency, not bells and whistles.

    Can these gadgets actually detect specific allergens like pet dander, or are they just guessing based on general particle counts?

    Look, I’ll give it to you straight: most of these consumer-grade monitors are guessing. They use laser scattering to count particles, which tells you how much junk is in the air, but it can’t tell the difference between a speck of dust, pollen, or pet dander. If you want to identify specific allergens, you’re looking at much more expensive lab-grade equipment. Don’t let a salesman convince you a $100 gadget knows your cat’s dander from a piece of lint.

  • How to Choose an Air Purifier for Your Home

    How to Choose an Air Purifier for Your Home

    I was sitting in my workshop last Tuesday, cleaning out some old capacitors, when I realized just how much nonsense is being sold to us under the guise of “innovation.” I saw an ad for one of those high-end smart air purifiers that claimed it could monitor your health via a cloud-based AI algorithm. Give me a break. I spent thirty years in systems engineering, and I can tell you right now: if a machine needs a constant Wi-Fi connection and a subscription service just to tell you the air is dusty, it’s not a tool—it’s a glorified paperweight. Most of these gadgets are just cheap fans wrapped in expensive plastic, designed to trick you into thinking you’re buying “intelligence” when you’re really just buying more software bugs.

    I’m not here to sell you on the latest app-enabled bells and whistles that will be obsolete by next Christmas. My goal is to strip away the marketing fluff and look at the actual hardware. I’m going to show you how to distinguish between a machine with a high-quality HEPA filter and a sensor that actually works, and which ones are just expensive distractions. We’re going to focus on build quality, airflow mechanics, and real-world reliability so you can invest your hard-earned money in something that actually clears the air.

    Table of Contents

    The Truth About Hepa Filtration Efficiency

    The Truth About Hepa Filtration Efficiency infographic.

    The Truth About HEPA Filtration Efficiency

    I’ve spent enough time looking at technical spec sheets to know that marketing departments love to play games with numbers. When you’re browsing for a new unit, you’ll see “HEPA-type” or “HEPA-like” plastered all over the box. Let me be clear: that is a red flag. In my experience, if it isn’t certified True HEPA, it’s just a glorified fan with some cheap paper inside. You want a machine that guarantees a specific level of HEPA filtration efficiency, specifically capturing 99.97% of particles down to 0.3 microns. Anything less is just moving dust around your living room instead of actually removing it.

    It isn’t just about the filter, though; it’s about how the machine handles what it finds. Many of these IoT enabled air cleaners claim to be “smart,” but if the sensor is poorly calibrated, the machine won’t ramp up when you actually need it. I’ve seen units that sit idle while a person is coughing right next to them because the sensor is too slow to react. You need a device where the hardware and the software actually talk to each other effectively.

    Why Pm25 Particle Detection Actually Matters

    Why Pm25 Particle Detection Actually Matters.

    Most of these manufacturers love to brag about their flashy displays and colorful LED rings, but if the machine can’t actually “see” what’s in the air, it’s just a glorified fan. This is where PM2.5 particle detection becomes the real litmus test for any decent unit. PM2.5 refers to those microscopic particles—think smoke, pollen, or combustion byproducts—that are small enough to get deep into your lungs. If a device doesn’t have a dedicated laser sensor to track these specific particulates, it’s essentially flying blind.

    I’ve seen too many people get caught up in the hype of IoT enabled air cleaners just because they can control them from a smartphone. But a fancy app is useless if the machine is running on a static timer instead of reacting to the room. You want real-time air quality monitoring that triggers the motor the second someone starts cooking or a window is opened. If the sensor is cheap and sluggish, the machine won’t ramp up until the air is already fouled. Don’t pay extra for a “smart” label if the hardware lacks the precision to detect the invisible stuff.

    Five Things to Check Before You Hand Over Your Credit Card

    • Look for a physical button override. If the only way to change the fan speed is through a buggy smartphone app that requires a cloud connection, you’ve bought a paperweight, not a tool. I want to be able to walk up to the machine and turn it up without hunting for my phone.
    • Verify the CADR rating, not the marketing fluff. Manufacturers love to use words like “ultra-quiet” or “smart-sensing” to distract you, but the Clean Air Delivery Rate (CADR) is the only number that tells you how much actual work that motor is doing per minute.
    • Check the filter replacement cost upfront. I’ve seen too many people buy a reasonably priced unit only to realize the proprietary replacement filters cost as much as a new machine every six months. If the filters aren’t readily available or are priced like gold, walk away.
    • Demand a real sensor, not a programmed guess. Some of these “smart” units just ramp up the fan based on a timer or a cheap light sensor. You want a unit with a dedicated laser particle sensor that reacts to actual smoke or dust in the air, not just a pre-set schedule.
    • Inspect the build quality of the casing. If the housing feels like thin, flimsy plastic that rattles when the fan hits high speeds, the motor won’t stay calibrated for long. A solid, heavy chassis usually means better vibration dampening and a longer lifespan.

    Roland’s Bottom Line: What to Look for Before You Buy

    Don’t get distracted by fancy smartphone apps or LED light shows; prioritize a true HEPA filter and a sensor that actually responds to real-world changes in your air.

    Check the build quality and filter replacement costs upfront, because a cheap machine that uses proprietary, overpriced filters is just a way for companies to bleed you dry over time.

    If a manufacturer can’t clearly list the CADR (Clean Air Delivery Rate) for your specific room size, they’re likely selling you marketing fluff instead of actual performance.

    Don't Get Fooled by a Pretty Interface

    I’ve seen enough engineers try to hide mediocre hardware behind a flashy smartphone app to know the truth: a sensor that can’t accurately read a room is just a glorified nightlight, and no amount of Bluetooth connectivity will make up for a poorly designed fan motor.

    Roland Delacroix

    The Bottom Line on Smart Air Purifiers

    The Bottom Line on Smart Air Purifiers

    At the end of the day, don’t let a sleek touchscreen or a flashy smartphone app distract you from the actual mechanics of the machine. I’ve seen too many people shell out hundreds of dollars for a device that looks great on a kitchen counter but lacks a true HEPA filter or a sensor capable of detecting real pollutants. If the machine can’t accurately track PM2.5 levels or if the build quality feels like a cheap toy, it isn’t doing its job. You need to prioritize mechanical reliability and filtration standards over whatever bells and whistles the marketing department is pushing this year. A smart feature is only useful if the hardware behind it is robust enough to actually clean your air.

    My advice is simple: buy for the long haul, not for the trend. When you’re looking at a spec sheet, look past the “smart” labels and ask yourself if the components are built to last more than a single season. You aren’t just buying a gadget; you’re investing in the air your family breathes every single day. Invest in a machine that values substance over software, and you won’t find yourself replacing a piece of expensive plastic just twelve months from now. Do your homework, check the filters, and buy something that actually works.

    Frequently Asked Questions

    Do I really need a smartphone app to control the unit, or can I just use the physical buttons on the machine?

    Look, if you can turn on a lamp with a switch, you don’t need an app. I’ve seen too many “smart” devices that become paperweights the moment your Wi-Fi hiccups or the manufacturer stops updating their software. If the unit has solid, tactile buttons on the chassis, use them. An app is just a convenience, not a necessity. Don’t pay a premium for “connectivity” if it makes the machine harder to operate.

    How often am I actually going to have to replace these expensive filters, and is there a way to tell if they're truly dirty?

    Look, the manufacturers will tell you to swap filters every six months like clockwork, but that’s often just a way to keep you spending. I don’t trust a timer alone. Instead, pull the filter out and actually look at it. If the pleats are gray or caked with dust, it’s done. If it still looks white, keep using it. Don’t let a programmed notification trick you into throwing away perfectly good hardware.

    Will these smart sensors actually trigger the fan speed up when I'm cooking, or is the sensor too slow to react to real smoke?

    That’s the million-dollar question. Most of these consumer-grade sensors use laser scattering to detect particles, and they aren’t instantaneous. If you’re searing a steak, the smoke hits the air long before the sensor registers the spike. You’ll likely see a lag of a minute or two before that fan actually kicks into high gear. Don’t rely on “auto mode” alone when cooking; I usually just manually crank the fan up myself.

  • How to Use Multi Device Pairing

    How to Use Multi Device Pairing

    I was sitting in my workshop last Tuesday, surrounded by the warm glow of a restored Marantz receiver, when I tried to switch my Bluetooth headphones from my tablet to my phone. It took me five minutes of tapping, swiping, and staring at a spinning loading icon just to get the two things to acknowledge each other. It’s ridiculous. Manufacturers love to slap “seamless” on every box, claiming their multi device pairing technology is a revolution, but most of the time, it’s just unreliable software masquerading as a feature. If a piece of gear requires a manual the size of a phone book just to switch audio sources, it hasn’t been engineered; it’s been overcomplicated.

    I’m not here to sell you on the latest marketing buzzwords or tell you that every new gadget is a miracle of modern science. My goal is to cut through the noise and tell you which setups actually work and which ones are just expensive plastic destined for a junk drawer. I’ll be looking at these connections from a systems perspective—focusing on stability, ease of use, and whether the hardware actually holds up when you need it to.

    Table of Contents

    Multipoint Bluetooth Technology Does It Actually Hold Up

    Multipoint Bluetooth Technology Does It Actually Hold Up?

    Multipoint Bluetooth technology is one of those marketing terms that sounds impressive on a spec sheet but often falls apart in a real-world environment. In theory, it’s supposed to allow your headphones to stay connected to both your laptop and your phone simultaneously. The idea is that you can listen to a podcast on your computer and then immediately take a call on your mobile without digging through settings menus. On paper, it’s a dream for productivity, but in practice, it’s often a fragile handshake between two different operating systems.

    I’ve spent more time than I’d like to admit troubleshooting devices that simply refuse to execute a seamless device handover. You’ll be mid-sentence on a Zoom call, only for your headphones to decide that a notification on your tablet is more important, cutting your audio entirely. It isn’t just a minor annoyance; it’s a failure of the core function. If the manufacturer hasn’t perfected the way these devices manage competing signals, you aren’t buying convenience—you’re just buying a new way to get frustrated.

    Pairing Protocols Explained Without the Unnecessary Jargon

    Pairing Protocols Explained Without the Unnecessary Jargon

    Look, the marketing departments love to throw around terms like “smart ecosystem integration” to make a simple connection sound like rocket science. They don’t need to do that. When we talk about pairing protocols explained, we’re really just talking about the rules of engagement between two pieces of hardware. In the old days, if you wanted to switch from your radio to your telephone, you physically moved the wire. Today, these protocols are supposed to handle that handoff digitally.

    The real test is how the device manages a seamless device handover. If you’re listening to a podcast on your tablet and a call comes in on your phone, the hardware should realize the priority has shifted and switch the audio stream without you having to dive into a menu. If the software is poorly written, you’ll end up fighting with the device, clicking buttons and hoping for the best. A well-engineered piece of gear should handle these transitions without needing your constant intervention. If you have to manually disconnect and reconnect every time you switch tasks, the engineers didn’t do their jobs right.

    Five Hard Truths for Setting Up Your Gear

    • Don’t trust the manual’s “seamless” promises. When you’re setting up multi-device pairing, do it manually the first time. Pair device A to your phone, then device B to your laptop, and then try to force them to shake hands. If it doesn’t work on the first attempt, it’s likely going to be a headache for the rest of its lifespan.
    • Check the Bluetooth version before you buy. I don’t care how many bells and whistles the marketing team promises; if the hardware is running an outdated Bluetooth standard, the handoff between your tablet and your phone is going to be clunky and prone to dropping signal. Look for Bluetooth 5.0 or higher if you want actual reliability.
    • Keep a dedicated “pairing log” in your notepad. I know it sounds old-fashioned, but when you have three different devices trying to claim one pair of headphones, things get messy. Jot down which device is currently the “primary” controller so you aren’t left scratching your head when your audio suddenly cuts out mid-sentence.
    • Beware of the “Multipoint” trap. Just because a device claims it can connect to everything doesn’t mean it can handle everything at once. Test it by playing a video on your laptop and then receiving a call on your phone. If the device can’t prioritize the call without crashing the audio stream, it’s just poorly engineered plastic.
    • Reset the cache when the connection gets “sticky.” If your headphones are stuck trying to talk to your old tablet instead of your new phone, don’t waste an hour digging through software menus. Most decent gear has a hard reset button combination. Use it, clear the memory, and start from scratch. It’s more efficient than fighting with buggy firmware.

    The Bottom Line: What to Look for Before You Buy

    Don’t believe the marketing hype about “seamless” switching; if the manufacturer doesn’t explicitly state they support true Multipoint, you’ll likely be stuck manually disconnecting and reconnecting every time you want to change devices.

    Reliability beats features every single time—a pair of headphones that connects to two devices instantly is worth more than a dozen fancy software gimmicks that crash the moment you get a phone call.

    Check the physical build alongside the specs; if a device relies entirely on a buggy app for its pairing logic, it’s just more expensive plastic that’s going to give you a headache in six months.

    The Real Test of Connectivity

    “I’ve spent enough time in manufacturing to know that if a system requires a manual just to switch from a laptop to a phone, the engineering has failed. Multi-device pairing shouldn’t feel like a magic trick; it should just work, every single time, without you having to hunt through a menu like you’re looking for a lost wrench.”

    Roland Delacroix

    The Bottom Line on Multi-Device Connectivity

    The Bottom Line on Multi-Device Connectivity.

    At the end of the day, multi-device pairing shouldn’t be a magic trick or a technical headache; it should just work. We’ve looked at how multipoint technology is supposed to bridge the gap between your phone and your laptop, and we’ve stripped away the marketing fluff to see what’s actually happening under the hood. If a manufacturer promises seamless switching but leaves you hunting through menus every time a call comes in, they’ve failed the most basic test of engineering. Don’t let the fancy spec sheets fool you—if the connection stability isn’t there, the feature is nothing more than expensive plastic cluttering up your desk.

    My advice is simple: stop chasing every shiny new gadget that claims to simplify your life. Instead, look for the tools that respect your time and your intelligence. A good piece of technology should feel like an extension of your workflow, not a barrier to it. Invest in hardware that prioritizes reliable protocols and solid build quality over gimmicky software bells and whistles. You work hard for your money, so make sure you’re spending it on equipment that actually serves its purpose without requiring a manual every single time you turn it on.

    Frequently Asked Questions

    If I’m connected to both my laptop and my phone, will the audio cut out or glitch when a call comes in?

    Here’s the honest truth: it depends entirely on how the manufacturer implemented the handoff. If you’ve bought a high-quality pair of headphones with proper multipoint logic, the switch should be seamless—the music pauses, the call connects, and you’re good to go. But I’ve seen plenty of cheap, plastic-heavy models that choke during the transition. If the firmware is poorly written, you’ll get that annoying stutter or a total disconnect. Don’t expect miracles from budget gear.

    Does using multi-device pairing drain my battery faster than just sticking to one connection at a time?

    The short answer is yes, it does. When you’re running multipoint, your headphones are essentially working double time, maintaining two separate active handshakes instead of one. It’s like running two engines in a car to keep more than one wheel turning—you’re going to burn through fuel faster. You’ll likely see a 10% to 15% drop in total runtime. If you’re heading out for a long flight, I’d stick to a single connection.

    Is there a way to manually force the connection to switch devices if the automation fails and starts acting up?

    Look, if the automation fails, don’t sit there staring at it. It won’t fix itself. Most of these gadgets have a “manual override” hidden in the settings, but the most reliable way is to simply toggle the Bluetooth off and back on for the device you actually want to use. If that’s too much of a headache, just go into your phone’s Bluetooth menu and tap the device name. It’s a pain, but it beats fighting a glitchy algorithm.

  • Guide to Choosing an Electric Scooter

    Guide to Choosing an Electric Scooter

    I was out in my garage last Tuesday, tinkering with a vintage Marantz receiver, when my neighbor came over to complain about the “smart” electric scooter he’d just bought. He spent a small fortune on a model that looked like something out of a sci-fi movie, but the damn thing had already developed a rattling frame and a software glitch that made it nearly impossible to steer. It’s the same old story: companies are selling you glittery nonsense wrapped in polished aluminum, hoping you won’t notice the substandard components hidden underneath. Most people see a sleek advertisement and think they’re buying a reliable mode of transport, but half the time, you’re just paying a premium to ride a glorified, expensive toy.

    I’m not here to sell you on the latest flashy trends or tell you that every gadget on the market is a revolution. My goal is to look past the marketing fluff and examine the actual mechanical integrity of these machines. I’m going to tell you exactly what to look for in a frame, a motor, and a battery so you don’t end up with a pile of expensive plastic in your hallway six months from now.

    Table of Contents

    The Best Electric Scooters for Commuting That Actually Last

    The Best Electric Scooters for Commuting That Actually Last

    When I look at the market for the best electric scooters for commuting, I see a lot of junk that belongs in a landfill, not on a city street. If you’re looking for something to get you from the train station to your office, you need to look past the flashy LED lights and focus on the chassis. I’ve spent enough time around heavy machinery to know that if the folding mechanism feels loose or the stem wobbles when you hit a crack in the pavement, you’re looking at a disaster waiting to happen. You want something with a solid aluminum frame and a decent motor that doesn’t whine like a dying vacuum cleaner when you hit a slight incline.

    Don’t get distracted by the “smart” features either. I don’t care if my ride connects to my smartphone via Bluetooth; I care if it can handle a rainy Tuesday without short-circuiting. For true last mile transportation solutions, prioritize mechanical reliability. Look for models with pneumatic tires—they offer actual shock absorption that cheap solid rubber just can’t match. If the build quality feels flimsy in the showroom, it’ll be broken by the time you reach your six-month mark.

    Foldable Electric Scooter Benefits Without the Wobbly Build

    Foldable Electric Scooter Benefits Without the Wobbly Build

    The whole point of looking into foldable electric scooter benefits is to find a way to bridge that gap between the train station and your front door. I call them last mile transportation solutions, and they’re incredibly practical for anyone tired of walking ten blocks in the rain. However, I’ve seen far too many models where the folding mechanism feels like it was designed by someone who has never actually used one. If the hinge has even a millimeter of play, you’re going to feel it every time you hit a crack in the sidewalk.

    When you’re shopping, don’t just look at how small it gets when collapsed; look at the locking mechanism. I always check to see if the latch is a heavy-duty steel lever or just some flimsy plastic clip that’s going to snap in six months. A decent machine should feel like a single, solid unit once it’s locked into place. You want something that offers portability without sacrificing the structural integrity required to keep you upright. If it wobbles while it’s sitting in your hallway, it’s certainly going to fail you when you’re moving at fifteen miles per hour.

    Five Things to Check Before You Hand Over Your Hard-Earned Cash

    • Don’t be fooled by the sleek marketing photos; look closely at the stem and the folding mechanism. If those joints feel loose or are made of thin, stamped aluminum, you’re buying a headache, not a vehicle.
    • Check the battery specs, but don’t just look at the range. I want to see how many charge cycles the cells are rated for. A scooter that claims 30 miles but dies after six months of daily use is just expensive junk.
    • Look for mechanical or hydraulic disc brakes. Many of these modern “lifestyle” scooters use cheap electronic braking that feels mushy and unreliable when you actually need to stop in a hurry.
    • Inspect the tire type before you buy. Pneumatic (air-filled) tires handle bumps much better, but if you live in a city full of glass and debris, you might want solid rubber—just make sure the frame is beefy enough to handle the extra vibration.
    • Always verify the weight capacity against your own build. Manufacturers often list a “maximum load” that’s right at the edge of what the motor can handle. If you’re pushing that limit, you’re going to burn out the controller in no time.

    The Bottom Line: Don't Get Fooled by Marketing

    Prioritize frame integrity over flashy displays; if the folding mechanism feels loose or wobbly in the shop, it’s going to fail you on a real-world commute.

    Check the motor and battery specs yourself instead of trusting the box; you want hardware that provides consistent power, not something that dies the moment you hit a slight incline.

    Stop buying the cheapest option just because it looks sleek—expensive plastic might look good in a showroom, but it won’t survive a year of actual use.

    ## The Real Test of a Scooter

    “I don’t care how many fancy LED displays or smartphone apps a scooter boasts; if the stem wobbles when you hit a pothole and the frame feels like hollow tin, you aren’t buying transportation—you’re buying a liability.”

    Roland Delacroix

    The Bottom Line

    Electric scooter reliability: The Bottom Line.

    At the end of the day, choosing an electric scooter shouldn’t feel like a gamble. I’ve spent enough time looking at schematics and stress-testing components to know that a pretty LED display won’t save you when a flimsy deck starts flexing under your weight. If you’re commuting, prioritize a motor with enough torque to handle real-world inclines and a frame that feels solidly engineered rather than assembled from recycled soda cans. Don’t get distracted by the flashy marketing or the newest app-connected gimmicks; focus on the mechanical integrity of the braking system and the battery’s build quality. That is what determines whether you have a reliable tool or a heap of scrap metal in six months.

    I know the market is flooded with options that look great in a showroom but fail the moment they hit a real pothole. It can be frustrating to navigate all this “smart” technology that seems designed to make things more complicated than they need to be. But if you take the time to look past the hype and demand better build standards, you’ll find a machine that actually serves you. Buy something that is built to be repaired, not replaced. Invest in quality, and you’ll find that a well-made piece of hardware can truly change your daily routine for the better.

    Frequently Asked Questions

    How much weight can these frames actually handle before the steering starts feeling loose?

    Look, don’t trust the marketing brochure’s “maximum load” blindly. Most manufacturers spec those numbers for a 150-pound person on flat pavement. If you’re pushing closer to that limit, you’ll feel the stem wobble almost immediately. Once the bearings in the folding mechanism or the steering column start to play, you’re playing a dangerous game. I always recommend leaving at least a 30-pound buffer from the rated capacity if you want the steering to stay tight.

    Is it worth paying the premium for a larger battery, or am I just paying for extra weight I don't need?

    Look, don’t get blinded by the numbers on the spec sheet. A bigger battery isn’t always a better investment. If you’re just riding two miles to the train station, a massive battery is nothing but dead weight that’ll make the scooter feel sluggish and hard to maneuver. Do the math first: calculate your round-trip distance and add a 20% buffer for hills or wind. If you don’t need that range, keep your money in your pocket.

    What's the real-world lifespan of these lithium-ion batteries once you start riding in the rain?

    Look, I’ll give it to you straight: rain is the silent killer of these things. Most manufacturers claim an IP rating, but that’s often just marketing fluff. If you’re riding through puddles or heavy spray, moisture creeps into the battery housing and eats the connections. You might see a significant drop in range or a total failure within a year if you aren’t careful. If you want it to last, keep it dry.

  • Understanding Mouse Dpi for Gaming

    Understanding Mouse Dpi for Gaming

    I was sitting at my workbench the other day, cleaning the contacts on a vintage Marantz receiver, when I saw another advertisement for a mouse claiming to have “25,000 DPI” for “pro-level precision.” I nearly laughed out loud. It’s the same old story in this industry: companies taking a simple technical specification and inflating it until it’s nothing more than expensive marketing fluff. Most of these kids don’t realize that chasing a massive gaming mouse dpi number is like trying to build a bridge out of toothpicks just because you can call them “high-strength fibers.” It’s nonsense, and frankly, it’s a waste of your hard-earned money.

    I’m not here to sell you on the latest RGB-lit plastic junk or repeat the jargon found in a glossy brochure. My goal is to strip away the nonsense and explain what actually matters when you’re trying to get a reliable connection between your hand and the screen. I’m going to show you how to find the sweet spot that actually works for your setup, rather than just buying into the hype. I promise to give you the straightforward truth based on how these sensors actually behave, not how the box says they do.

    Table of Contents

    High Dpi vs Low Dpi Pros and Cons Reality Check

    High Dpi vs Low Dpi Pros and Cons Reality Check

    Here is the reality of the situation: more isn’t always better. When companies slap “25,000 DPI” on a retail box, they aren’t telling you that most people will never cross the 1,600 mark without feeling like they’ve lost all control. High DPI can offer smoother cursor movement on 4K monitors, but it often comes at the cost of mouse sensor tracking accuracy. If the sensor is overstretched, you’ll start seeing jitter—tiny, erratic movements that have nothing to do with your actual hand motion.

    On the flip side, running at a lower setting is what most serious players actually do. It provides a sense of stability and precision that high-end marketing can’t replicate. If you’re trying to understand dpi vs sensitivity explained, remember that sensitivity is a combination of your hardware settings and your actual physical movement. I’ve seen plenty of kids chase massive numbers only to realize they can’t hit a target because their sensor is essentially “skating” on noise. Stick to what is stable; don’t let the spec sheet bully you into buying a device that’s too twitchy for its own good.

    Mouse Sensor Tracking Accuracy vs Expensive Plastic Gimmicks

    Mouse Sensor Tracking Accuracy vs Expensive Plastic Gimmicks

    Look, I’ve seen enough “revolutionary” hardware in my time to know that a shiny RGB strip doesn’t make a component better. When you’re looking at a spec sheet, you need to separate the actual mouse sensor tracking accuracy from the useless bells and whistles. A manufacturer will scream about 25,000 DPI from the rooftops, but if the sensor is cheap and skips frames when you move quickly, that number is worthless. It’s like putting a Ferrari engine inside a lawnmower chassis; it doesn’t matter how much power you have if the frame can’t handle the torque.

    In my experience, the real meat of the machine is the optical sensor performance. You want a sensor that provides a consistent, predictable signal without “jitter” or artificial smoothing. Some of these high-end models try to mask poor hardware with software tricks, but that just introduces input lag. If you want to know if a mouse is built to last or just built to sell, stop looking at the maximum DPI and start looking at how the sensor handles rapid, erratic movements. That’s where the cheap plastic falls apart.

    Five Practical Rules for Setting Your DPI Without Getting Ripped Off

    • Stop chasing the highest number on the box. Most professional players hover between 400 and 1600 DPI; anything higher is usually just a way for manufacturers to slap a “high-spec” sticker on a mediocre sensor.
    • Find your “natural” sensitivity by testing your muscle memory, not by reading a spec sheet. Set your DPI to a reasonable baseline, then adjust your in-game sensitivity until the movement feels like an extension of your hand, not a twitchy mess.
    • Prioritize sensor consistency over raw speed. A sensor that tracks smoothly at 800 DPI is worth ten times more than a cheap one that jitters when you try to push it to 10,000. If the cursor jumps, it’s junk.
    • Don’t let “DPI Stages” buttons fool you. Those little switches on the top of the mouse are often poorly calibrated. I’d rather have one reliable setting I can trust than five different presets that all feel slightly off.
    • Use a decent mousepad to complement your settings. You can have the most precise DPI in the world, but if you’re sliding your mouse across a cheap, uneven desk surface, you’re just fighting against physics.

    The Bottom Line: Don't Get Sold a Bill of Goods

    Ignore the massive DPI numbers on the box; a high number doesn’t mean a better sensor, it just means the manufacturer is trying to hide a lack of actual precision behind marketing fluff.

    Focus on sensor consistency and tracking accuracy rather than raw speed, because a mouse that skips or jitters is just a piece of expensive plastic, no matter how many “dots per inch” it claims to have.

    Find the “sweet spot” for your own hand and setup—most people actually perform better at much lower DPI settings than the flashy advertisements would lead you to believe.

    ## The Marketing Trap

    “I’ve seen enough spec sheets in my time to know when a company is selling you engineering and when they’re just selling you a bigger number. If a manufacturer is shouting about 25,000 DPI like it’s a revolution, they’re likely trying to distract you from the fact that the sensor’s actual stability is mediocre at best. In my experience, a high number on a box doesn’t make a tool better; it just makes it more expensive to be wrong.”

    Roland Delacroix

    The Bottom Line on DPI

    The Bottom Line on DPI truth.

    At the end of the day, don’t let a flashy box with “25,000 DPI” written in neon letters trick you into opening your wallet. We’ve seen through this: high numbers don’t equate to better control, and most of that extra sensitivity is just marketing fluff designed to separate fools from their hard-earned money. Focus on the sensor’s actual tracking consistency and the build quality of the unit. If the mouse feels like a hollow piece of cheap plastic in your hand, it doesn’t matter how many dots per inch it claims to have; it’s going to fail you when you need it most. Stick to what is reliable and predictable.

    My advice is simple: stop chasing the specs on the packaging and start trusting your own hands. Technology should serve you, not the other way around. Find a tool that feels natural, performs consistently, and doesn’t require a software manual just to change a setting. You don’t need the most expensive gear on the market to get the job done; you just need equipment that actually works without the gimmicks. Buy something built to last, set it to a level that makes sense for your movement, and then get back to what you were actually doing.

    Frequently Asked Questions

    If I have a high-DPI mouse, can I just turn the sensitivity down in my settings, or am I still stuck with inferior hardware?

    Look, you can certainly dial back the sensitivity in your software, but you aren’t magically fixing a bad sensor. If the hardware underneath is cheap junk, turning the DPI down just means you’re getting more precise readings of a low-quality, jittery signal. It’s like trying to tune a radio station that’s mostly static; you can turn the volume down, but the interference is still there. Buy a decent sensor first.

    Does a higher DPI actually increase the precision of the sensor, or is it just making the cursor move faster across the screen?

    Look, it’s a common misconception, but don’t let the marketing fool you. Increasing the DPI doesn’t magically make the sensor “smarter” or more precise; it just tells the sensor to report more counts for every inch you move the mouse. Higher DPI essentially just makes your cursor fly across the screen faster. If you crank it up too high, you’re actually making it harder to be precise because every tiny, unintentional tremor in your hand gets magnified.

    Why do most professionals seem to use much lower DPI settings than what's advertised on the retail packaging?

    Look, those massive numbers on the box are just there to catch the eye of someone who doesn’t know any better. High DPI sounds impressive, but it actually makes the cursor twitchy and hard to control. Professionals prefer lower DPI because it offers precision. It forces you to use more of your arm for movement, which builds muscle memory and keeps your aim steady. It’s about control, not how fast a number can climb.

  • Stop Buying Expensive Plastic: How to Choose the Right Coffee Maker That Actually Works.

    Stop Buying Expensive Plastic: How to Choose the Right Coffee Maker That Actually Works.

    I was sitting in my workshop last Tuesday, surrounded by the guts of a 1970s Marantz receiver, when I realized just how much the world has gone to hell with modern appliances. I looked at the sleek, touchscreen-operated coffee machine my daughter brought over, and all I saw was a disaster waiting to happen—a glorified computer wrapped in flimsy, overpriced plastic that’ll be in a landfill by next Christmas. Most people think they need a device that connects to their Wi-Fi or features twenty different programmable settings just to get a decent caffeine fix, but they’re being sold a bill of goods. If you’re trying to figure out how to choose the right coffee maker, you need to stop looking at the shiny LED displays and start looking at the build quality.

    Before you pull the trigger on any of these machines, do yourself a favor and check the actual user reviews for long-term durability, not just the shiny photos in the catalog. I’ve learned the hard way that a machine might look great on day one, but if the heating element is flimsy, you’re just buying a future paperweight. If you’re looking for more practical advice on navigating modern consumer trends or finding reliable local resources, I’ve found that checking out milfs near me can sometimes lead to some surprisingly useful community insights that the big manufacturers won’t tell you. Just remember: always look for metal components over plastic wherever possible if you want something that survives more than a year of daily use.

    I’m not here to sell you on some high-tech gadget that requires a software update just to brew a dark roast. My goal is simple: I want to help you find a machine that is built to last and actually does its one job without a headache. I’m going to break down the mechanics of these machines—from thermal stability to heating element durability—so you can stop wasting your hard-earned money on hype and start investing in hardware that actually works.

    Automatic Drip vs Pour Over Reliability Over Gimmicks

    Automatic Drip vs Pour Over Reliability Over Gimmicks

    When you’re looking at automatic drip vs pour over, you have to decide if you want convenience or control. I’ve seen plenty of modern drip machines that look sleek on a countertop but are essentially glorified timers filled with thin, brittle plastic. If you go the automatic route, look for a machine with a metal heating element and a heavy-duty carafe. Most people just want a reliable way to get caffeine in the morning without a fuss, but if the internal components are cheap, you’ll be replacing that machine in eighteen months.

    On the other hand, pour over setups are the ultimate in mechanical simplicity. There are no circuit boards to fry and no sensors to malfunction. It’s just a cone, a filter, and hot water. It’s arguably the most budget friendly coffee brewing equipment you can buy because there isn’t much to actually break. If you have the patience to stand there for a few minutes, you’ll get a better cup and a tool that will likely outlive your next three gadgets. Just don’t expect it to do the work for you.

    Single Serve vs Carafe Coffee Makers Which Actually Works

    Now, let’s talk about the elephant in the room: single serve vs carafe coffee makers. I see these pod-based machines everywhere lately, marketed as the ultimate convenience. But from an engineering standpoint, they’re a headache. You’re essentially buying a complex, pressurized system with a dozen tiny moving parts, most of which are made of thin plastic that’s prone to scale buildup. They work fine for a quick fix, but you’re trading long-term reliability for a bit of speed, and you’ll likely be replacing that unit in three years when the internal seals give out.

    If you want something that actually stands the test of time, a standard carafe machine is the way to go. A decent thermal carafe keeps your coffee hot without that burnt, “cooked” taste you get from cheap heating plates. When looking at coffee maker features to consider, prioritize build quality and ease of maintenance over fancy touchscreens. A simple, well-built drip machine with a glass or stainless steel carafe is much easier to clean and far less likely to fail you on a Monday morning. Stick to the basics; they tend to last.

    Five Rules for Avoiding the Tech Junk Heap

    • Look for metal, not just plastic. If the heating element or the water reservoir feels like a flimsy toy, it’s going to crack or leak within a year. I’d rather pay a bit more upfront for a machine with stainless steel components than replace a cheap plastic one every eighteen months.
    • Check the ease of cleaning. If a machine has a dozen tiny, inaccessible nooks and crannies, it’s just a breeding ground for mold and scale buildup. A machine is only as good as its maintenance routine; if it’s a pain to scrub, you won’t do it, and the coffee will eventually taste like old sludge.
    • Ignore the “smart” features. I don’t need my coffee maker to connect to my Wi-Fi or send a notification to my phone. Those extra circuit boards are just more points of failure. Stick to a machine with physical buttons or a simple toggle—mechanical reliability beats a buggy app every single time.
    • Evaluate the footprint and build stability. Some of these modern machines are top-heavy and wobble when you pour the water in. A solid, heavy base tells me the internal components are well-seated and the unit won’t slide across your counter like a puck on ice every time you try to use it.
    • Don’t fall for the “specialty” labels. You don’t need a machine that claims to use “aerospace-grade” heating technology to get a decent cup. Look for consistent temperature control and a simple design. If the manual is fifty pages long just to explain how to brew a single pot, walk away.

    The Bottom Line

    At the end of the day, picking a coffee maker shouldn’t feel like a research project for a NASA launch. We’ve looked at the trade-offs between the convenience of a single-serve pod machine and the honest, reliable simplicity of a classic carafe or a manual pour-over. My advice remains the same: look past the shiny LED screens and the touchpads that will inevitably fail after a year of steam exposure. Focus on the build quality and how easy it is to actually clean the components. If a machine is held together by nothing but cheap, flimsy plastic and proprietary software, you aren’t buying an appliance—you’re buying a future trip to the landfill. Buy for durability, not for bells and whistles.

    I know it’s tempting to grab the newest, most expensive gadget on the shelf just because the box looks high-tech. But remember, the goal isn’t to own the most advanced piece of kitchenware; it’s to have a reliable way to start your morning. A good tool should serve you, not the other way around. Find something that does the job consistently, stays out of your way, and actually lasts long enough to become a staple in your kitchen. Stop chasing the hype and start investing in hardware that works.