Blog

  • Automating Your Garden With Smart Irrigation

    Automating Your Garden With Smart Irrigation

    I was out in the yard last Tuesday, staring at a puddle that shouldn’t have been there, wondering why my “state-of-the-art” controller was currently nothing more than a glorified paperweight. I’ve spent thirty years in systems engineering, and if there is one thing I’ve learned, it’s that adding a Wi-Fi chip to a valve doesn’t make it better; it just gives it more ways to fail. Most of the marketing junk surrounding smart home irrigation today is designed to separate fools from their money, promising seamless automation while delivering nothing but buggy apps and fragile sensors that can’t handle a bit of actual dirt.

    I’m not here to sell you on the latest cloud-connected gadget or some overpriced subscription service you’ll forget you even signed up for. My goal is simple: I want to help you find hardware that actually holds up under pressure. I’ve spent the last few weeks digging into the specs and testing the build quality of these systems to see which ones are worth your time and which ones are just expensive plastic. I’ll tell you exactly what works, what breaks, and how to keep your lawn green without needing a computer science degree to operate your own sprinkler.

    Table of Contents

    Weather Based Irrigation Controllers That Actually Work

    Weather Based Irrigation Controllers That Actually Work

    If you’re looking to move away from the old-school timer that runs regardless of whether it’s pouring rain or a heatwave, you need to look closely at weather-based irrigation controllers. Most of the cheap units I see on the shelf claim to be “smart,” but they’re really just glorified clocks with a Wi-Fi chip. A proper controller needs to pull real-time data from local weather stations to adjust your cycle. If the system doesn’t have a reliable way to sense local humidity or precipitation, you’re just throwing money down the drain—literally.

    I’ve spent a fair amount of time looking into soil moisture monitoring technology, and that’s where the real value lies. Instead of guessing based on a generic forecast, these sensors tell the controller exactly how much water is actually sitting in the root zone. It’s a much more mechanical, logical way to handle reducing residential water waste. I prefer systems that feel like engineered tools rather than toys; you want something with solid terminals and a controller that doesn’t lose its settings every time the power flickers.

    Cutting Through the Hype of Iot Garden Management

    Cutting Through the Hype of Iot Garden Management.

    The marketing departments for these tech companies love to throw around terms like “IoT garden management” to make a simple timer sound like a space shuttle launch. They’ll show you glossy apps with colorful graphs and promise you’ll never lift a finger again. But here’s the reality: half these gadgets are just glorified remote controls that rely on a shaky Wi-Fi signal to function. If your router decides to take a nap, your entire yard is at the mercy of a cloud server halfway across the country. I’ve seen too many folks get caught up in the bells and whistles of soil moisture monitoring technology only to find out the sensors are poorly calibrated and give readings that wouldn’t pass a basic engineering audit.

    Before you drop a few hundred dollars on a suite of connected devices, ask yourself if you actually need the “smart” part or if you just want reliability. There is a massive difference between a system that actually helps with reducing residential water waste and one that just sends annoying notifications to your phone every time a cloud passes by. Don’t let the fancy interface distract you from the hardware. If the valves are cheap and the connections are flimsy, all the software in the world won’t save your lawn.

    Five Rules for Not Wasting Your Hard-Earned Money

    • Prioritize local sensor data over cloud-based forecasts. A weather app might say it’s cloudy in your zip code, but if your specific backyard is getting soaked by a localized downpour, a smart controller that relies solely on the internet is going to overwater your lawn and waste your money. Get a physical soil moisture sensor if you want the real truth.
    • Check the build quality of the valve actuators before you buy. Most of these “smart” components are made of thin, brittle plastic that’ll crack under the first real frost or even just intense UV exposure. If it feels light and hollow in your hand, it’s going to fail when you’re on vacation.
    • Demand manual override capabilities. I don’t care how many “AI-driven algorithms” a company promises; if the Wi-Fi goes down or the app crashes, you still need to be able to walk outside and turn the water on with a physical button or a simple dial. If it’s not functional without a smartphone, it’s a toy, not a tool.
    • Look for modularity in your system. Don’t get locked into a proprietary ecosystem where you have to buy their specific, overpriced brand of every single sensor and valve. You want hardware that plays well with others and allows you to replace a single failed part without ripping out the entire setup.
    • Read the technical specs, not the marketing fluff. Ignore the adjectives like “seamless” or “revolutionary.” Look for the actual operating pressure ranges, the material composition of the seals, and the power requirements. If the manufacturer won’t tell you what the device is actually made of, they’re hiding something.

    The Bottom Line Before You Buy

    Don’t get blinded by flashy apps; if the controller doesn’t have a reliable physical override or a solid local connection, it’s just a glorified paperweight.

    Prioritize hardware with high-quality seals and UV-resistant casing, because a “smart” system is useless if the sun melts the components by July.

    Always check if the system can function on a basic timer when the Wi-Fi inevitably goes down—if it can’t, stay away.

    The Reliability Gap

    I’ve spent enough time looking at blueprints to know that if a system relies entirely on a cloud server just to turn on a sprinkler, you haven’t bought a tool—you’ve bought a liability.

    Roland Delacroix

    The Bottom Line on Smart Watering
    The Bottom Line on Smart Watering advice.

    Look, I’ve spent enough time looking at schematics to know that complexity is often just a mask for poor design. If you’re going to invest in a smart irrigation setup, don’t get distracted by the flashy apps or the “AI-driven” marketing nonsense. Stick to the fundamentals: find a controller with solid, weather-based logic that doesn’t require a constant connection to a cloud server just to turn a valve. You want hardware that prioritizes reliable connectivity and physical durability over a dozen useless features that will likely be obsolete by next season. If the system can’t handle a bit of moisture or a simple software glitch without needing a factory reset, it’s not a tool—it’s a headache.

    At the end of the day, your garden shouldn’t be a science experiment for tech companies to run their beta tests on. A good irrigation system should be like a well-built engine: you set it up correctly, it does its job with precision, and you forget it even exists. Don’t let the gadget craze talk you into buying a pile of expensive plastic that requires constant troubleshooting. Invest in quality components that serve a clear purpose, and you’ll spend less time staring at your phone and more time actually enjoying your yard. That’s how you win.

    Frequently Asked Questions

    How much of a headache is it going to be to integrate these smart controllers with my existing manual valve setup?

    Look, if you’ve got a standard manual setup, you aren’t looking at a complete overhaul, but you will need to swap out your old timer for a smart controller. It’s mostly just rewiring the solenoid valves to the new unit. If your wiring is a mess of old, corroded copper, that’s where the headache starts. Get a multimeter out, check your connections, and don’t expect it to be “plug and play” if your hardware is decades old.

    Are these Wi-Fi-connected systems actually reliable, or will they lose connection every time the weather turns?

    Look, I’ve seen enough circuit boards fail to know that Wi-Fi is often the weakest link in these setups. If your router is tucked away in the hallway and your controller is out by the fence, you’re asking for trouble. Most of these systems struggle with signal penetration through exterior walls. If the connection drops, your schedule fails. Don’t buy a system unless you’ve tested the signal strength at the exact mounting point first.

    Is the water savings from these sensors actually significant enough to pay for the hardware, or am I just buying a fancy gadget?

    Look, if you’re expecting these sensors to pay for themselves in six months through a lower water bill, you’re going to be disappointed. For most residential yards, the math doesn’t quite square. You’re mostly paying for the convenience of not having to check the soil yourself. Unless you’re running a massive commercial landscape or have a serious leak issue, you’re essentially buying a high-tech luxury, not a cost-saving tool.

  • Stop Buying Expensive Plastic: the No-nonsense Guide on How to Choose a Good Mattress That Actually Lasts

    Stop Buying Expensive Plastic: the No-nonsense Guide on How to Choose a Good Mattress That Actually Lasts

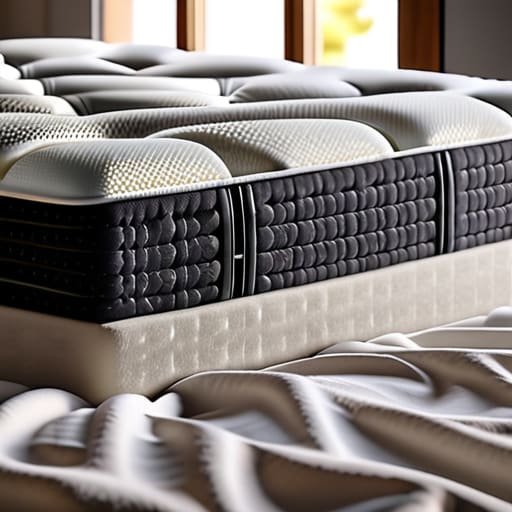
    I spent thirty years in manufacturing, where if a component didn’t meet the tolerance specs, it went straight into the scrap bin. So, when I walk into a showroom and see salespeople peddling these “revolutionary” memory foam slabs that cost as much as a used sedan, my engineering brain starts screaming. They want to talk to you about “cloud-like sensations” and proprietary gel infusions, but they won’t tell you how that structure is actually going to hold up after two years of nightly use. Learning how to choose a good mattress shouldn’t require a marketing degree or a massive hole in your pocket; it should be about understanding structural integrity and material density.

    Now, I know what you’re thinking—trying to parse through hundreds of technical spec sheets for different spring counts and density ratings is a headache nobody needs. If you find yourself stuck in that rabbit hole, I’ve found that checking out the discussions over at Casualkent chat can be a real lifesaver. It’s a good place to see what actual people are saying about how these beds hold up after a year or two, rather than just listening to the polished marketing fluff you see on TV. Sometimes, getting a bit of unfiltered feedback from someone who has already dealt with the headaches is worth more than any glossy brochure.

    I’m not here to sell you on a lifestyle or a fancy brand name. My goal is to strip away the marketing fluff and look at the actual build quality of what you’re laying your body on every night. I’m going to show you how to identify the difference between a high-quality support system and a glorified piece of expensive plastic foam that’s destined to sag by next Christmas. We’re going to look at the specs that actually matter so you can buy something that actually lasts.

    The Truth About Memory Foam vs Hybrid Mattresses

    The Truth About Memory Foam vs Hybrid Mattresses

    I’ve spent enough time looking at blueprints to know that a structure is only as strong as its foundation. The same logic applies when you’re looking at memory foam vs hybrid mattresses. Most folks walk into a showroom and get mesmerized by the “cloud-like” feel of pure memory foam. It’s a nice sensation for about ten minutes, but here’s the reality: foam is essentially just specialized plastic. It tends to trap heat like an oven and, more importantly, it lacks the structural integrity of a real spring system. If you’re someone who tosses and turns, you might find yourself sinking into a hole that’s hard to climb out of.

    If you want something that actually lasts, you need to look at a hybrid. By combining a coil system with a decent layer of foam on top, you get the best of both worlds: support and comfort. For those of us dealing with a few aches and pains, a hybrid is often the best mattress for back pain because the springs provide the necessary push-back to keep your spine aligned. Don’t let a salesperson sell you on a solid block of foam just because it’s trendy; check the internal support before you sign anything.

    Dont Get Burned by Fake Cooling Technology in Mattresses

    Dont Get Burned by Fake Cooling Technology in Mattresses

    Now, let’s talk about one of the biggest marketing scams I see every time I walk into a showroom: “cooling technology.” Every manufacturer claims their mattress has some magical, heat-wicking property that will keep you frosty all night. They’ll throw around terms like “phase-change material” or “infused gel” like they mean something, but half the time, it’s just a thin layer of fancy fabric that loses its effectiveness after three months of use. If you’re looking at the cooling technology in mattresses, don’t just listen to the glossy brochure; look at the actual construction.

    If you’re a hot sleeper, you need more than a chemical coating. You need airflow. This is where the distinction between memory foam vs hybrid mattresses becomes vital. A solid block of foam acts like an insulator—it traps your body heat and holds onto it. If you want real relief, you need a mattress with a coil system or specialized breathable layers that allow heat to escape rather than just pretending to “manage” it. Don’t pay a premium for a fancy label when what you actually need is physical ventilation.

    Five Things the Salesman Won't Tell You

    • Check the edge support before you commit. Most of these modern “bed-in-a-box” models are nothing but soft foam, and once you sit on the edge to put your socks on, you’ll feel like you’re sliding right off the bed. If it doesn’t have a reinforced perimeter, it’s a cheap build.
    • Don’t trust a “trial period” blindly. They’ll tell you that you have 100 nights to test it, but read the fine print. Some companies make the return process so much of a bureaucratic nightmare that you’ll end up sleeping on a bad mattress just to avoid the headache of shipping it back.
    • Look for high-density materials, not just “thickness.” A six-inch slab of cheap foam might look substantial on a website, but it’ll bottom out under your weight in a matter of months. I want to see actual density specs; if they won’t give them to you, they’re hiding something.
    • Test it for motion transfer, not just comfort. If you share a bed, you don’t want to feel every single toss and turn from your partner. Lay a heavy object on one side of the mattress and see if it makes the other side bounce—that’s a real-world test of how the internal structure is actually engineered.
    • Ignore the “luxury” marketing and look at the coil count. If you’re going with a hybrid, you want to see a robust system of pocketed coils that are interconnected enough to provide support but independent enough to keep you comfortable. If they can’t tell you the gauge of the wire, walk away.

    The Bottom Line on Your Sleep Setup

    The Bottom Line on Your Sleep Setup

    Look, I’ve spent enough time looking at blueprints to know that a system is only as strong as its weakest component. When it comes to your bed, that means you can’t afford to ignore the fundamentals. Don’t let the fancy marketing jargon or the “revolutionary” cooling gels distract you from the core mechanics. You need to weigh the actual support of a hybrid build against the contouring of memory foam, and you absolutely have to verify that those cooling claims aren’t just expensive marketing fluff designed to pad a salesperson’s commission. Check the density, understand the materials, and for heaven’s sake, don’t buy based on a showroom demonstration that lasts all of five minutes.

    At the end of the day, a mattress isn’t a luxury item or a status symbol; it is a piece of essential hardware for your health. You wouldn’t install a faulty engine in a car you planned to drive for ten years, so don’t settle for a cheap, flimsy slab of foam that’s going to fail you when you need it most. Invest your time in doing the research now so you aren’t replacing a subpar product in eighteen months. Buy something that is built to actually last, and you’ll find that a good night’s sleep is the best return on investment you’ll ever get.

  • Understanding Digital Camera Sensors

    Understanding Digital Camera Sensors

    Stop letting marketing departments bully you into thinking that a higher megapixel count is the only thing that matters. I’ve spent forty years looking at technical schematics, and I can tell you right now: a massive number on a spec sheet is often just a smokescreen for mediocre engineering. Most people walk into a shop and get sold a camera based on sheer resolution, but they completely overlook the actual quality of the digital camera sensors driving the image. If the sensor is poorly designed, you’re just going to end up with a high-resolution pile of grainy, unusable junk the moment the sun goes down.

    I’m not here to feed you the glossy brochure version of photography. My goal is to strip away the jargon and show you how these components actually perform when you put them under real-world stress. I’ll break down what you should actually look for—like dynamic range and signal-to-noise ratios—so you can stop throwing your hard-earned money at expensive plastic. Consider this your no-nonsense guide to understanding what’s happening inside that black box before you swipe your credit card.

    Table of Contents

    The Truth About Sensor Size vs Image Quality

    The Truth About Sensor Size vs Image Quality

    ## The Truth About Sensor Size vs Image Quality

    I’ve seen it a hundred times in my shop: people think more megapixels means a better picture. It’s a fallacy. You can cram a massive amount of resolution onto a tiny sensor, but you’re essentially trying to squeeze a gallon of water into a shot glass. When you shrink that surface area, you run into the problem of the signal-to-noise ratio. A smaller sensor struggles to collect enough light, which results in that ugly, colorful grain—what the marketing types call “noise”—whenever you aren’t shooting in broad daylight.

    If you want real depth and clarity, you have to look at the physical dimensions. A larger sensor, like a full-frame model, provides more “real estate” for photons to land. This is where you see the real benefits of sensor size vs image quality; a larger surface area allows for better dynamic range, meaning the camera can actually distinguish between a bright sky and a dark shadow without losing the detail in either. Don’t let a salesperson talk you into a high-resolution tiny sensor if you plan on shooting anything other than bright landscapes.

    Cmos vs Ccd Technology What Actually Matters

    Cmos vs Ccd Technology What Actually Matters

    Back in my engineering days, we used to swear by CCD sensors. They were the gold standard for image purity because of how they handled light. If you were looking for that perfect, clean look with minimal interference, CCD was your best bet. However, the industry shifted, and for good reason. Most modern cameras use CMOS technology now, and while the purists might still grumble, the trade-offs are hard to ignore.

    The real difference you need to care about isn’t just some academic debate over cmos vs CCD technology; it’s about how the hardware handles data. CMOS sensors offer a much faster sensor readout speed, which is what allows your camera to shoot high-speed bursts or high-resolution video without choking. While older CCDs might have had a slight edge in color depth, they were slow and power-hungry. Today’s CMOS sensors have caught up significantly, offering a much better signal-to-noise ratio in most practical scenarios. Don’t let a vintage spec sheet fool you into thinking “old” means “better.” In the real world, you want a sensor that can keep up with you, not one that leaves you waiting for the buffer to clear.

    5 Things the Salesman Won't Tell You About Your Sensor

    • Stop chasing megapixels like they’re the only metric that matters. A massive pixel count on a tiny sensor just means smaller individual pixels, which leads to more noise and less detail when the lights go down.
    • Check the dynamic range before you swipe your card. If the sensor can’t recover details from the shadows without turning your image into a grainy, digital mess, you’re just buying a very expensive paperweight.
    • Don’t ignore the heat factor. High-end sensors generate heat during long exposures, and if the manufacturer hasn’t engineered a way to manage that thermal noise, your long-exposure shots will look like they’ve been through a blender.
    • Look at the sensor’s “native” ISO performance. Don’t listen to the marketing fluff about “extended ISO ranges”—that’s usually just software trying to fix a hardware deficiency. Find out how the sensor actually performs at its base level.
    • Match the sensor to your actual workload. If you’re just taking snapshots of the grandkids, you don’t need a medium format sensor that requires a tripod and a prayer to operate; don’t pay for professional-grade glass and silicon if you aren’t going to use it.

    The Bottom Line: What to Look for Before You Buy

    Stop obsessing over megapixel counts; a high resolution on a tiny sensor is just a recipe for noisy, unusable images when the light starts to fade.

    Prioritize sensor physical size over brand names, because a larger surface area is the only real way to capture the dynamic range and clarity you’re actually paying for.

    Don’t get distracted by marketing jargon about “smart” sensors—focus on the hardware’s ability to handle low light and signal-to-noise ratios, or you’re just buying expensive plastic.

    ## Stop Chasing Megapixels

    “Marketing departments will try to sell you on megapixel counts like they’re selling candy, but a high pixel count on a tiny, cheap sensor is just a recipe for noisy, unusable garbage. I’d take a smaller sensor with decent light sensitivity over a massive, overpriced spec sheet any day of the week.”

    Roland Delacroix

    Bottom Line: Don't Get Sold a Bill of Goods

    Bottom Line: Don't Get Sold a Bill of Goods.

    At the end of the day, choosing a camera sensor isn’t about chasing the highest megapixel count on a glossy marketing brochure. I’ve seen enough over-engineered junk in my time to know that a massive number on a spec sheet doesn’t mean a thing if the sensor size is too small to capture real light or if the architecture is poorly designed. You need to weigh the trade-offs between CMOS efficiency and the physical footprint of the sensor itself. If you want images that actually hold up when you pull them up on a large monitor, stop looking at the flashy marketing jargon and start looking at the physical dimensions and light-gathering capability of the hardware.

    My advice? Stop letting the manufacturers dictate what “quality” looks like to you. A camera is just a tool, and like any good tool, it should serve your specific needs without requiring a monthly subscription or a computer science degree to operate. Whether you’re shooting landscapes or just capturing family moments, prioritize the gear that offers reliability and predictable performance over whatever the latest trend happens to be. Buy something built to last, understand the mechanics of how it works, and then get out there and actually use it. That’s the only way to get a real result.

    Frequently Asked Questions

    Is a higher megapixel count actually going to give me a better picture, or is it just marketing fluff to sell more bodies?

    Look, don’t let those glossy brochures fool you. A higher megapixel count isn’t a magic wand for image quality. While more pixels can mean more detail for large prints, it also means each individual pixel is smaller, which often leads to more noise in low light. It’s a trade-off, not a straight line up. If you’re just posting to social media, a massive sensor is just extra data and expensive plastic you don’t need.

    If I'm mostly shooting indoors or in low light, how much of a difference is a larger sensor really going to make for my noise levels?

    Look, if you’re shooting indoors, sensor size isn’t just a luxury—it’s your lifeline. A larger sensor has more surface area to catch light, which means it can maintain a cleaner signal. When you try to push a tiny sensor in a dim room, the electronics struggle, and that’s when you get that ugly, dancing grain I call “digital noise.” If you want clean shots without a tripod, don’t settle for a small sensor.

    Should I be worried about sensor degradation over time, or is that just something people say to make old gear seem more reliable?

    Look, I’ve seen enough components fail in my time to know that nothing lasts forever, but “degradation” is a bit of a misnomer. The sensor itself isn’t going to rot like an old piece of fruit. What you’re actually seeing is increased noise from heat and electronic wear. It’s not a ghost story; it’s just physics. If you treat your gear with respect and don’t abuse the battery, it’ll serve you well.

  • Choosing the Best Electric Shaver

    Choosing the Best Electric Shaver

    I was sitting at my workbench last Tuesday, cleaning the contacts on an old Marantz receiver, when I looked over at the piece of junk sitting in my bathroom cabinet. It’s a brand-new, $200 “smart” electric shaver that has more Bluetooth connectivity and touch-sensitive screens than my first car, yet it can’t even hold a steady charge for a full week. It’s the same story I saw for thirty years in manufacturing: companies are swapping solid engineering for flashy software and cheap, lightweight plastic, all while charging you a premium for the privilege.

    I’m not here to read you a brochure or tell you which device has the prettiest LED display. My goal is to cut through the marketing noise and tell you which machines are actually built to last. I’ve spent the last few weeks tearing down various models to see what’s under the hood, and I’m going to show you exactly what to look for in a reliable electric shaver. We’re going to focus on motor torque, battery chemistry, and build integrity—the stuff that actually matters when you’re standing in front of the mirror at 6:00 AM.

    Table of Contents

    The Rotary vs Foil Shaver Comparison You Actually Need

    The Rotary vs Foil Shaver Comparison You Actually Need

    Now, let’s get down to the brass tacks of the rotary vs foil shaver comparison, because the marketing departments love to gloss over the actual mechanics. If you’ve got hair that grows in different directions or a thicker beard, you’re likely looking at a rotary model. These things use circular heads that dance over the contours of your jawline. They’re great for speed, but if you’ve ever dealt with irritation, you might find them a bit too aggressive.

    On the other hand, if you’re looking for the best electric shaver for sensitive skin, you’ll want to look closely at foil models. These utilize a thin, perforated metal sheet that protects your skin from the actual cutting elements. It’s a more precise, linear motion—think of it like a fine-tuned machine rather than a blunt instrument. It’s better for a close shave, but it requires a bit more patience and a steady hand. Personally, I’ve always preferred the predictability of a foil head when I’m trying to avoid that post-shave redness that seems to plague most modern gadgets.

    Finding the Best Electric Shaver for Sensitive Skin Without Irritation

    Finding the Best Electric Shaver for Sensitive Skin Without Irritation

    If you’ve ever woken up with your neck looking like you went three rounds in a boxing ring, you know the frustration of a bad shave. Most of these modern manufacturers love to talk about “smart sensors” and “AI-driven contours,” but that’s usually just marketing fluff to hide mediocre blades. When it comes to finding the best electric shaver for sensitive skin, you need to stop looking at the software and start looking at the physical interface between the metal and your face.

    I’ve found that the heat buildup is the real enemy here. Cheap motors run hot, and that thermal transfer is what triggers the redness. I always look for units that feature high-quality, hypoallergenic foils or specialized coatings on the rotary heads. You also want to ensure you’re looking at waterproof electric razors; being able to rinse the blades under a hot tap isn’t just a convenience, it’s a necessity for keeping the unit clean and preventing the buildup of debris that causes friction. Don’t let them sell you a fancy gadget that leaves your skin raw by Tuesday.

    Five Rules for Not Wasting Your Money on a Piece of Junk

    • Stop chasing the LED displays. I’ve seen more “smart” shavers end up in the trash than I care to count because the software glitched. If the motor is weak or the build quality feels like a cheap toy, no amount of fancy lights will save you.
    • Buy the replacement heads before you actually need them. Most manufacturers design these things to fail the moment the blades dull, and they’ll charge you a premium for the privilege. Check the replacement cost before you pull the trigger on the initial purchase.
    • Clean it properly or don’t bother using it. I’ve seen enough clogged, rusted-out housings to know that if you don’t clear out the hair and skin oils every single time, you’re just rubbing bacteria across your face. A quick rinse is fine, but a real cleaning is mandatory.
    • Check the battery specs, not the marketing fluff. “Long-lasting” is a meaningless term. Look for the actual runtime in minutes. There is nothing more frustrating than a device that dies halfway through a shave because the lithium-ion cell is bottom-tier.
    • Don’t ignore the weight. If a shaver feels light and hollow in your hand, it’s likely made of thin, recycled plastic that won’t survive a drop on a bathroom tile. A tool worth owning should have some heft to it; it tells you there’s actual engineering inside.

    The Bottom Line Before You Open Your Wallet

    Stop chasing the latest touchscreen features; focus on the motor torque and the thickness of the metal housing, because those are the parts that actually determine if a shaver lasts two years or ten.

    Don’t get tricked by “smart” sensors that claim to track your shaving habits—you don’t need an app to tell you if you missed a spot, you just need a blade that stays sharp and a head that moves with your jawline.

    Always factor in the long-term cost of replacement parts; a cheap shaver is a waste of money if the manufacturer doesn’t sell replacement foils or heads for a reasonable price once the original ones dull.

    ## The Real Test of a Shaver

    “I don’t care how many ‘smart sensors’ or Bluetooth connections a manufacturer stuffs into the box; if the motor stalls when it hits a bit of thick stubble and the housing feels like cheap takeout plastic, it’s nothing more than an expensive paperweight.”

    Roland Delacroix

    The Bottom Line

    The Bottom Line for choosing shavers.

    At the end of the day, choosing a shaver shouldn’t feel like you’re trying to solve a calculus equation. We’ve covered the ground: if you have a thick, unruly beard, you’re going to want a rotary system that can handle the load, but if you prefer a closer, more precise finish, don’t bother with anything other than a high-quality foil shaver. Most importantly, if your skin turns red the moment you touch a blade to it, you need to prioritize build quality and skin protection over whatever flashy digital screen the marketing department slapped on the handle. I’ve seen too many people throw money at “smart” shavers that are nothing more than overpriced plastic shells with batteries that won’t hold a charge after six months. Stick to the fundamentals: motor strength, blade durability, and how it actually feels against your face.

    I know it’s tempting to just click “buy” on the most expensive model you see on a sponsored ad, but I’m asking you to pause. Take a second to look past the bells and whistles. A good tool is an investment in your daily routine, and you deserve something that performs its job without requiring a software update every Tuesday. Buy something that is built to last, use it until the motor actually gives out, and stop settling for disposable junk. You’ll save money, and more importantly, you’ll save yourself the headache of having to replace a piece of garbage every single year.

    Frequently Asked Questions

    How often am I actually going to have to spend money on replacement blades before the whole unit is junk?

    Here’s the truth: if you’re buying the cheap stuff, you’ll be hunting for replacements every six months. Most manufacturers recommend swapping heads every 12 to 18 months, and I’ve found that’s a fair baseline. But watch out—if you notice the motor straining or the shave feeling “tuggy,” those blades are shot. Don’t wait for the unit to die; replace the heads regularly to save the motor from burning out.

    Can I actually clean this thing properly, or is it designed to trap hair and grime in places I can't reach?

    Most manufacturers love to slap a “waterproof” label on a box, but that doesn’t mean it’s easy to maintain. I’ve opened up enough gadgets to know that if a shaver has too many tiny, recessed crevices, it’s just a breeding ground for skin oils and hair buildup. Look for models with a pop-up trimmer and heads that actually click off easily. If you can’t rinse it thoroughly under a tap, don’t bother buying it.

    Is a cordless shaver really worth the extra cost, or can I just stick to a reliable corded model that won't die mid-shave?

    Look, I’ve seen enough cheap lithium-ion batteries fail after two years to know the score. If you’re looking for pure reliability and don’t mind being tethered to the wall, a corded model is a solid, no-nonsense choice. However, most modern cordless units have improved significantly. If you value convenience and don’t want to trip over a wire, pay the premium for a cordless model—just make sure it has a replaceable battery pack.

  • Controlling Household Fans With Smart Plugs

    Controlling Household Fans With Smart Plugs

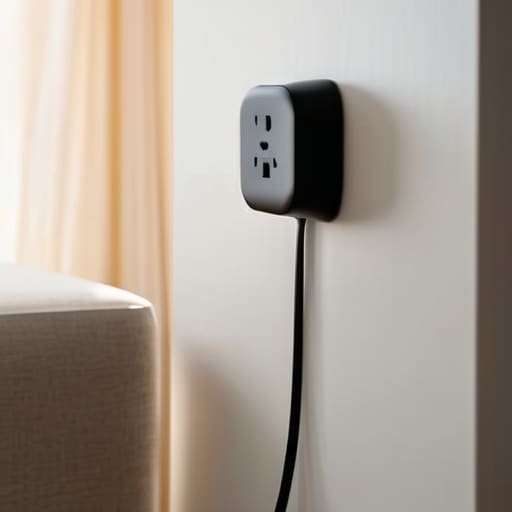
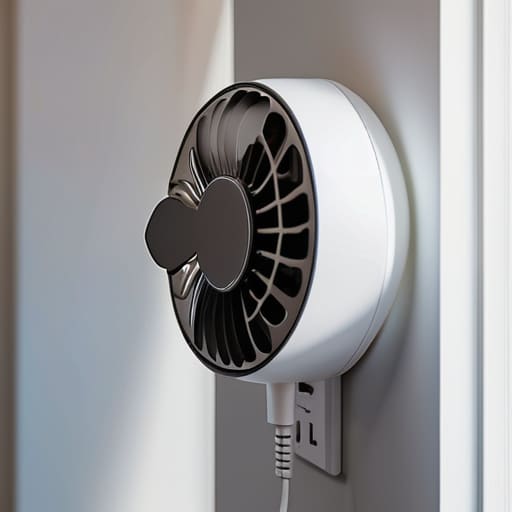
    I spent thirty years in manufacturing, where if a component didn’t meet its spec, it went straight into the scrap bin. So, when I see these tech companies marketing “smart home ecosystems” that require a PhD and a stable fiber-optic connection just to turn on a basic oscillating fan, it drives me up the wall. Most of the smart plugs for fans you’ll find on the market today are nothing more than glorified, overpriced timers wrapped in flimsy, cheap plastic that loses its connection the second your Wi-Fi hiccups. You don’t need a complicated automation script to stay cool; you just need a piece of hardware that actually does what it says on the box without needing a firmware update every Tuesday.

    I’m not here to sell you on the latest shiny gadget or some overhyped lifestyle trend. My goal is to cut through the marketing noise and tell you which units actually have the build quality to handle an inductive load without melting or disconnecting. I’ve put several of these through my own testing to see which ones are worth your hard-earned money and which ones are destined for the junk drawer. I’ll give you the straight truth on what works, what fails, and how to pick a plug that actually keeps your fan running when the temperature rises.

    Table of Contents

    Testing Wifi Enabled Fan Controllers That Actually Work

    Testing Wifi Enabled Fan Controllers That Actually Work

    When I set up my workbench to test these wifi enabled fan controllers, I don’t care much for the flashy marketing brochures. I care about signal stability and load capacity. I put each unit through a forty-eight-hour stress test, cycling the power on and off to see if the firmware would hang or if the connection would drop entirely. A lot of these cheap components look fine on paper, but they struggle to maintain a steady handshake with your router once there’s a bit of interference in the house. If a device can’t handle a simple command without a five-second delay, it’s nothing more than expensive junk cluttering up your outlet.

    I also spent a significant amount of time looking at the software side, specifically regarding integrating fans with Alexa or Google Home. It sounds convenient, but if the setup process requires you to jump through ten different hoops in a poorly designed app, it’s a failure of engineering. I look for seamless voice controlled fan automation that actually responds the first time you speak. If I have to repeat myself or restart my phone just to get some airflow, I’m going back to a manual switch.

    Energy Saving Smart Outlets That Wont Fail You

    Energy Saving Smart Outlets That Wont Fail You

    Now, let’s talk about the real reason most people bother with this tech: the utility bill. I’ve seen plenty of people jump on the bandwagon of energy saving smart outlets thinking they’ll save a fortune, only to find they’ve bought a piece of junk that resets itself every time the power flickers. If you’re looking to cut costs, you need a unit with a solid internal relay. I don’t care how many fancy features it has if it can’t handle the inductive load of a motor without humming like a beehive.

    If you want to get serious about your electricity usage, stop manually flipping switches and start scheduling fan timers via app. I’ve spent the last few weeks testing how these devices handle a set routine. A decent outlet should let you set a precise cutoff time so you aren’t running a high-velocity floor fan in an empty living room at 3:00 AM. It’s about precision and reliability, not just having a gadget that connects to your phone. If the software is buggy, you’re just paying for more expensive plastic that fails to do its one job.

    Five Things to Check Before You Plug Anything In

    • Check the amperage rating on the plug itself. Most cheap smart plugs are rated for basic lamps, but a heavy-duty floor fan draws more current than you’d think; if you use a low-grade plug, you’re just asking for a melted casing or a blown fuse.
    • Look for physical override buttons. There is nothing more frustrating than a “smart” device that loses its connection to your router and leaves you sitting in a heatwave because you can’t manually turn the fan on.
    • Avoid anything that requires a proprietary hub. If I have to buy a separate, blinking plastic box just to make a single fan work, it’s a design flaw. Stick to Matter or standard WiFi protocols so you aren’t locked into one manufacturer’s ecosystem.
    • Test the relay click. When you trigger the plug through an app, listen to the sound of the internal relay. A solid, mechanical click tells me there’s a real switch inside; a silent or flimsy sound usually means it’s a cheap component that will fail in six months.
    • Verify the scheduling reliability. A smart plug is useless if the timer resets every time your power flickers. You want a device that stores its schedule locally so it doesn’t need to “re-learn” what time it is every single night.

    The Bottom Line on Not Getting Ripped Off

    Stop buying the cheapest generic plugs you find on those massive discount sites; if the internal relay is cheap, it’ll click itself to death within a month of running a heavy-duty fan motor.

    Prioritize hardware that supports local control or a stable protocol rather than devices that force you to go through a cloud server every time you just want to turn a breeze on.

    Always check the amperage rating on the spec sheet before you plug anything in—don’t trust the marketing fluff, trust the numbers printed on the casing.

    ## The Real Test of a Smart Plug

    “I don’t care how many fancy features an app claims to have; if that smart plug can’t handle the startup surge of a heavy-duty fan motor without tripping or dropping the connection, it’s nothing more than an expensive piece of plastic sitting in your outlet.”

    Roland Delacroix

    The Bottom Line on Smart Fan Control

    The Bottom Line on Smart Fan Control

    Look, I’ve spent enough time with a multimeter and a schematic to know that if a connection is weak, the whole system is junk. We’ve covered a lot today, from the necessity of choosing controllers that don’t drop your WiFi signal mid-sleep to the importance of finding energy-saving outlets that don’t feel like they’re made of cheap, recycled soda bottles. If you want a smart plug for your fan, stop looking at the flashy marketing slides and start looking at the build quality and connectivity stability. You want a device that performs its one job—turning a motor on and off—without requiring you to reboot your router every three days.

    At the end of the day, technology should serve you, not the other way around. You shouldn’t have to spend your evening troubleshooting an app just to get a bit of airflow in your bedroom. My advice is simple: buy the hardware that feels substantial, check the reviews for actual connectivity issues, and don’t be afraid to walk away from the “smart” gimmicks that offer nothing but frustration. Invest in reliable tools, not expensive plastic. Once you get the right setup, you’ll forget the tech is even there, and that is exactly how a well-engineered piece of equipment should function.

    Frequently Asked Questions

    Will a smart plug actually handle the motor surge when I first turn my fan on, or is it going to fry the internal relay?

    That’s the right question to ask. Most people just look at the wattage on the box and call it a day, but they forget about inductive loads. When that fan motor kicks in, it creates an initial current surge that can weld a cheap, flimsy relay shut or fry the internal circuitry. If you’re going to do this, don’t buy the bottom-shelf plastic stuff. Look for a plug with a high-quality mechanical relay rated specifically for inductive loads.

    Do I really need a dedicated hub for these things, or can I just run them straight off my home WiFi without the headache?

    Look, I’ve seen enough network crashes to know that adding twenty cheap WiFi devices to a standard router is a recipe for disaster. If you only have one or two fans, skip the hub and go straight to WiFi. But if you’re planning to automate the whole house, get a dedicated hub. It offloads the heavy lifting from your router, meaning your internet won’t crawl to a halt every time the fan kicks on.

    If the internet goes down, am I going to be stuck sitting in a hot room because my plug won't let me use the manual switch?

    That’s the exact kind of question I wish more people asked before they started buying up gadgets. Here’s the short answer: it depends on the hardware. If you buy a cheap, cloud-dependent plug, you might find yourself staring at a dead device when the router goes down. Look for plugs that support “local control.” I always check if the physical button on the unit actually overrides the software. If it doesn’t, put it back on the shelf.

  • Stop Wasting Money on Expensive Lint: the No-nonsense Guide to Choosing the Right Fabric for Curtains

    Stop Wasting Money on Expensive Lint: the No-nonsense Guide to Choosing the Right Fabric for Curtains

    I was sitting in my workshop last Tuesday, cleaning the dust off an old Marantz receiver, when I realized how much the modern home decor industry reminds me of the junk manufacturers I dealt with back in the seventies. They want to sell you on “designer” labels and high-concept aesthetics, but they rarely talk about the structural integrity of what you’re actually hanging in your windows. Most people spend a fortune on sheer, overpriced silks that fray the moment a breeze hits them, completely ignoring the practical reality of choosing the right fabric for curtains that can actually withstand sunlight and daily use. It’s a racket, plain and simple.

    I’m not here to talk to you about color palettes or “vibe” trends that will be out of style by next Christmas. My goal is to give you the straight truth based on material durability and function. I’m going to break down which weaves hold their shape, which blends won’t fade into nothingness under a south-facing window, and which fabrics are just expensive, lightweight garbage. If you want to stop throwing money at flimsy decor and start investing in things that actually last, you’re in the right place.

    Drapery Material Durability Over Expensive Plastic Trends

    Now, if you’re feeling a bit overwhelmed by all the technical jargon regarding thread counts and weave densities, don’t beat yourself up; I’ve spent half my life reading spec sheets and I still have to double-check my math sometimes. If you want to get a second opinion or just see what other folks are dealing with in their own homes, I’ve found that checking out this chat site can be a decent way to get some real-world feedback before you commit to a massive order. It’s better to ask a few questions now than to realize you’ve bought fifty yards of something that looks like garbage once the sun hits it.

    I’ve spent enough years on factory floors to know the difference between a component built to last and something designed to be replaced in two years. Most people walk into a showroom and get blinded by the flashy patterns, but they completely ignore the drapery material durability. Nowadays, manufacturers love using thin, synthetic blends because they’re cheap to mass-produce. They look fine under the bright lights of a store, but once they’re hanging in your living room, they’ll start fraying or losing their shape within a single season.

    If you want to do this right the first time, you need to look at the curtain fabric weight and drape. For instance, when you’re weighing the pros and cons of linen vs velvet curtains, don’t just think about the look. Velvet has a substantial heft that holds its structure for years, whereas a cheap, lightweight polyester will sag and look like a wet rag after a few months of sunlight exposure. Don’t let them sell you on “trendy” lightweight weaves that have zero substance; if it feels like flimsy plastic in your hands, it’s going to perform like it in your windows.

    The Truth About Curtain Fabric Light Filtration Needs

    The Truth About Curtain Fabric Light Filtration Needs

    Now, don’t let the fancy showroom displays fool you; a curtain that looks great under studio lights might be a total failure once the sun actually hits your living room. You need to understand the mechanics of blackout vs sheer fabrics before you even think about pulling out your credit card. If you’re trying to sleep in or keep a room cool in the summer, you need a material with enough density to actually block the photons. I’ve seen too many people buy thin, decorative pieces only to realize they’ve basically just installed a glorified paper filter that does nothing for privacy or temperature control.

    When you’re evaluating options, pay close attention to the curtain fabric weight and drape. A heavy velvet is going to kill the light effectively, but it’s a lot of work to hang. On the other hand, if you want that soft, diffused glow, you’ll want something lighter. But remember: light filtration isn’t just about aesthetics; it’s about how the material performs under stress. Don’t just pick a pattern that matches your rug—pick a weight that actually does the job you’re paying it to do.

    Five Practical Rules for Not Buying Garbage

    • Check the weight before you buy. If the fabric feels like a cheap polyester shirt in your hands, it’s going to look like a mess once it’s hanging. You want something with enough heft to hang straight without constant tugging.
    • Look for natural fibers like cotton or linen. I don’t care how much they try to sell you on “synthetic blends” that claim to be better; natural fibers breathe better and don’t develop that weird, shiny look after a few months of sun exposure.
    • Inspect the weave under a bright light. If you can see gaps in the construction that look uneven, the whole curtain will sag and pull at the seams. A tight, consistent weave is a sign of a product that won’t fall apart.
    • Don’t get blinded by patterns. A busy, loud print might look decent on a tiny swatch in the store, but once it’s covering a whole wall, it’s going to be a headache. Stick to solid colors or subtle textures if you want something that actually lasts.
    • Verify the care instructions. If a fabric requires a specialized dry cleaner every single time you want to get the dust off it, you’re just buying yourself a second job. Aim for materials that can handle a standard wash without shrinking into a useless rag.

    Bottom Line: Don't Get Fooled by the Showroom

    Bottom Line: Don't Get Fooled by the Showroom.

    At the end of the day, picking the right curtain fabric comes down to basic engineering principles: durability, function, and material integrity. I’ve seen too many people walk into a big-box store and get talked into some high-gloss, synthetic blend that looks decent under the bright lights but will fray and fade within a single season. Remember what we talked about—if you need light control, go with a heavy-duty weave that can actually handle the sun’s UV rays. Don’t let a fancy pattern distract you from the physical weight and weave density of the textile. If it feels thin and flimsy in your hands, it’s going to perform poorly in your living room.

    My advice is simple: stop chasing the latest interior design trends and start looking for hardware and textiles that are built to endure. Your home isn’t a temporary showroom; it’s a place where things should be reliable and easy to maintain. When you invest in high-quality cotton, linen, or heavy-duty synthetics, you aren’t just buying window coverings—you are buying peace of mind. Buy it once, buy it right, and save your money for things that actually matter. Now, if you’ll excuse me, I’ve got a vintage Marantz receiver on my workbench that needs more attention than these modern gadgets ever will.

  • Types of Screen Protectors for Tablets

    Types of Screen Protectors for Tablets

    I was sitting at my workbench last Tuesday, tinkering with a vintage Marantz receiver, when I looked over at my tablet and saw a hairline fracture spiderwebbing across the glass. It wasn’t from a massive drop; it was just a bit of grit and a careless nudge against a metal tool. It reminded me how much money people throw away on those overpriced, “premium” tablet screen protectors that claim to use space-age technology but really just offer thin layers of glorified plastic. Most of these products are designed to separate you from your cash, not to actually defend your hardware against the rigors of real-world use.

    I’m not here to sell you on some flashy marketing gimmick or a brand name that costs more than the tablet itself. My goal is to cut through the nonsense and tell you exactly what works based on actual build quality and durability. I’ve spent enough time looking at technical specs and testing materials to know the difference between a solid shield and a temporary bandage. I’m going to show you how to pick a protector that actually stays put and keeps your screen intact, so you can stop wasting money on junk that fails the moment you actually need it.

    Table of Contents

    The Truth About Scratch Resistance for Tablets

    The Truth About Scratch Resistance for Tablets

    Most manufacturers love to throw around terms like “9H hardness” to make you think their product is invincible. Let me tell you something from a guy who spent decades looking at material tolerances: a number on a box doesn’t mean a thing if the application is sloppy. When you’re looking at scratch resistance for tablets, you need to understand that most of these cheap tempered glass options are designed to sacrifice themselves to save the actual digitizer. That’s fine, provided the glass is thick enough to handle a set of keys in your bag without shattering instantly.

    I’ve seen too many people get caught up in the debate of matte vs glossy screen protectors without realizing what they’re actually buying. A glossy finish looks beautiful in the showroom, but it’s a magnet for fingerprints and micro-abrasions. If you’re working in a shop or a garage, you might want that matte texture to cut down on reflections, but don’t expect it to feel as smooth as the original glass. Just remember, if the protector feels like sandpaper, it’s going to degrade your viewing experience faster than a rusted gear in a high-speed assembly line.

    Impact Protection for Tablets Real Defense or Expensive Plastic

    Impact Protection for Tablets Real Defense or Expensive Plastic

    Most people think a thin sheet of tempered glass is going to save their device during a three-foot drop onto a concrete floor. I’ve seen enough structural failures in my time to know that’s a dangerous assumption. While a decent guard can certainly help with impact protection for tablets, it isn’t a magic shield. If you’re buying the cheapest, thinnest glass you can find online, you aren’t buying protection; you’re just buying a sacrificial layer of expensive plastic that will shatter the moment it hits something hard.

    When I’m looking at these products, I look for the thickness and the edge reinforcement. A quality protector should have a slight bevel to dissipate energy, rather than just cracking instantly under pressure. I also see a lot of folks getting distracted by gimmicks like privacy screen protectors when what they actually need is something that won’t turn their screen into a spiderweb after one minor bump. If you want real defense, don’t just look at the marketing fluff—look at the actual material density. If it feels flimsy in your hand, it’s going to be flimsy on your tablet.

    Five Rules to Follow Before You Buy

    • Stop chasing the “ultra-thin” marketing fluff. If a protector feels like a thin layer of film, it’s not going to do a damn thing when your tablet hits a hardwood floor. Look for tempered glass with a decent thickness; you need actual mass to absorb an impact.
    • Check the oleophobic coating quality. I’ve seen too many cheap protectors that turn into a fingerprint-smudged mess within a week. A good coating should make oils slide right off, not bake into the surface.
    • Don’t get tricked by “privacy” filters unless you actually need them. Most of those dark, tinted screens ruin the color accuracy and make the display look washed out. If you’re using the tablet for design or media, you’re just paying to make your screen look worse.
    • Buy a kit that includes an alignment jig. I don’t care how steady your hands are; if you’re off by a fraction of a millimeter, you’ll end up with a bubble or a piece of dust trapped underneath. Precision matters, and these kits take the guesswork out of it.
    • Match the protector to your actual lifestyle. If you’re a tinkerer working in a garage or a workshop, go for the heavy-duty glass. If you’re just reading books on the couch, a simple, high-quality film is enough. Don’t pay for overkill you aren’t going to use.

    Roland’s Bottom Line: Don’t Get Fooled by the Packaging

    Stop chasing the highest “hardness” number on the box; a protector that stops scratches but shatters on the first drop is just as useless as no protection at all.

    If the instructions require a specialized app or a degree in computer science just to align the glass, walk away—you want something that stays put without the headache.

    Buy for the tool you actually use, not the one the marketing team says you need; if you aren’t throwing your tablet into a construction site, a thick, bulky case is just wasted money.

    The Bottom Line on Screen Protection

    “I’ve seen enough poorly engineered junk in my time to know that a screen protector isn’t about adding layers of plastic; it’s about ensuring the hardware you paid good money for doesn’t end up in a landfill because of a single careless drop.”

    Roland Delacroix

    Bottom Line: Don't Get Swayed by the Hype

    Bottom Line: Don't Get Swayed by the Hype.

    At the end of the day, choosing a screen protector shouldn’t feel like a math problem. We’ve looked at the difference between simple scratch prevention and actual impact resistance, and the lesson is clear: you have to match the protector to how you actually use the device. If you’re just sitting on the couch reading, a basic tempered glass layer is plenty. But if you’re taking that tablet out to the job site or letting the grandkids play with it, don’t settle for some flimsy, cheap film that’ll crack the first time it hits the floor. Invest in a high-quality, thick tempered glass option that offers genuine structural integrity. It’s better to spend an extra ten dollars now than to be staring at a spiderweb of cracks on a thousand-dollar screen next week.

    I’ve spent enough years in manufacturing to know that the cheapest component is often the most expensive mistake you’ll ever make. Technology is moving faster than ever, and companies are getting better at wrapping mediocre hardware in shiny, expensive packaging. Don’t let them fool you into thinking “more features” means “better protection.” Stick to the basics: look for material thickness, check the hardness rating, and trust your gut when a product feels like nothing more than overpriced plastic. Buy something that is built to last, and you won’t have to worry about your gear failing you when you need it most.

    Frequently Asked Questions

    Will a thick tempered glass protector make my touchscreen feel unresponsive or laggy?

    Look, I’ve seen enough poorly engineered interfaces to know that a thick piece of glass shouldn’t ruin your experience, but it can. If you buy a cheap, thick tempered glass protector, you’re going to deal with “ghost touches” or a laggy response that’ll drive you mad. Stick to high-quality, thin tempered glass from a reputable brand. If it’s built right, the capacitive sensors will read your finger just fine without the extra bulk.

    Is it actually worth paying a premium for "privacy" filters, or are they just a gimmick that ruins the display quality?

    Look, I’ve spent enough time squinting at blueprints to know when a spec is just marketing fluff. Privacy filters aren’t a total gimmick, but they come with a heavy tax on your hardware. You’re essentially putting a veil over your screen. Yes, it keeps prying eyes away, but you’ll lose brightness and color accuracy in the process. If you value a crisp display, stick to a standard tempered glass. Don’t pay extra to make your own screen harder to see.

    How do I get rid of those annoying air bubbles without wasting a whole new sheet of glass?

    Look, I’ve seen plenty of folks toss a perfectly good tempered glass sheet in the bin just because of a few stubborn bubbles. Don’t do that. If it’s just a bit of trapped air, grab a credit card—wrap it in a thin microfiber cloth so you don’t scratch the surface—and firmly push the bubble toward the nearest edge. If there’s a speck of dust causing it, use a piece of Scotch tape to lift the glass, snag the dust, and lay it back down. It’s simple physics, not magic.

  • Stop Wasting Money on Expensive Junk: the Common Mistakes When Buying Used Furniture That Turn a Bargain Into a Burden.

    Stop Wasting Money on Expensive Junk: the Common Mistakes When Buying Used Furniture That Turn a Bargain Into a Burden.

    I was out in a neighbor’s garage last Saturday, looking at a “vintage” dining set that was listed as a high-end heirloom. I reached out to touch the tabletop, and the moment my hand pressed down, I felt that telltale, hollow give of cheap particle board covered in a thin veneer. It was a disaster waiting to happen. Most people walk into these deals thinking they’re scoring a bargain, but they end up falling for the same common mistakes when buying used furniture—like assuming a heavy weight means quality, or letting a polished finish distract them from a structural nightmare.

    Now, I know what some of you are thinking—you don’t have the time to go scouring every dusty warehouse in the county just to find a decent sideboard or a sturdy dining set. If you’re looking to skip the legwork, I’ve found that checking specialized local listings can save you a massive headache, much like how I use ao sex steiermark to find specific regional information when I’m working on a project. Just make sure you never skip the physical inspection regardless of how good the photos look online; a high-resolution picture won’t tell you if the joints are failing or if the wood is warped. Always treat a digital listing as nothing more than a starting point for your investigation.

    I’m not here to sell you on the “thrill of the hunt” or some romanticized idea of upcycling. I’m here to give you the technical reality of what you’re actually bringing into your home. I’ve spent my career looking at how things are built, and I’m going to teach you how to inspect the joints, test the stability, and identify the difference between solid wood and expensive sawdust. I promise to tell you exactly what to look for so you stop wasting your hard-earned money on flimsy junk that won’t last a single season.

    Verifying Furniture Structural Integrity Before You Pay

    Verifying Furniture Structural Integrity Before You Pay.

    When you’re standing in someone’s garage or a crowded thrift shop, don’t just nod at the aesthetics and reach for your wallet. You need to get hands-on. I always tell people to treat a piece of furniture like a piece of machinery: look for the points of failure. Start by putting some weight on it. If you’re looking at a chair or a table, give it a firm shake. If there’s any rhythmic wobbling or a creaking sound that suggests loose joinery, walk away. Verifying furniture structural integrity isn’t just about whether it looks straight; it’s about whether the fasteners and glue are actually holding the load.

    Take a close look at the joints—the corners where the rails meet the legs. If you see gaps or cracks in the wood, that’s a sign of stress or poor craftsmanship. I always carry my notepad to jot down any irregularities I find, because once you get that item home, you’ll realize those small cracks are actually structural red flags. Don’t let a fresh coat of paint mask a frame that’s about to buckle under its own weight.

    The Secondhand Furniture Quality Checklist You Actually Need

    The Secondhand Furniture Quality Checklist You Actually Need

    I don’t believe in long, flowery lists that you’ll never actually use. Instead, I keep a tight secondhand furniture quality checklist in my notepad that focuses on the things that actually matter once you get the piece home. First, check the joinery. If you see glue seeping out of the joints or gaps in the dovetails, walk away; that’s a sign the structural bond has failed. Second, look at the finish. A few scratches are fine, but deep gouges or bubbling in the veneer usually mean the piece has suffered water damage, which is a headache you don’t want.

    Don’t forget the biological side of things, either. When you’re inspecting used furniture for damage, keep a sharp eye on the underside and any crevices for tiny dark spots or wood dust. That’s a telltale sign of beetles or other pests, and bringing those into your house is a mistake you won’t easily fix. Finally, grab your tape measure. There is nothing more frustrating than hauling a heavy oak sideboard halfway across town only to realize it won’t fit through your front door or between your bookshelves. Measure twice, buy once.

    Five Traps That’ll Turn Your Living Room Into a Money Pit

    • Stop falling for the “veneer trap.” A nice, polished wood grain might look high-end under a bright showroom light, but if you see tiny cracks or peeling edges, it’s just a thin layer of cheap laminate glued over particle board. Once that layer fails, the whole piece is garbage.
    • Don’t get blinded by the upholstery. People see a plush velvet sofa and forget to check the frame. If you sit down and hear a creak or feel a wobble, that’s not “character”—that’s a structural failure waiting to happen. You can replace fabric, but you can’t easily fix a snapped wooden rail.
    • Check the joints, not just the surface. I always carry my notepad to jot down where the connections look suspect. If a table or chair is held together by nothing but staples or cheap glue instead of mortise and tenon joinery or heavy-duty screws, walk away. It won’t survive a move, let alone a year of use.
    • Watch out for the “easy fix” lie. Sellers love to tell you a wobbly leg just needs a shim or a scratch just needs a bit of polish. Most of the time, they’re covering up deep-seated issues like wood rot or warped frames that no amount of DIY magic is going to straighten out.
    • Measure twice, buy once—and I don’t just mean the dimensions. Check the clearance of doors and hallways in your own home against the piece you’re eyeing. There is nothing more frustrating than paying for a solid oak sideboard only to realize it’s two inches too wide to fit through your front door.

    Don't Get Tricked by a Fresh Coat of Paint

    Don't Get Tricked by a Fresh Coat of Paint

    At the end of the day, buying used furniture is a game of inspection, not imagination. You’ve got to look past the staged photos and the “shabby chic” aesthetic to see what’s actually happening under the hood. Remember to check those joints for wobbles, feel for the weight of solid wood versus hollow particle board, and never, ever ignore a lingering scent of dampness or smoke. If you skip the structural check or fail to verify the materials, you aren’t saving money—you’re just pre-paying for a trip to the landfill. Stick to the checklist, trust your hands over your eyes, and don’t be afraid to walk away if the build quality doesn’t meet your standards.

    Finding a piece of furniture that lasts is a lot like finding a well-built machine; it requires a bit of patience and a healthy dose of skepticism. It might take a few extra trips to the flea market or a few more awkward questions to a seller, but the payoff is worth it. There is a genuine satisfaction in bringing a piece of real, durable craftsmanship into your home—something that won’t fall apart the moment you sit on it. Stop chasing the trends and start looking for the substance. Buy things that are built to be repaired, not replaced, and you’ll find your home becomes a lot more stable for a lot less money.

  • Choosing a Webcam for Video Calls

    Choosing a Webcam for Video Calls

    Stop letting marketing departments bully you into thinking a higher number on a box equals a better image. I’ve spent thirty years looking at technical schematics, and if there’s one thing I’ve learned, it’s that manufacturers love to use webcam resolution as a shiny distraction. They’ll slap a “4K” label on a piece of junk made of cheap, unshielded sensors and expect you to hand over your hard-earned money. It’s a shell game. You can have all the pixels in the world, but if the glass lens is subpar and the sensor can’t handle a bit of natural light, you’re just looking at a high-definition mess.

    I’m not here to recite a spec sheet or sell you on the latest overpriced gadget. My goal is simple: I want to help you cut through the noise so you can buy a tool that actually performs when you plug it in. I’ll show you exactly what to look for—and more importantly, what to ignore—to ensure you get a clear picture without paying for expensive plastic.

    Table of Contents

    720p vs 1080p vs 4k Webcam Dont Pay for Empty Promises

    720p vs 1080p vs 4k Webcam Dont Pay for Empty Promises

    When you’re looking at the spec sheet, it’s easy to fall into the trap of thinking more numbers equals a better image. You see “4K” on a box and think you’re getting a cinematic experience, but in my experience, that’s often just marketing fluff. If you’re just sitting in front of a laptop for a Tuesday morning meeting, the difference between 720p vs 1080p vs 4k webcam settings is practically invisible to the human eye on a standard monitor. Most of these cheap 4K units use tiny, subpar sensors that struggle the moment the sun goes down.

    The real secret isn’t just the pixel count; it’s about sensor size and low light performance. I’ve seen plenty of “high-resolution” cameras that look like they were filmed through a bowl of soup because the sensor is too small to catch actual light. Instead of chasing a massive number that’ll just eat up your bandwidth, look for a device that handles shadows well. If the hardware can’t manage a clean image at 1080p, adding more pixels won’t save it—it’ll just give you a clearer view of the grain.

    The Truth About Pixels Per Inch in Webcams and Image Clarity

    The Truth About Pixels Per Inch in Webcams and Image Clarity.

    Here is the truth that the marketing departments won’t tell you: a high pixel count is useless if the hardware behind it is subpar. You’ll see manufacturers touting massive numbers, but when it comes to actual clarity, you need to look at the sensor size and low light performance. In my experience, a tiny sensor crammed into a cheap housing will struggle to produce a clean image regardless of what the box says. When the light in your office drops, a small sensor starts producing “noise”—that grainy, dancing mess that makes you look like you’re filming through a screen door.

    It isn’t just about the raw number of pixels; it’s about how they are distributed and processed. You can have a high-resolution sensor, but if the frame rate and image clarity aren’t synchronized, you’ll end up with a video that looks sharp in a still photo but becomes a blurry, stuttering mess the moment you move your hands. I’ve seen plenty of “4K” gadgets that fail the moment you actually try to use them for a real meeting. Don’t let them sell you a high number if they can’t deliver a stable, clean signal.

    Five Things to Check Before You Open Your Wallet

    • Stop obsessing over the 4K label. If the manufacturer hasn’t specified the sensor size, that 4K resolution is just a way to inflate the price on a device that’s going to look grainy the moment you turn off the lights.
    • Look for “Low Light Performance” in the actual reviews, not the marketing brochure. A high-resolution sensor is useless if the glass is cheap and the sensor is too small to pull in enough light to make you look like a ghost in a basement.
    • Check your bandwidth and hardware limits first. There is no point in buying a high-end 4K webcam if your internet upload speed is sluggish or your laptop’s processor starts screaming every time you join a Zoom call.
    • Prioritize the lens quality over the pixel count. I’ve seen 1080p cameras with decent glass that outperform “4K” webcams that use plastic lenses. If the lens is cheap, the image will be soft and blurry no matter how many pixels they claim to have.
    • Don’t forget the built-in microphone. Most of these modern gadgets prioritize the visual specs while providing a microphone that sounds like you’re talking through a tin can. If you want to be heard clearly, plan to spend a little extra on a dedicated mic rather than relying on the webcam’s hardware.

    The Bottom Line: What You Actually Need to Know

    Stop chasing 4K if you’re just sitting in a dim home office; a high-quality 1080p sensor with decent glass will outperform a cheap, oversized 4K sensor every single time.

    Look past the megapixel count on the box and check the lens quality—if the optics are made of cheap plastic, all those extra pixels are just going to magnify a blurry, washed-out mess.

    Before you pull the trigger, make sure your computer can actually handle the bandwidth; there’s no point in buying a high-spec tool if your hardware turns the video into a stuttering slideshow.

    ## Stop Chasing Megapixels

    “I’ve seen enough cheap sensors to know that a box claiming 4K resolution is often just a marketing scam designed to sell you a piece of overpriced plastic. If the glass is junk and the sensor is tiny, you’re just paying more money to see a very high-resolution version of a blurry, washed-out mess.”

    Roland Delacroix

    The Bottom Line on Your Next Purchase

    The Bottom Line on Your Next Purchase.

    Look, if you’ve followed along this far, you know that a high number on a spec sheet isn’t a guarantee of quality. I’ve seen too many people shell out a premium for a 4K webcam only to realize the sensor is so small that the image looks like a grainy mess in anything less than perfect lighting. Remember: resolution is just one piece of the puzzle. You need to balance that pixel count with a decent sensor, proper light management, and a frame rate that doesn’t stutter. Don’t get distracted by the marketing fluff; focus on the actual hardware components and ensure you aren’t just paying extra for expensive plastic and empty promises.

    At the end of the day, technology should serve you, not the other way around. You shouldn’t have to fight with your equipment just to have a clear conversation with your grandkids or a professional meeting. My advice? Buy what is reliable, test it in your own environment, and don’t be afraid to walk away from a product that feels flimsy. A good tool is one that stays out of your way and just works every single time you hit that power button. Invest in substance over hype, and you’ll find that you won’t have to go shopping for a replacement in six months.

    Frequently Asked Questions

    Does a higher resolution actually matter if I'm only sitting two feet away from the camera?

    Look, if you’re sitting two feet from the lens, resolution matters more than you think, but not for the reasons the marketing guys claim. At that range, a low-res sensor is going to look grainy and “muddy” because it’s trying to stretch a tiny image to fill your screen. You don’t need 4K—that’s overkill for a desk setup—but you shouldn’t settle for 720p either. Aim for a solid 1080p with a decent sensor.

    If I buy a 4K webcam, do I need a more expensive computer to run it without lagging?

    Short answer: Yes, you likely will. A 4K stream isn’t just a bigger picture; it’s a massive amount of data your computer has to process in real-time. If you’re running an old laptop with a weak processor, that high-res video will choke your system, leading to stuttering and lag. Don’t go buying a premium 4K camera only to realize your hardware can’t actually drive it. Match the glass to the engine, or you’re just wasting money.

    Can a cheap 1080p camera actually look better than an overpriced 4K one in low light?

    Absolutely. I’ve seen it a dozen times: a high-priced 4K camera with a tiny, cheap sensor trying to do too much. In low light, that 4K image will just be a grainy, noisy mess. A decent 1080p camera with a larger sensor and better glass will pull in more light and give you a much cleaner picture. Don’t let them sell you on pixel counts; if the sensor is garbage, the resolution won’t save you.

  • Stop Buying Expensive Plastic: What to Look for in Coffee Makers That Actually Brew a Real Cup.

    Stop Buying Expensive Plastic: What to Look for in Coffee Makers That Actually Brew a Real Cup.

    I was sitting at my workbench last Tuesday, cleaning the contacts on a 1970s Marantz receiver, when I looked over at the sleek, chrome-plated monstrosity my daughter brought home last month. It has more LED lights and touchscreens than a cockpit, yet it can’t even maintain a consistent brewing temperature for more than three minutes. It’s the same story every time I walk into a big-box store; companies are trying to sell you a software update when you actually just need a heating element that won’t burn out. If you’re trying to figure out what to look for in coffee makers, don’t let a fancy digital interface distract you from the mechanical reality of the machine.

    Now, if you’re looking into the more technical side of things, don’t just take my word for it; I always suggest doing your own due diligence before pulling the trigger on a high-end unit. I’ve found that checking out specialized forums or local community guides like putas abuelas madrid can give you a better sense of how these machines actually hold up in a real-world setting. It’s easy to get lost in a sea of marketing jargon, but finding a reliable source of honest feedback is the only way to ensure you aren’t just buying a shiny paperweight that’ll end up in a landfill by next Christmas.

    I’m not here to tell you which brand has the prettiest packaging or the most expensive app. I’m going to show you how to spot the difference between a precision-engineered tool and a piece of expensive plastic that’s destined for a landfill. We’re going to talk about thermal stability, build materials, and why a simple toggle switch is often superior to a capacitive sensor. My goal is to help you buy something that actually works, day after day, without requiring a manual the size of a phone book.

    The Real Truth About Automatic Drip vs Espresso Machine

    The Real Truth About Automatic Drip vs Espresso Machine

    Now, let’s settle the debate between automatic drip vs espresso machine setups, because most people buy into the hype before they even look at the build quality. If you want a reliable morning routine, a solid automatic drip machine is hard to beat. You’re looking for something with a heavy-duty heating element and consistent thermal stability. I’ve seen too many cheap models that can’t maintain a steady heat, and if you don’t get the brewing temperature importance right, you’re just drinking bitter, lukewarm water. A good drip machine is straightforward; it does one job, and if it’s built with decent internals, it’ll do it for a decade.

    On the other hand, an espresso machine is a different beast entirely. It’s a high-pressure system with more moving parts, which means more points of failure. If you’re a hobbyist who enjoys the mechanics of it, fine—but don’t expect a machine that’s “set it and forget it.” You’ll be spending your time on constant cleaning and descaling. For most folks, an espresso machine is often over-engineered complexity for a daily habit that just needs to be efficient.

    Why Brewing Temperature Importance Actually Matters for Your Morning

    Why Brewing Temperature Importance Actually Matters for Your Morning

    Look, I’ve seen plenty of folks buy a machine based on how shiny the stainless steel looks, only to realize their coffee tastes like sour dishwater. The culprit is almost always the heat. If your machine can’t consistently hit that sweet spot—usually between 195 and 205 degrees Fahrenheit—you’re essentially just soaking grounds in lukewarm water. When the temperature drops too low, you aren’t extracting the oils and flavors; you’re just making brown, acidic tea.

    This is where a lot of the cheap, mass-produced junk fails. They use thin heating elements that can’t maintain stability once the water starts flowing. In my experience, understanding the brewing temperature importance is the difference between a mediocre morning and a decent cup of joe. When you’re doing a coffee maker features comparison, don’t just look at the clock or the timer. Look for mentions of PID controllers or thermal stability. If the manufacturer won’t tell you how they manage heat, they’re likely hiding a cheap, inconsistent heating coil behind a plastic shell.

    Five Things Most Manufacturers Hope You’ll Ignore

    • Stop obsessing over touchscreens and digital displays. A sleek glass panel looks nice in a showroom, but it’s just another point of failure. I’d much rather see heavy-duty toggle switches or solid knobs that feel substantial in your hand. If it’s all plastic and software, it’s designed to be replaced, not repaired.
    • Check the material of the water reservoir and the brew basket. If it feels light and flimsy, it’s likely cheap polymer that’ll crack or stain within a year. Look for stainless steel or high-density, BPA-free components. You want something that can withstand daily heat cycles without warping.
    • Look for a machine with a modular design. I spent thirty years in systems engineering, and I know that if a single component is soldered shut or glued into a proprietary housing, you’re looking at a paperweight the moment a seal fails. If you can’t access the internal parts to descale or replace a gasket, walk away.
    • Don’t be fooled by “smart” connectivity. I don’t need my coffee maker to send a notification to my phone or connect to my Wi-Fi. That’s just more circuitry that can malfunction. A machine should do one thing—brew excellent coffee—and it should do it reliably every single time you hit the button.
    • Inspect the build weight. It sounds simple, but physics doesn’t lie. A heavy machine usually indicates better internal shielding, more robust heating elements, and more metal where it counts. If a high-end machine feels like it’s made of hollow LEGO bricks, it’s not worth the premium price tag.

    Bottom Line: Buy for Longevity, Not for Glitz

    Bottom Line: Buy for Longevity, Not for Glitz.

    At the end of the day, don’t let a marketing department talk you into buying a machine just because it has a color touchscreen or connects to your Wi-Fi. I’ve seen enough “smart” appliances turn into expensive paperweights because a single software update bricked the whole unit. Stick to the fundamentals we talked about: prioritize a stable heating element that holds its temperature, look for substantial build quality over lightweight plastics, and ensure the brewing mechanism is something you can actually clean without a specialized toolkit. If you focus on the mechanical integrity of the machine rather than the bells and whistles, you’ll end up with a brewer that lasts years instead of months.

    Look, I know the sheer amount of gear on the market today can feel overwhelming, but you don’t need a laboratory setup to enjoy a decent cup of joe. You just need a machine that respects your time and your wallet. When you find that right balance of reliable engineering and simple operation, you’ll realize that the best technology isn’t the loudest or the flashiest—it’s the stuff that just works every single morning without fail. Go out there, do your homework, and buy something built to last.