Author: Roland Delacroix

  • Choosing a Smart Home Security Camera

    Choosing a Smart Home Security Camera

    I was out in the garage last Tuesday, trying to calibrate an old Marantz receiver, when my phone started screaming at me with a notification for my “smart” security system. I checked the feed, only to find a gust of wind had knocked a stray branch against the lens, triggering a high-priority alert. It’s the same old story: companies are selling you a smart home security camera wrapped in a shiny marketing package, but underneath the hood, it’s just buggy software and cheap sensors that can’t tell the difference between a burglar and a tree. I’m tired of seeing people throw hundreds of dollars at overhyped plastic junk that fails the moment the Wi-Fi hiccups or a cloud server goes down.

    I didn’t spend thirty years as a systems engineer to be fooled by flashy apps and subscription models. In this guide, I’m going to cut through the marketing nonsense and tell you which devices actually have the build quality to last and the reliability you need when it actually matters. I’ll show you how to spot the difference between a real tool and a glorified toy, so you can protect your home without wasting a dime on unreliable tech.

    Table of Contents

    Dont Get Tricked by Fancy Wireless Video Doorbell Features
    Dont Get Tricked by Fancy Wireless Video Doorbell Features

    Don’t Get Tricked by Fancy Wireless Video Doorbell Features

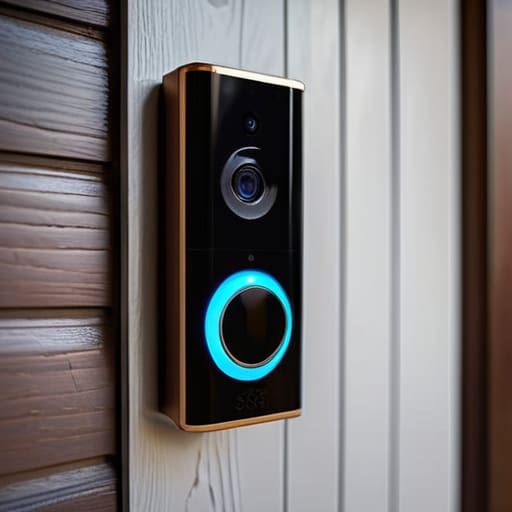
    I see it every time I walk into a big-box store: a glossy box promising the moon with a dozen different bells and whistles. Manufacturers love to bury you in a list of wireless video doorbell features that sound impressive on paper but offer zero real-world value. They’ll talk about AI that can supposedly tell the difference between a stray cat and your neighbor, but half the time, you’ll just end up with a phone that won’t stop buzzing every time a leaf blows past your porch. You don’t need a computer science degree to secure your front door; you need a device that actually triggers when it’s supposed to.

    One of the biggest traps they set is the subscription model. They’ll sell you a sleek-looking unit for a bargain price, only to reveal later that you can’t even see your own footage without a monthly fee. This is where the debate over cloud storage vs local recording becomes vital. If you want true reliability, look for a system that allows you to save video directly to a microSD card or a home hub. Don’t let them lock your own data behind a paywall just because they used a bit of polished plastic instead of solid hardware.

    Cloud Storage vs Local Recording Where Does Your Data Live

    Cloud Storage vs Local Recording Where Does Your Data Live

    Now, let’s talk about where your footage actually goes, because this is where most people get caught in a subscription trap. You’ll see plenty of manufacturers pushing cloud storage vs local recording as if the cloud is the only way to fly. They want you to pay a monthly fee just to see what happened on your porch ten minutes ago. In my experience, relying solely on the cloud is a gamble; if your internet drops out right when someone is tampering with your gate, you’re left with nothing but a blank screen.

    If you ask me, you want hardware that supports an SD card or a dedicated NVR. Local recording means you own your data, and more importantly, it works even when the Wi-Fi is acting up. I’ve seen too many “smart” setups fail because a server went down halfway across the country. If you can’t access your footage without a recurring monthly bill, you don’t truly own the device—you’re just renting it. Look for gear that offers a solid local option so you aren’t paying a “digital tax” just to keep your own files.

    Five Things to Check Before You Hand Over Your Credit Card

    • Look for a physical mounting bracket that actually feels solid. If the mounting hardware is made of that thin, brittle plastic, the first stiff breeze or heavy rain is going to knock your expensive investment right off the wall.
    • Check the power source requirements before you commit. I’ve seen too many people buy a “wire-free” camera only to realize they’re spending half their life climbing a ladder to recharge a battery that dies every three days.
    • Verify the field of view and avoid the “fisheye” trap. Some manufacturers use ultra-wide lenses that make everything look clear until you try to identify a face, at which point everything turns into a blurry, distorted mess.
    • Demand a decent night vision range. A camera that looks great at noon is useless if its infrared sensors can’t see more than five feet into the darkness of your driveway.
    • Make sure the setup isn’t a headache. If the instruction manual is just a QR code that leads to a bloated app, walk away. You want a system that connects to your network and stays connected without needing a software update every Tuesday.

    The Bottom Line: What to Look for Before You Pull the Trigger

    Prioritize local storage over monthly subscriptions; if you’re paying a fee just to view your own footage, you’ve been sold a lemon.

    Check the build material—if it feels like a cheap toy in your hand, it won’t survive a single season of real weather.

    Demand reliability over “smart” gimmicks; a camera that’s too complicated to set up is just a high-tech paperweight when you actually need it.

    ## The Real Test of a Camera

    I don’t care how many megapixels a marketing brochure promises or how many “AI detection” bells and whistles they throw at you; if that camera can’t stay connected to your network when the weather turns sour, you haven’t bought a security tool, you’ve just bought an expensive piece of plastic for your porch.

    Roland Delacroix

    Bottom Line: Don't Buy the Hype
    Bottom Line: Don't Buy the Hype.

    At the end of the day, choosing a security camera shouldn’t feel like you’re signing a contract with a tech company you don’t trust. We’ve looked at why those flashy doorbell gimmicks are often just distractions, and why relying solely on a cloud subscription is a recipe for a headache when your internet decides to act up. If you want real security, you need to prioritize hardware that offers local storage options and a build quality that can actually withstand a summer heatwave or a winter freeze. Stop looking at the marketing brochures and start looking at the technical specifications—specifically how the device handles data and how much “planned obsolescence” is baked into the plastic.

    I know the sheer amount of options out there can be overwhelming, but don’t let the marketing departments bully you into buying something you don’t need. A security system is meant to give you peace of mind, not a second job managing notifications and troubleshooting software bugs. Buy something that is built to last, something that respects your privacy, and most importantly, something that actually works when the doorbell rings at 2:00 AM. Invest in reliability, not just the latest shiny gadget, and you won’t find yourself replacing the whole system again in eighteen months.

    Frequently Asked Questions

    If I go with a local storage setup, how hard is it to actually get my footage back when I need to see something?

    Look, if you go local, you aren’t at the mercy of some company’s server going down. But don’t expect it to be “plug and play” like a smartphone. You’ll likely be plugging an SD card into your computer or accessing a hard drive via your network. It’s a bit more hands-on, sure, but once you’ve got the file path set up, you have total control. No subscriptions, no lag—just your footage, right where you left it.

    Do these wireless models really hold up against bad weather, or is the casing going to crack after one winter?

    That’s the million-dollar question. Most of these wireless units are built with thin, injection-molded plastic that’s fine for a sunny porch, but they’ll fail you when the temperature swings. If you’re looking at a model, don’t just look at the resolution; look for an IP65 or IP67 rating. If the casing feels light and hollow, it’s going to crack under UV exposure or freeze up during a hard frost. Buy hardware, not toys.

    How much extra am I going to be paying in monthly subscription fees just to keep the basic features working?

    That’s the real kicker, isn’t it? They sell you the hardware for a reasonable price, but then they hold your own footage hostage. Most of these companies charge anywhere from $4 to $15 a month just to let you see recorded clips or get decent motion alerts. Over three years, that “cheap” camera just became a recurring tax. If it doesn’t have a microSD slot for local storage, you’re just renting your own security.

  • How to Choose a Portable Power Bank

    How to Choose a Portable Power Bank

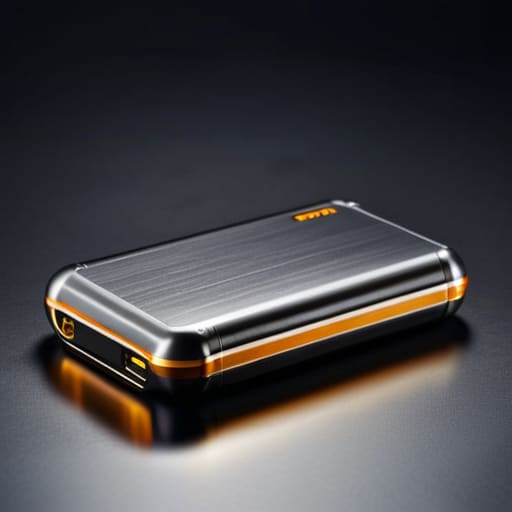
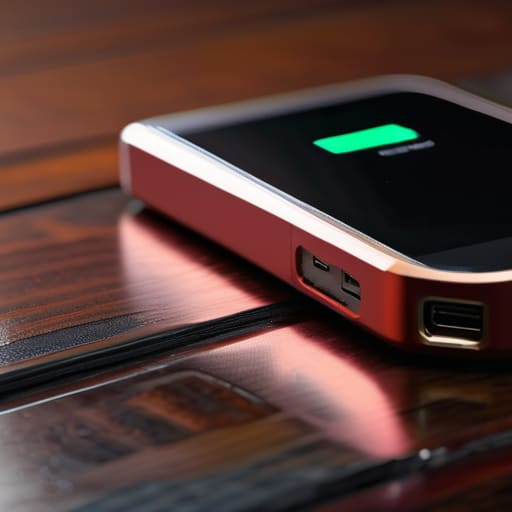
    I was sitting at my workbench last Tuesday, tinkering with an old Marantz receiver, when I realized just how much the industry has started lying to us. I’d just picked up a “high-capacity” portable charger that promised enough juice to run a small village, only to find it died halfway through a single phone charge. It’s the same old story: manufacturers slap a massive number on the box to dazzle you, but when it comes down to actual power banks capacity, the reality is usually a joke. They’re selling you marketing fluff wrapped in cheap, lightweight plastic that can’t hold a steady current to save its life.

    I’m not here to walk you through a technical manual or bore you with theoretical physics. I’ve spent thirty years looking at how things are actually built, and I know when a spec sheet is being dishonest. In this guide, I’m going to show you how to look past the big numbers and find out what these things can actually do for you. I’ll teach you how to spot the difference between a reliable piece of kit and an expensive paperweight before you open your wallet.

    Table of Contents

    Mah vs Wh Explained Decoding the Lies on the Box

    Mah vs Wh Explained Decoding the Lies on the Box

    Look, most manufacturers love to slap a massive “20,000 mAh” sticker on the front of a box because they know that big number makes people feel good. It’s a marketing trick, plain and simple. The problem is that mAh (milliamp-hours) only tells you one part of the story; it doesn’t account for the voltage. If you want to know how much actual work a device can do, you need to stop looking at the milliamp rating and start looking at the Wh (Watt-hours).

    Think of it like this: mAh is like measuring the size of a fuel tank, but Wh tells you how much energy is actually in the tank. When we talk about mAh vs Wh explained, we’re really talking about the difference between a measurement of charge and a measurement of total energy. This is why a high-capacity lithium ion battery capacity might look impressive on paper, but if the voltage is low, it won’t power your laptop for more than twenty minutes. If you want to avoid buying a heavy, useless brick, check the Wh rating on the fine print before you hand over your hard-earned money.

    Energy Density in Power Banks Why Size Isnt Everything

    Energy Density in Power Banks Why Size Isnt Everything

    Now, don’t let a compact design fool you into thinking a device is inferior. In my engineering days, we dealt with this constantly—trying to pack more output into a smaller footprint without the whole thing turning into a heater. When you look at energy density in power banks, you’re looking at how much juice is actually packed into the physical cells. A high-end unit might be half the size of a cheap competitor but hold the same amount of charge because they aren’t cutting corners on the chemistry.

    The problem is that manufacturers love to hide behind slim profiles. They’ll sell you a pocket-sized unit that looks sleek, but if they’ve used low-grade cells to achieve that size, you’re going to see a massive drop in lithium ion battery capacity after only a few months. I’ve seen it a dozen times: a device that works great for a week and then dies halfway through a charge. If you want something that lasts, look for a build that feels substantial. If it feels like a hollow piece of cheap plastic, it probably is.

    Five Rules of Thumb Before You Open Your Wallet

    • Check the discharge rate, not just the total capacity. A power bank might claim a massive capacity, but if the internal circuitry can’t push that energy out fast enough, you’ll be sitting there for three hours just to get a 20% charge on your phone.
    • Look for real-world reviews that mention “actual capacity.” Manufacturers love to print the theoretical maximum on the box, but once you account for heat loss and voltage conversion, you’re usually only getting about 60% to 70% of that number into your device.
    • Avoid the “ultra-slim” trap. In my experience, if a manufacturer manages to cram a massive mAh rating into a device that’s thin enough to fit in a shirt pocket, they’ve likely compromised on cell quality or used cheap, low-density chemistry to save on weight.
    • Demand a reputable brand with a clear warranty. I’ve seen too many “no-name” units from online marketplaces that claim to be 30,000mAh but die after three cycles. If they won’t stand behind the build quality, they’re selling you junk.
    • Match the output to your needs. There’s no sense in buying a heavy-duty power bank with high-wattage USB-C PD if you only intend to charge a pair of wireless earbuds. Don’t pay for extra capacity and power you’re just going to carry around like dead weight.

    The Bottom Line: What to Look for Before You Pay

    Ignore the giant mAh numbers printed in bright colors on the box; look for the Watt-hour (Wh) rating instead, because that’s the only measurement that tells you how much actual work the battery can do.

    Factor in the “conversion tax”—you’ll never get 100% of that advertised capacity into your phone because energy is lost as heat during the transfer, so always buy more than you think you need.

    Demand build quality over slimness; a power bank that feels like a hollow piece of cheap plastic is likely using low-grade cells that will lose their ability to hold a charge before you even finish paying it off.

    ## The Truth About the Label

    Stop letting a high mAh number blind you; if the manufacturer won’t tell you the actual watt-hours, they aren’t selling you a power source, they’re selling you a marketing gimmick wrapped in cheap plastic.

    Roland Delacroix

    Bottom Line: Don't Pay for Marketing Fluff

    Bottom Line: Don't Pay for Marketing Fluff.

    At the end of the day, don’t let a flashy marketing campaign or a massive number on a box do the thinking for you. We’ve covered enough to know that a high mAh rating is meaningless if the manufacturer is cutting corners on cell quality or hiding the true energy density. You need to look past the surface-level specs and understand the difference between Wh and mAh, because that’s where the real math happens. If you aren’t checking for reputable brands that actually report their capacity accurately, you aren’t buying a power source—you’re just buying a heavy, expensive paperweight that will fail you right when your phone hits 1%.

    My advice is simple: buy for utility, not for hype. I’ve spent my career looking at how things are built from the inside out, and I can tell you that the best piece of tech is the one that actually works when you need it most. Stop chasing the newest, thinnest gadget just because it looks good on a shelf. Instead, look for build quality, verified capacity, and a design that respects your time and your wallet. Invest in reliable hardware that does its job without needing a software update, and you’ll never find yourself stranded with a dead battery and a handful of expensive plastic junk.

    Frequently Asked Questions

    If a power bank says it's 20,000mAh, why does it feel like it only charges my phone once or twice?

    It’s not your imagination, and it’s not a broken battery. Here’s the reality: that 20,000mAh number is the total capacity of the cells inside, but you can’t actually use all of it. Between the energy lost as heat during the conversion process and the voltage jump required to charge your phone, you’re looking at a “real-world” efficiency of maybe 65% to 70%. You aren’t getting 20,000mAh; you’re getting about 14,000.

    Does the charging speed of my wall adapter actually change how much usable energy I get out of the bank?

    Look, it’s a common misconception, but let’s get one thing straight: your wall adapter doesn’t change the total amount of energy stored inside the cells. If a bank has 10,000mAh, it has 10,000mAh whether you charge it with a snail or a lightning bolt. What the adapter does change is how long you’re stuck waiting by the outlet. A faster brick gets the job done sooner, but it won’t magically turn a small battery into a big one.

    How much does the temperature of my gear affect how much capacity I'm actually getting during a trip?

    Look, if you’re hiking in the freezing cold or leaving your gear in a hot car, don’t expect those numbers on the box to hold up. Lithium batteries are temperamental; extreme cold slows down the chemical reaction, making the capacity feel like it’s evaporated. On the flip side, heat is a silent killer that degrades the cells permanently. Keep your power bank in an inside pocket near your body warmth. Treat it like a precision tool, not a tank.

  • The 7 Best Top Rated Espresso Machines for Home Use to Upgrade Your Morning

    The 7 Best Top Rated Espresso Machines for Home Use to Upgrade Your Morning

    I’ve spent three decades looking at blueprints and stress-testing components, so I have a low tolerance for anything that feels like it was designed to fail. Nowadays, you walk into any big-box store and get hit with a wall of shiny, lightweight gadgets that look great under LED lights but feel like they’ll crack if you look at them wrong. Most people think they need a complicated computer interface to get a decent caffeine fix, but they’re actually just paying a premium for expensive plastic and unnecessary software. Finding the top rated espresso machines for home use shouldn’t feel like a gamble where you lose fifty bucks every time a seal leaks or a pump dies.

    I’m not here to sell you on the latest “smart” gimmick that requires a Wi-Fi connection just to brew a shot. Instead, I’ve put my notepad to work and vetted seven specific machines that actually prioritize build quality and thermal stability. In the following list, I’m going to break down which models offer real mechanical reliability and which ones are just overpriced paperweights. By the time you finish reading, you’ll know exactly which machine will actually sit on your counter and do its job every single morning without a fight.

    The Workhorse for Real Enthusiasts

    The Workhorse for Real Enthusiasts.

    Now, before you go out and drop a month’s worth of grocery money on one of these machines, I want to give you one piece of advice: don’t let the flashy marketing fool you. If you find yourself getting overwhelmed by all the technical jargon and conflicting reviews online, I’ve found that checking out more practical, community-driven advice can help clarify things. Sometimes, looking for unfiltered opinions on sites like women looking for sex or similar forums can give you a better sense of how people actually use these gadgets in their daily lives, rather than just reading a spec sheet. It’s all about finding that real-world reliability before you commit to a piece of hardware.

    If you’re tired of machines that feel like they were made in a toy factory, the Breville Bambino Plus is a decent starting point. It’s got a compact footprint, which is fine, but what I actually care about is how it handles the temperature. It uses a thermojet heating system that gets up to temp in seconds, which is impressive enough for a machine this small.

    Built Like a Tank

    Now, if you want to talk about actual engineering, we have to look at the Rancilio Silvia. This machine is the closest thing I’ve found to the industrial hardware I used to design back in the day. It’s heavy, it’s made of stainless steel, and it feels like it could survive a minor earthquake without skipping a beat.

    Overkill for Most, Perfect for Some

    The Rocket Espresso Appartamento is a beautiful piece of machinery, but I’m not talking about the aesthetics. I’m talking about the dual boiler system. Having a dedicated boiler for steam and another for brewing means you aren’t sitting around waiting for the temperature to stabilize between tasks. It’s a logical design that respects your time.

    The Automated Compromise

    I usually have a hard time with fully automatic machines because they hide the mechanics from you, and I don’t like being kept in the dark. The Jura E8 is a prime example of this “black box” approach. It’s incredibly convenient, and I’ll give it that—you press a button and a drink appears.

    The Professional's Home Companion

    The Lelit Mara X is a clever bit of engineering that tries to bridge the gap between consumer gadgets and professional gear. It uses a PID controller to manage temperature, which is a fancy way of saying it keeps things consistent. In my experience, consistency is the difference between a good cup and a mediocre one.

    Simplicity at Its Best

    Sometimes, you just want a machine that does one thing and does it well without a touchscreen or a Wi-Fi connection. The Gaggia Classic Pro is exactly that. It’s a straightforward, mechanical affair that relies on proven designs rather than unnecessary software.

    The High-End Investment

    If you have the budget and you want the absolute pinnacle of home brewing, the La Marzocco Linea Micra is where the conversation ends. This isn’t just a kitchen appliance; it’s a scaled-down version of the machines you’d see in a high-end cafe. The thermal stability is virtually unmatched in the consumer market.

    The Bottom Line on Your Morning Brew

    Look, I’ve spent the last few weeks tearing through these specs, and the lesson is clear: you have to decide whether you want a kitchen appliance or a piece of machinery. If you want something that just works with the push of a button, go for the automated models we discussed, but if you actually care about the longevity of the heating elements and the pressure stability, you’ll want to invest in something with more manual control. Don’t get distracted by fancy touchscreens or Wi-Fi connectivity that will be obsolete in three years; focus on the build quality and the ease of maintenance. A machine is only as good as your ability to clean it and keep it running year after year.

    At the end of the day, your espresso machine shouldn’t be a source of frustration before you’ve even had your first sip of caffeine. I’ve seen enough “smart” gadgets fail because they relied too heavily on software instead of solid mechanical engineering. Buy something that feels substantial in your hands and offers a predictable result every single morning. If you pick a machine based on reliability rather than hype, you aren’t just buying a way to make coffee—you’re buying a reliable part of your daily routine that won’t end up in a landfill by next Christmas. Now, go get yourself a decent cup.

  • Managing Home Heating With Smart Plugs

    Managing Home Heating With Smart Plugs

    I was sitting in my workshop last Tuesday, tinkering with an old Marantz receiver, when I realized how much the industry has shifted from building things that last to building things that just look sleek. I saw a neighbor struggling with a “smart home” setup that had completely lost its mind; his heater wouldn’t kick on because his Wi-Fi dropped for three seconds. It’s absolute nonsense. People are being sold these glorified, flimsy gadgets under the guise of efficiency, but most smart plugs for heating on the market today are nothing more than overpriced plastic that will fail you the moment a real frost hits.

    I’m not here to sell you on a lifestyle or show you how to turn your living room into a sci-fi movie set. My goal is much simpler: I want to help you find hardware that actually does its job without requiring a software update every other week. I’ve spent the last month putting several models through the ringer, checking their load capacities and connection stability, so you don’t have to. I’ll tell you exactly which ones are worth your hard-earned money and which ones belong in the scrap heap.

    Table of Contents

    Dont Blow a Fuse Checking Smart Plug Wattage Capacity for Heaters

    Dont Blow a Fuse Checking Smart Plug Wattage Capacity for Heaters

    Before you go clicking “buy” on some flashy gadget, pull out your manual and look for the numbers. This is where most people trip up. A space heater isn’t like a bedside lamp; it pulls a massive amount of current to generate heat. If you try to run a high-wattage ceramic heater through a cheap, underpowered plug, you aren’t just being inefficient—you’re creating a fire hazard. You need to verify the smart plug wattage capacity for heaters against the actual draw of your unit. I always tell my friends to check the sticker on the back of the heater first. If that heater pulls 1,500 watts and your plug is only rated for 10 amps, you’re asking for a melted casing and a tripped breaker.

    Don’t just assume “smart” means “heavy duty.” In my engineering days, we lived by the spec sheet, and you should too. I highly recommend looking for models that include smart plug energy monitoring. Not only does this let you see exactly how much juice that old heater is sucking up, but it also gives you peace of mind that the hardware is handling the load without overheating. If the app shows the wattage spiking near the plug’s limit, it’s time to pull the plug—literally.

    Reducing Heating Bills With Smart Tech That Actually Works

    Reducing Heating Bills With Smart Tech That Actually Works

    Look, the whole point of bringing these gadgets into your home isn’t just to play with your phone; it’s about efficiency. Most people leave their space heaters running in empty rooms because they’re too lazy to walk over to the wall, or they forget to turn them off before heading to bed. That is essentially throwing cash into a furnace. By setting up automated heating schedules, you ensure the heat is only drawing power when you actually need it. I’ve found that a simple schedule—turning the unit off at 8:00 AM and back on at 5:00 PM—can do more for your wallet than any fancy thermostat ever could.

    If you really want to see where your money is going, you need to look for a model with smart plug energy monitoring. I always keep my notepad handy to log the kilowatt-hour readings over a week. If you can’t see the data, you’re just guessing. Most of these modern apps let you track usage in real-time, which takes the guesswork out of reducing heating bills with smart tech. If the numbers don’t drop after a week of scheduling, you’ve either got a bad heater or you’re using the wrong plug.

    Five Things to Check Before You Plug Anything In

    • Look for a physical override switch. I’ve seen too many “smart” devices that turn into expensive paperweights if your Wi-Fi drops out; you need to be able to click that heater on manually without needing a smartphone.
    • Demand a heavy-duty build. If the plug feels light or hollow, walk away. Heating elements draw a lot of current, and cheap, thin plastic will warp or even melt under a sustained load.
    • Check the app’s stability. If the manufacturer’s software looks like it was slapped together by a teenager, the connection will be unreliable. A smart plug is useless if you can’t trust the schedule you set.
    • Verify the “Energy Monitoring” feature. If you’re serious about cutting costs, don’t just buy a timer; get a plug that actually reports real-time wattage so you can see exactly how much that space heater is eating from your wallet.
    • Ensure it works with your existing ecosystem. Don’t get caught in a trap where you need five different apps just to run your living room. Stick to brands that play well with others so you aren’t constantly troubleshooting your own house.

    The Bottom Line: What to Look for Before You Buy

    Never trust a cheap, unbranded plug with a space heater; if the wattage rating isn’t clearly stated in the manual, leave it on the shelf.

    Prioritize a stable Wi-Fi connection over fancy app features, because a “smart” plug is useless if it can’t talk to your router when the temperature drops.

    Look for physical build quality—if the plastic feels thin or flimsy in your hand, it won’t handle the continuous electrical load required to keep a room warm.

    ## The Golden Rule of Heating Tech

    “I’ve seen too many folks buy a cheap, $10 plastic plug from a big-box store and try to run a space heater through it. That’s not ‘smart’ living; that’s asking for a melted outlet and a fire hazard. If you aren’t checking the amperage rating on that plug against the heater’s draw, you aren’t saving money—you’re gambling with your house.”

    Roland Delacroix

    Bottom Line: Don't Get Swept Up in the Hype

    Bottom Line: Don't Get Swept Up in the Hype.

    At the end of the day, choosing a smart plug for your heating isn’t about finding the one with the flashiest app or the most colorful LED ring. It’s about the fundamentals: checking your wattage to ensure you don’t melt a circuit, and selecting a device with a reliable wireless connection that won’t drop out the moment the weather turns. I’ve seen too many folks buy a cheap, flimsy unit only to have it fail right when the temperature drops below freezing. If you stick to the specs, prioritize build quality over brand names, and ensure the plug can handle the actual load of your heater, you’ll save yourself a massive headache and a lot of wasted cash.

    Technology should serve you, not the other way around. You don’t need a complicated ecosystem of interconnected gadgets just to keep your living room comfortable; you just need tools that do exactly what they claim on the box. My advice? Take a moment to read the manual, check your connections, and buy equipment that is built to last. When you stop chasing every new shiny gadget and start focusing on reliability and practical utility, you’ll find that modern tech can actually make your life easier without turning your home into a science experiment.

    Frequently Asked Questions

    Can I use a smart plug with an electric baseboard heater, or is that asking for a fire hazard?

    Look, I’ll give it to you straight: in most cases, you shouldn’t. Most electric baseboard heaters pull a massive amount of continuous current, and most consumer-grade smart plugs just aren’t built to handle that kind of sustained load. You’re essentially asking a piece of inexpensive plastic to manage a high-voltage beast. If the internal relay fails or the connections overheat, you’ve got a serious fire hazard on your hands. Stick to a dedicated smart thermostat instead.

    How do I know if the smart plug's app is actually going to work with my existing home Wi-Fi setup?

    Look, there’s nothing more frustrating than unboxing a piece of gear only to have it fail because it can’t talk to your router. Before you buy, check if the plug requires a 2.4GHz band. Most do, and if your router tries to force everything onto 5GHz, you’re going to have a headache. If you aren’t tech-savvy, stick to brands that explicitly mention “easy setup” or “dual-band support.” Don’t let a bad connection turn your heater into a paperweight.

    Is it worth buying a more expensive brand, or will a cheap one do the same job without burning out?

    Look, I’ve seen enough melted plastic in my time to know that “cheap” usually comes with a hidden tax. If you’re plugging in a low-wattage lamp, sure, grab the bargain bin option. But for a space heater? Don’t be reckless. A cheap plug uses inferior relays that can weld themselves shut or, worse, overheat under a continuous load. Spend the extra twenty bucks on a reputable brand. It’s not about the fancy app; it’s about the components inside.

  • How to Install a Smart Thermostat

    How to Install a Smart Thermostat

    I was sitting on my workshop floor last Tuesday, staring at a pile of colorful wires and a sleek, white plastic slab that was supposed to make my life “easier,” but instead felt like a puzzle designed by someone who has never held a screwdriver. The marketing promised a seamless experience, but the reality of smart thermostat setup is often a mess of incompatible voltage and confusing apps that demand more attention than a high-maintenance pet. I’ve spent thirty years in systems engineering, and if there is one thing I know, it’s that complexity is usually just a mask for poor design.

    I’m not here to sell you on the “magic” of a connected home or some fancy cloud-based algorithm. What I am going to give you is a practical, engineer-approved roadmap to getting your unit installed without blowing a fuse or losing your mind. We are going to skip the marketing fluff and focus on the actual hardware—checking your C-wire, verifying your terminal connections, and ensuring the software doesn’t become a useless paperweight the moment you walk away. Let’s get to work and do this right the first time.

    Table of Contents

    Guide Overview

    Total Time: 30-60 minutes
    Estimated Cost: $100-250
    Difficulty: Beginner

    Tools & Supplies

    • Screwdriver (Phillips or Flathead for terminal screws)
    • Smartphone (For app configuration and Wi-Fi setup)
    • Drill (Optional, for mounting new wall anchors)
    • Smart Thermostat (1 unit)
    • Wall Anchors and Screws (Included with unit)
    • Electrical Tape (Small amount for wire management)

    Step-by-Step Instructions

    • 1. Before you even think about unscrewing anything, go to your breaker box and kill the power to your HVAC system. I’ve seen too many folks try to play it safe by just turning the thermostat to “off,” but that won’t stop a stray wire from shorting out your control board. You want zero chance of a spark while you’re working.
    • 2. Pop that old faceplate off and take a good, long look at the wiring. Don’t trust the labels on the wires themselves; they’re often wrong. Grab that notepad I mentioned and sketch out exactly where each wire goes—which one is in the R terminal, which is the C, and so on. If you don’t document this now, you’ll be staring at a bird’s nest of copper later wondering why your AC won’t kick on.
    • 3. Now, here is where most people stumble: the C-wire. Most modern smart thermostats need a “common” wire to provide constant power, or they’ll just die on you. If you don’t see one tucked in the wall, don’t panic, but don’t try to wing it by just stripping more copper. You might need a power extender kit, which usually comes in the box, but you’ll need to follow its specific wiring diagram to the letter.
    • 4. Once you’ve got your map, pull the old baseplate off and mount the new one. Use a level—not your “eye-balling it” method—because if that thing is crooked, it’s going to drive you crazy every time you walk past it. Secure the screws firmly, but don’t over-torque them; these plastic housings aren’t built like the heavy-duty steel components I used to work with, and you’ll crack the casing if you’re too aggressive.
    • 5. Feed those wires through the new base and tighten the terminal screws until the wire is snug. Give each one a gentle tug to make sure it’s actually seated in the terminal. If a wire slips out while you’re trying to snap the faceplate on, you’re going to have a much longer afternoon than you planned.
    • 6. Snap the display unit onto the base, head back to the breaker, and flip the power back on. If the screen lights up, you’ve cleared the first hurdle. If it stays dark, don’t start cursing the manufacturer just yet; nine times out of ten, it’s a loose connection or a blown fuse in the furnace caused by a wire touching the wrong terminal during installation.
    • 7. Finally, get to the software side of things. The app will walk you through the Wi-Fi connection, but don’t get distracted by all the “smart features” and “energy savings” fluff they try to sell you. Focus on the core scheduling settings first. Make sure the system actually triggers the heat and the cooling properly before you spend an hour customizing your lighting scenes or weather reports.

    Verify Your Hvac System Compatibility Before You Buy

    Verify Your Hvac System Compatibility Before You Buy

    Before you go clicking “buy” on some shiny new gadget, you need to pull the cover off your current thermostat and actually look at what’s behind it. Most of these modern units aren’t just plug-and-play; they require a constant stream of power to keep that Wi-Fi radio running. I’ve seen far too many folks get halfway through their smart thermostat installation steps only to realize they’re missing the one crucial wire that makes the whole thing tick.

    Specifically, you’re looking for a “C-wire”—that common wire that provides continuous 24V power. If you open your wall box and see nothing but two or three thin wires tucked into the drywall, you’ve got a problem. You can try to find a workaround with a power extender kit, but I’d rather you check your HVAC system compatibility upfront. It’s much easier to verify your wiring than it is to return a piece of expensive plastic because it won’t even turn on. Don’t let the marketing fluff convince you it’s simple; verify the hardware first.

    Mastering the Smart Thermostat Wiring Diagram Without the Stress

    Mastering the Smart Thermostat Wiring Diagram Without the Stress

    Now, don’t let that colorful little piece of paper they call a smart thermostat wiring diagram intimidate you. It looks like a mess of spaghetti, but it’s actually quite logical if you approach it like a real engineer. Before you start stripping any wires, take a clear photo of your old setup. I’ve seen too many folks pull everything out, lose track of which wire went where, and end up staring at a dead furnace. Label every single wire with the stickers provided in the box before you disconnect a thing. If the letters on your old terminal don’t match the new ones, don’t guess—check the actual wire color and the manual.

    The biggest headache I see is the dreaded “C-wire” issue. Most of these modern, fancy units need constant power to keep their Wi-Fi radios running, and if you don’t have that common wire, you’re going to have a bad time. If your old setup is missing it, don’t just assume you can bypass it with some cheap adapter. Follow a proper C-wire connection guide or consider a professional if the wiring looks more like a bird’s nest than a circuit. Measure twice, wire once.

    Five Things the Salesman Won't Tell You Before You Start

    • Label your wires before you touch a single screw. I don’t care how easy the app claims it is; once those colored wires pop out of the wall and go back into the drywall, you’re looking at a three-hour headache you didn’t ask for. Use the stickers that come in the box, or better yet, use my old masking tape and a Sharpie.
    • Check your C-wire connection twice. These modern gadgets are hungry for power, and if you think you can just “bypass” the common wire, you’re asking for a flickering screen or a system that shuts down in the middle of a heatwave. If you don’t have one, don’t wing it—buy a power adapter.
    • Don’t mount it right next to a drafty window or a heat vent. I’ve seen plenty of folks complain their thermostat is “broken” when, in reality, it’s just sitting in a pocket of hot air. It needs to be on an interior wall, away from direct sunlight, or the readings will be junk.
    • Take a photo of the old wiring before you disconnect anything. Digital manuals are great until your Wi-Fi goes down or your phone dies mid-install. Having a clear, high-resolution photo of exactly where the R, W, and Y wires sat in the old unit is your best insurance policy.
    • Test the system manually before you walk away. Once it’s on the wall, don’t just trust the app. Go turn the heat up and listen for the furnace to kick in, then switch it to cooling and make sure the AC actually engages. You want to find the problems while you still have your tools in your hand, not at 2:00 AM when the house is freezing.

    The Bottom Line: Don't Get Burned by the Hype

    Before you even crack the box, double-check that your C-wire is actually there; if you’re flying blind without constant power, no amount of software updates will save that thermostat from acting up.

    Treat the wiring like you would a vintage amplifier—measure twice, connect once, and if a terminal feels flimsy or doesn’t seat properly, don’t force it just to get it done.

    Stop trying to automate everything through a buggy app; make sure the physical interface on the wall is intuitive enough that you can actually adjust the temperature when the Wi-Fi decides to take a nap.

    The Golden Rule of Installation

    I’ve seen enough blown fuses and fried control boards to know one thing: a smart thermostat isn’t a toy, and it isn’t a magic wand. If you skip the step of verifying your C-wire or ignore a loose terminal connection just to get the app running faster, you aren’t being efficient—you’re being reckless with your own money.

    Roland Delacroix

    Don't Let the Tech Win

    Don't Let the Tech Win: Smart Thermostat.

    At the end of the day, setting up a smart thermostat shouldn’t feel like you’re trying to crack a safe. We’ve covered the essentials: you checked your HVAC compatibility so you didn’t waste a dime, you verified your C-wire was actually present, and you sat down with that wiring diagram instead of just guessing and hoping for the best. If you followed those steps and the unit is finally communicating with your furnace, you’ve done the heavy lifting. Most of the headaches people run into come from rushing the installation or ignoring the fine print in the manual, but if you took the time to do it right, you’ve avoided the most common pitfalls that lead to a service call.

    My advice? Once it’s up and running, stop fiddling with the app every five minutes. These devices are meant to work for you, not the other way around. Technology is at its best when it’s reliable and invisible, quietly managing your home’s climate while you focus on more important things. You’ve put in the work to ensure your system is efficient and properly wired; now, let the hardware do what it was engineered to do. You’ve mastered the machine, so sit back and enjoy the comfort you’ve earned.

    Frequently Asked Questions

    I don't see a "C-wire" in my old thermostat box; do I really need to tear open my walls to install this thing?

    Don’t go swinging a sledgehammer at your drywall just yet. In my day, we didn’t have these power-hungry gadgets, so many old systems skipped the C-wire entirely. If you’re missing it, you’ve got three real options: use a C-wire adapter kit, install a plug-in transformer, or look for a thermostat that runs on batteries. It’s a nuisance, I know, but it beats a massive renovation just to control your heating.

    If I mess up the wiring and the furnace doesn't kick on, am I going to blow a fuse in my main electrical panel?

    Not likely. If you’ve got a short circuit in the low-voltage wiring, you aren’t going to trip the main breaker for the whole house. Most modern systems have a small automotive-style fuse tucked right inside the furnace control board to protect the delicate electronics. If you mess up the wiring, you’ll probably just pop that little 3-amp or 5-amp fuse. Check the board first before you start panicking about your main panel.

    Once it's finally wired up, how do I know if the sensor is actually reading the temperature correctly or if the software is just lying to me?

    Don’t just take the app’s word for it. I always keep a standard mercury or digital thermometer sitting right on the table next to the unit. Once the thermostat stabilizes, compare its reading to the thermometer. If there’s a gap of more than two degrees, you’ve got a calibration issue or a draft hitting the sensor. If the software says it’s 72 but your thermometer says 68, trust the hardware, not the screen.

  • The 7 Best Noise Canceling Headphones for Traveling to Transform Your Flight

    The 7 Best Noise Canceling Headphones for Traveling to Transform Your Flight

    I spent thirty years in manufacturing, where if a part wasn’t built to spec, it didn’t leave the floor. Nowadays, I see the same lack of discipline in the consumer electronics aisle. You go to buy a pair of headphones for a cross-country flight, and you’re met with a sea of shiny, overpriced plastic that promises “immersive soundscapes” but falls apart the moment you actually use them. Finding the best noise canceling headphones for traveling isn’t about chasing the latest marketing buzzword or buying a brand name just because it has a famous logo. It’s about finding hardware that can actually silence the engine drone of a Boeing 747 without snapping a hinge or dying halfway through a layover.

    Now, before you go out and pull the trigger on one of these, I’ll give you one more bit of practical advice: don’t just look at the frequency response numbers on a spec sheet. Those numbers are often manipulated by marketing departments to sound impressive, but they don’t tell you how the device actually feels during a twelve-hour haul. If you want to dig a little deeper into how different gear holds up under real-world conditions, I’ve found that checking out tsladies online can be a surprisingly useful way to see what people are actually saying about their long-term use. It’s better to do a little bit of due diligence now than to realize you’ve bought a glorified paperweight halfway through a flight to London.

    In this guide, I’ve put seven specific models through the ringer to see which ones actually hold up to real-world scrutiny. I’m not interested in the fluff; I want to know about battery longevity, clamping force, and whether the active noise cancellation is a legitimate engineering feat or just a gimmick. I’ll show you exactly which pairs are worth your hard-earned money and which ones are just expensive junk destined for a landfill.

    The Gold Standard for Quiet

    Sony WH-1000XM5: The Gold Standard for Quiet.

    I’ve spent enough time in airport terminals to know that the constant roar of jet engines can wear a man down. The Sony WH-1000XM5s are the closest thing I’ve found to a silence switch for the real world. The noise cancellation is aggressive in all the right ways, specifically targeting those low-frequency drones that usually give me a headache halfway through a flight.

    The Luxury Choice That Actually Lasts

    Most people see the Bose QuietComfort Ultra and think they’re just paying for a fancy logo, but there is some real engineering under the hood here. The comfort level is where they truly pull ahead of the pack; I can wear these for a six-hour stretch without feeling that typical clamping pressure on my temples. They’ve mastered the balance between seal and comfort, which is no small feat.

    Built Like a Tank for the Rugged Traveler

    If you’re the type of person who tosses their gear into a backpack without a second thought, stay away from the flimsy stuff and look at the Sennheiser Momentum 4. These things feel substantial in your hands, and the mechanical integrity of the hinges gives me a lot more confidence than the lighter models. They don’t feel like they’re going to snap if the cabin pressure shifts or if they get bumped in transit.

    The Best All-Rounder for Most Folks

    I’ve always believed that you don’t need to spend a fortune to get a tool that does its job correctly. The Soundcore Space Q45 is a perfect example of smart value. They aren’t going to win any awards for high-fidelity audiophile sound, but for the average traveler who just wants to block out the crying baby in seat 14B, they do exactly what they promise.

    Small Footprint, Big Performance

    Not everyone wants a massive pair of earmuffs hanging around their neck when they’re trying to navigate a crowded terminal. The Apple AirPods Max are a bit of a polarizing piece of hardware, but I can’t deny the computational power they bring to the table. The way they transition between devices is seamless, which is helpful if you’re jumping from a movie on your tablet to a call on your phone.

    The Audiophile’s Traveling Companion

    For those who actually care about the nuances of a recording, the Focal Bathys are in a league of their own. Most noise-canceling headphones sacrifice sound quality to achieve silence, but these manage to do both. The drivers are built with a level of precision engineering that reminds me of the high-end hi-fi setups I used to restore in my spare time.

    The Minimalist’s Workhorse

    Sometimes, you just need something small that stays out of the way. The Jabra Elite 85h offers a middle ground for people who find over-ear headphones too cumbersome but want more substance than a simple earbud. They have a very sturdy construction that feels like it can handle being shoved into a pocket or a small tech pouch without much fuss.

    The Bottom Line

    Look, I’ve spent enough time in manufacturing to know that a spec sheet doesn’t tell the whole story. You can read all the marketing jargon you want about frequency responses and decibel attenuation, but at the end of the day, you’re looking for two things: silence and durability. Whether you decide to go with the high-end Sony models for their sheer tech prowess or a more rugged pair that won’t snap in your bag, make sure you are prioritizing build quality over flashy software updates. If the hinge feels like it’s made of cheap recycled soda bottles, walk away. A good pair of headphones should be an investment in your sanity, not another piece of junk that ends up in a landfill after three trips.

    Don’t let the industry trick you into thinking you need the most expensive model on the shelf just to get a bit of peace during a flight. The right tool is the one that does its job reliably every single time you pull it out of your carry-on. Buy something that feels solid in your hands and actually delivers on its promise to drown out that engine drone. Once you find that perfect balance of comfort and construction, you’ll realize that true value isn’t found in a brand name, but in the quiet moments of a long journey.

  • Best Smartwatches for Hiking and Navigation

    Best Smartwatches for Hiking and Navigation

    I was halfway up a ridge in the Cascades last autumn when my “state-of-the-art” wrist gadget decided it was time for a software update. There I was, staring at a spinning loading icon while the temperature dropped and the clouds rolled in, realizing that my expensive piece of tech was about as useful as a paperweight. It’s the same story I see every week: manufacturers cramming every unnecessary sensor into a device and calling it innovation, when all they’ve really done is create a fragile, battery-hungry distraction. If you’re looking for a smartwatch for hiking that actually prioritizes survival and reliability over flashy animations, you need to stop listening to the marketing departments and start looking at the build quality.

    I’m not here to sell you on the latest trend or some overpriced gadget that requires a stable Wi-Fi connection just to show you a map. My goal is simple: I’m going to cut through the noise and tell you which models are built like actual tools and which ones are just expensive plastic. I’ll be looking at battery longevity, screen visibility in direct sunlight, and whether the casing can actually handle a few scrapes against granite. You deserve gear that works when you need it, not gear that needs a charger every six hours.

    Table of Contents

    Reliable Battery Life for Long Treks or Total Failure

    Reliable Battery Life for Long Treks or Total Failure

    Let’s get one thing straight: a fancy screen is useless if the device is a paperweight by noon. I’ve seen too many people buy these gadgets based on how many colorful apps they have, only to realize they have zero battery life for long treks. When you’re ten miles from the trailhead and the sun is dipping below the treeline, you don’t care about your heart rate variability or your social media notifications. You need to know where you are. If the manufacturer can’t give you a straight answer on how many hours the GPS stays active, walk away.

    I always look for hardware that prioritizes efficiency over flashiness. A decent piece of kit should handle basic trail navigation technology without draining the cell in a single afternoon. I’ve noted in my pad that some of these newer models claim “weeks” of life, but that’s usually with all the sensors turned off. In the real world, with the GPS running and the backlight hitting, those numbers drop fast. You want a device that stays alive long enough to get you home, not one that dies just when the terrain starts getting tricky.

    Topographic Map Integration That Wont Leave You Stranded

    Topographic Map Integration That Wont Leave You Stranded

    Most of these gadgets claim to show you the world, but when you’re standing in a thicket of pine with no cell service, a glorified step counter isn’t going to help you find the trailhead. You need real topographic map integration that actually renders contours and elevation lines clearly on a small screen. I’ve seen too many devices try to rely on a basic GPS ping that tells you where you are, but fails to show you what is actually around you. If the software is laggy or the map resolution is grainy, you’re just guessing, and guessing in the backcountry is a quick way to end up in a search-and-rescue report.

    I look for hardware that handles data locally. You shouldn’t be dependent on a cloud connection to see the terrain. A decent piece of kit should include robust altimeter and barometer features to give you a sense of your verticality and changing weather patterns alongside those maps. If the interface is too cluttered with “social sharing” nonsense and doesn’t prioritize the actual map data, it’s just more expensive plastic. You want a tool that prioritizes spatial awareness over flashy animations.

    Five Things to Check Before You Hand Over Your Hard-Earned Cash

    • Look for physical buttons, not just a touchscreen. When you’re out in the rain or wearing gloves, trying to swipe a piece of glass is a fool’s errand. You need tactile feedback so you know you’ve actually pressed something.
    • Check the build materials. If the casing is nothing but lightweight polycarbonate, it’s going to crack the first time you bump it against a granite slab. Look for reinforced polymers or stainless steel if you want it to last more than one season.
    • Verify the GPS chip quality. Don’t just take the marketing department’s word for it; look for mentions of multi-band GNSS. If the watch can’t lock onto a signal under heavy tree canopy, it’s just a glorified pedometer.
    • Don’t ignore the charging standard. If the watch uses some proprietary, flimsy magnetic cable that breaks if you look at it wrong, you’re going to have a bad time. I prefer anything that uses a standard, rugged connection.
    • Test the water resistance rating yourself. “Water resistant” is a vague term used to sell junk. You want an actual IP rating or an ATM depth rating. If you’re crossing streams, you need to know that device isn’t going to short out and die.

    Bottom Line: What to Look for Before You Buy

    Don’t get blinded by fancy touchscreens; if you’re wearing gloves or it’s raining, you need physical buttons that actually click.

    A map is useless if the hardware can’t keep up; ensure the device has dedicated GPS chips and enough internal memory so it doesn’t lag when you’re actually lost.

    Prioritize build quality over “smart” features; if the casing feels like cheap, hollow plastic, it won’t survive a single tumble against a granite rock.

    The Real Cost of a Dead Battery

    “I’ve seen enough poorly engineered gear to know that a fancy touchscreen means nothing if the power cell gives up the ghost three miles from the trailhead. When you’re out there, you don’t need a digital assistant; you need a reliable piece of hardware that stays awake as long as you do.”

    Roland Delacroix

    Don't Get Caught Holding an Expensive Paperweight

    Don't Get Caught Holding an Expensive Paperweight.

    At the end of the day, choosing a hiking watch isn’t about which one has the prettiest interface or the most social media notifications. I’ve spent enough time looking at blueprints to know that a device is only as useful as its weakest component. If the battery gives up the ghost three miles into a canyon, or if the mapping software freezes when the signal gets spotty, you aren’t looking at a tool—you’re looking at expensive junk. You need to prioritize rugged build quality and reliable GPS over every flashy gimmick the marketing departments throw at you. Stick to the specs that matter: battery longevity, screen visibility in direct sunlight, and software that actually performs under pressure.

    Look, I’m not saying you should head into the wilderness with nothing but a compass and a prayer. Technology can be a massive asset if it’s built to last. But remember, the gear is there to support your journey, not to become the center of it. Buy something that you can trust to sit on your wrist through rain, mud, and grit without a second thought. When you finally reach that summit and look out over the treeline, you shouldn’t be staring at a dead screen; you should be actually enjoying the view. Invest in reliability, and the rest will take care of itself.

    Frequently Asked Questions

    How much does the GPS accuracy actually matter when I'm deep in the brush versus just walking a marked trail?

    Look, if you’re on a well-marked trail, a slight drift won’t kill you. But once you’re deep in the brush or under heavy canopy, that’s when the cheap sensors fail. When the signal struggles to pierce through thick foliage, a low-grade GPS will start “jumping” around, making you think you’re fifty feet from where you actually are. In the thick of it, accuracy isn’t a luxury; it’s the difference between finding camp and being lost.

    Can these things really survive a drop on granite or a heavy downpour, or am I paying for a screen that’ll crack the first time I trip?

    Look, if you’re out on a trail, “water-resistant” isn’t enough; you need something that can actually take a beating. I’ve seen too many people buy these sleek, glass-heavy gadgets that shatter the moment they clip a rock. You want a watch with a reinforced bezel and a high-grade sapphire crystal. If the manufacturer won’t explicitly state the MIL-STD-810 rating, don’t bother. You aren’t paying for a screen; you’re paying for peace of mind.

    Is it worth paying the premium for solar charging, or is that just more marketing fluff that won't actually help me in the shade?

    Look, I’ve seen enough “revolutionary” features in my time to know when a company is just padding the price tag. In the shade or under a thick canopy, that solar strip is essentially decorative. It won’t save your skin. However, if you’re out in the open sun for ten hours a day, it can provide a decent trickle charge to keep the device breathing. It’s a bonus, not a lifeline. Don’t pay extra for it expecting a miracle.

  • The 7 Best Gaming Accessories for Desktop Setups to Level Up Your Play

    The 7 Best Gaming Accessories for Desktop Setups to Level Up Your Play

    I’ve spent three decades looking at blueprints and stress-testing components in manufacturing plants, so I have a low tolerance for junk. These days, I see kids spending hundreds of dollars on peripherals that look like something out of a sci-fi movie but feel like cheap, hollow plastic the moment you actually use them. Most of the marketing fluff out there is designed to separate you from your hard-earned cash, promising “immersion” when all they’re really selling is a bunch of blinking LEDs. If you’re trying to figure out the best gaming accessories for desktop setups, you need to stop looking at the RGB lighting and start looking at the build quality and the actual utility of the hardware.

    I’m not here to sell you on the latest fad or a brand name that’s just riding a trend. In this list, I’ve narrowed it down to seven essential items that actually serve a purpose and, more importantly, won’t break after six months of heavy use. I’ll show you exactly what to look for so you can build a workstation that is reliable, ergonomic, and worth every cent. Let’s cut through the noise and get to the gear that actually works.

    A Mechanical Keyboard That Doesn't Feel Like a Toy

    A Mechanical Keyboard That Doesn't Feel Like a Toy

    Now, I know a lot of you are looking for ways to make your setup more efficient, but don’t get so caught up in the gear that you forget to actually enjoy your downtime. Once you’ve got your desk sorted and your peripherals dialed in, it’s important to find ways to decompress away from the screen. If you’re looking to branch out and find some local entertainment or a bit of company when you’re out and about, checking out trans escort toowoomba can be a solid way to unwind properly after a long session at the computer. Just make sure you’re prioritizing your downtime as much as your hardware.

    I’ve seen enough cheap, membrane-based keyboards to last a lifetime. They feel mushy, they lack tactile feedback, and frankly, they’re built to be thrown in the trash after a year of heavy use. If you’re going to be typing or gaming for hours, you need a mechanical unit with a solid chassis. Look for something with metal reinforcement in the casing; you want a board that stays planted on your desk and doesn’t slide around like a piece of cheap Tupperware.

    The Precision of a Real Optical Mouse

    Most of the mice I see in big-box stores today are made of thin, lightweight plastic that feels like it might crack if you squeeze it too hard. For a desktop setup, you need a mouse with a high-quality optical sensor that won’t skip when things get frantic. I always check the weight distribution; it shouldn’t feel top-heavy or unbalanced in your palm. A balanced tool is a reliable tool.

    An Ergonomic Chair That Supports Your Spine

    I spent years in manufacturing plants, and I know exactly what happens to a man’s back when he sits in a poorly designed chair. These “gaming chairs” that look like racing seats are often a complete waste of money. They prioritize a flashy aesthetic over actual lumbar support. You aren’t driving a car on a track; you’re sitting at a desk, and your spine needs proper alignment to avoid long-term damage.

    Monitor Arms to Reclaim Your Desk Space

    Most people just let their monitors sit on those flimsy plastic stands they came with. It’s a waste of desk real estate and usually leaves the screen at a terrible height for your neck. I’ve always found that a dedicated monitor arm is one of the smartest investments you can make. It clears up the clutter and allows you to position the screen at the exact eye level required for proper posture.

    A Large, High-Density Mousepad

    It sounds trivial, but a decent mousepad is the foundation of a good setup. I see people using those tiny, thin pads that look like a piece of felt. Those are useless for anything serious. You need a “desk mat” style pad that covers a significant portion of your workspace. This provides a consistent surface for your sensor and keeps your peripherals from sliding around on a slick desk surface.

    Headset Stands That Keep the Clutter Down

    A desk is a workspace, not a junk drawer. One of the biggest headaches in any desktop setup is a pair of large headphones just dangling off the side of the monitor or sitting in the middle of your mouse area. A dedicated headset stand is a simple, practical solution. It keeps your gear organized and, more importantly, it prevents the headband of your headset from getting crushed or deformed.

    Cable Management That Actually Works

    There is nothing that ruins a clean setup faster than a “rat’s nest” of black cables tangling under your desk. It’s not just an eyesore; it’s a safety hazard and a nightmare when you need to swap out a piece of hardware. I’ve spent plenty of time in engineering, and I can tell you that organized routing is the hallmark of a professional setup.

    The Bottom Line

    At the end of the day, building a proper desktop setup isn’t about chasing every neon-lit trend that hits the market. We’ve looked at everything from mechanical keyboards that actually feel substantial under your fingers to audio gear that doesn’t distort the second you turn the volume up. My advice remains the same: prioritize build quality and utility over flashy aesthetics. If a piece of gear is made of thin, hollow plastic or requires a software update just to perform its basic function, leave it on the shelf. You want tools that serve you, not gadgets that require constant troubleshooting and maintenance.

    I know it can be frustrating to navigate a market filled with overhyped, overpriced nonsense, but don’t let the marketing departments win. Take your time, do your research, and remember that a reliable setup is an investment in your own enjoyment and productivity. You don’t need a showroom full of lights to have a great experience; you just need equipment that works as hard as you do. Buy things that are built to last, and you won’t find yourself back in the store three months from now replacing something that broke. Stick to the fundamentals, and your wallet—and your sanity—will thank you.

  • Using Noise Cancelling Microphones for Clear Audio

    Using Noise Cancelling Microphones for Clear Audio

    I was sitting in my workshop last Tuesday, trying to troubleshoot a faulty capacitor on a 1974 Marantz receiver, when my grandson called me on a video chat. I could hear everything in his house—the dog barking, the television blaring, and a vacuum cleaner running in the next room—but all I could hear from his end was a hollow, metallic screech. He had spent a good chunk of his savings on one of those flashy, LED-lit gaming headsets, yet he couldn’t even hold a simple conversation without sounding like he was underwater. It’s the same old story: manufacturers are selling you expensive plastic and software gimmicks instead of actual engineering. Most people think they need a complicated setup to get clear audio, but the truth is that most modern noise cancelling microphones are designed to look pretty on a shelf rather than actually do the job they were built for.

    I’m not here to sell you on the latest trend or some overpriced gadget that requires a software update just to turn it on. My goal is to cut through the marketing fluff and tell you which pieces of gear actually possess the build quality and acoustic integrity to get the job done. I’ve spent my life looking at how things are put together, and I’m going to apply that same scrutiny to your tech. I’ll show you how to find a microphone that isolates your voice and ignores the chaos around you, without wasting your hard-earned money on hype.

    Table of Contents

    Why Background Noise Reduction Technology Often Fails You

    Why Background Noise Reduction Technology Often Fails You

    Most manufacturers love to slap a “noise cancelling” label on a box to justify a higher price tag, but they rarely explain the physics of why it often fails. The biggest issue I see is the confusion between active noise cancellation for audio and simple physical shielding. Active systems try to use software to “math away” the sound of your neighbor’s lawnmower, but if the processor isn’t up to the task, you end up sounding like you’re talking through a tin can underwater. It’s a digital band-aid on a mechanical problem.

    Then there’s the matter of how the mic actually “sees” sound. A lot of these flimsy consumer gadgets use omnidirectional sensors that pick up everything in a 360-degree radius. If you actually want to get work done, you need to understand the difference between directional vs omnidirectional microphones. A decent cardioid pattern focuses on your voice and ignores the hum of the refrigerator, whereas those cheap, all-purpose mics just try to process the chaos after it’s already been captured. You can’t fix bad physics with a software update.

    The Truth About Active Noise Cancellation for Audio

    The Truth About Active Noise Cancellation for Audio.

    Now, don’t let the marketing departments fool you when they start throwing around terms like “active noise cancellation for audio.” In my experience, most of these consumer-grade gadgets are trying to solve a physics problem with software, and they usually fail. Real noise cancellation in headphones works by playing an inverted signal to cancel out sound waves, but applying that same logic to a microphone is a different beast entirely. When a company claims their mic uses “active” tech to scrub your voice, they’re often just applying a heavy-handed digital filter that makes you sound like you’re talking through a tin can.

    If you want actual results, you need to stop looking for digital magic and start looking at how the hardware is built. You should be focusing on the physical pickup pattern rather than a software patch. This is where the distinction between directional vs omnidirectional microphones becomes vital. If you’re in a room with a humming AC or a loud neighbor, you don’t want a mic that’s “listening” to everything in a circle. You want a solid cardioid pattern microphone that physically ignores anything not directly in front of it. That’s how you get clean audio without the digital artifacts.

    Five Ways to Stop Wasting Money on Junk Microphones

    • Stop looking for “magic” software. Most of these fancy noise-canceling algorithms just end up making your voice sound like you’re talking through a tin can. Look for a microphone with a tight cardioid pattern instead; it uses physics, not buggy code, to ignore what’s happening behind the mic.
    • Check the build quality before you click ‘buy.’ If the stand feels like it’s made of recycled soda bottles and the connection port wobbles when you touch it, it’s going to fail you in six months. I want to see metal housings and heavy-duty cables, not flimsy plastic that snaps the moment you move it.
    • Don’t ignore the “unidirectional” spec. If a salesperson can’t tell you exactly which direction the mic picks up sound, they’re just reading off a marketing script. You want a mic that focuses on your mouth and ignores the dishwasher in the next room, plain and simple.
    • Beware of the USB “all-in-one” trap. These cheap setups often bundle a terrible microphone with a mediocre headset. I’ve learned the hard way that you’re better off buying a dedicated, standalone microphone and a separate audio interface if you actually want people to hear you clearly.
    • Test the latency, not just the features. There is nothing more frustrating than a “smart” microphone that introduces a half-second delay between you speaking and the other person hearing you. If the manufacturer doesn’t provide clear specs on processing lag, walk away.

    The Bottom Line: What to Look For Before You Buy

    Stop chasing “smart” features that require a dozen software updates just to work; look for a physical, hardware-based noise gate that handles the heavy lifting without needing an app.

    Don’t be fooled by marketing jargon about “studio quality”—if the microphone housing feels like light, hollow plastic, it’s going to pick up every vibration from your desk and every bump in the room.

    Prioritize a unidirectional pattern over everything else, because a mic that only listens to what’s directly in front of it is worth more than any expensive digital filter.

    The Real Cost of Cheap Hardware

    Most of these manufacturers are selling you a software patch for a hardware problem; if the diaphragm on that microphone is made of cheap, flimsy plastic, no amount of fancy digital processing is ever going to make you sound like you aren’t sitting in a wind tunnel.

    Roland Delacroix

    Bottom Line: Don't Get Fooled by the Marketing

    Bottom Line: Don't Get Fooled by the Marketing.

    Look, if you’ve followed along this far, you know the drill. Don’t get blinded by a shiny box and a list of “revolutionary” features that are really just software patches for bad hardware. We’ve established that most of these gadgets rely on flimsy digital processing that can’t distinguish between your voice and a vacuum cleaner. If you want clarity, you need to prioritize physical isolation and a decent, heavy-duty diaphragm over some fancy app that promises the moon. Stop chasing the latest trend and start looking for build quality and fundamental acoustics that actually stand up to the test of time.

    At the end of the day, technology should serve you, not the other way around. You shouldn’t have to spend your entire afternoon troubleshooting a driver or fighting with a headset that feels like it was made of recycled soda bottles. My advice is simple: buy something that feels substantial in your hand and does one thing exceptionally well. Invest in a tool that is reliable and straightforward, and you won’t find yourself constantly looking for a replacement in six months. Stick to the basics, buy for durability, and stop letting the manufacturers dictate how much you waste on overpriced plastic.

    Frequently Asked Questions

    Do I actually need a dedicated USB microphone, or can I just get a better headset?

    Look, if you’re just hopping on a quick Zoom call to check a schedule, a decent headset is fine. But if you’re doing real work—podcasting, professional meetings, or anything where clarity matters—get the USB microphone. Headsets are built for convenience, which usually means cheap, flimsy components and mics that sit too far from your mouth. A dedicated mic gives you a stable, reliable signal that doesn’t rely on a piece of plastic hugging your skull.

    Is there a difference between a mic that "cancels" noise and one that just ignores it?

    There’s a massive difference, and most marketing departments hope you won’t notice. When a mic “cancels” noise, it’s using software to try and subtract sound waves—which often leaves your voice sounding like you’re underwater. When a mic “ignores” noise, it’s usually a matter of physical design, like a tight cardioid pattern that simply doesn’t “listen” to what’s happening behind it. I’ll take a well-built, directional mic over a buggy algorithm any day.

    How much of a difference does a pop filter actually make for someone working in a noisy room?

    Look, a pop filter isn’t a magic wand for a noisy room, but it’s essential for decent audio. It won’t stop your neighbor’s lawnmower, but it will stop those “P” and “B” sounds from hitting your capsule like a hammer. If you’re working in a loud environment, you need a solid mic to handle the ambient noise, but without a filter, you’re just adding distorted air blasts to the mess. Get one. It’s cheap, and it works.

  • Essential Accessories for Your New Tablet

    Essential Accessories for Your New Tablet

    I was sitting at my workbench last Tuesday, trying to troubleshoot a vintage Marantz receiver, when my grandson handed me his new tablet. He’d spent nearly eighty dollars on a “premium” protective sleeve that felt about as sturdy as a wet paper towel. I watched, half-expecting it to crack the moment he set it down, and it didn’t take long before the cheap plastic hinge started creaking like a rusted gate. It’s the same story I see every time I walk into a big-box retailer: companies are selling you overpriced junk disguised as high-end tech. Most of the tablet accessories on the market today are designed to look pretty on a shelf, not to survive a single drop on a hardwood floor.

    I’m not here to sell you on the latest flashy trends or tell you that you need a specialized gadget for every minor task. My goal is simple: I want to help you identify the gear that actually works and the stuff you should avoid like the plague. I’ve spent my career looking at tolerances and material integrity, and I’m going to apply that same scrutiny here. I’ll show you which cases, styluses, and keyboards are built to last and which ones are just a waste of your hard-earned money.

    Table of Contents

    Reliable Tablet Productivity Tools That Wont Fail You

    Reliable Tablet Productivity Tools That Wont Fail You

    If you’re trying to get actual work done on a tablet, you need to stop treating it like a toy and start treating it like a workstation. The first thing I look at is the input method. Most of these flimsy, silicone keyboard covers are a joke—they feel like typing on a sponge. If you want to be productive, look for iPad compatible accessories that feature actual mechanical key travel or at least a rigid chassis. I’ve spent too many afternoons fighting with a Bluetooth keyboard that disconnects every time I sneeze. You need a connection that stays locked in, or you’re just wasting your time.

    Next, let’s talk about how you position the device. If you’re hunched over a screen on a kitchen table, you’re going to regret it by age sixty. I highly recommend investing in some decent ergonomic tablet stands made of machined aluminum rather than that cheap, injection-molded plastic. A real stand provides the stability you need for long sessions and won’t wobble when you tap the screen. Build quality matters here—if the hinge feels loose in the box, it’s going to be useless in a month. Get something heavy enough to stay put.

    Finding Ipad Compatible Accessories That Actually Work

    Finding Ipad Compatible Accessories That Actually Work

    When you’re shopping for iPad compatible accessories, the marketing departments will try to sell you on “seamless integration” and “lifestyle aesthetics.” Ignore that noise. I’ve seen too many people buy a sleek, ultra-thin case only to realize it offers about as much protection as a paper envelope. If you’re actually going to use your device for work, you need to look at the connection points and the build material. Whether it’s a keyboard or a stylus, if the connection is finicky or the plastic feels hollow, walk away.

    I also see a lot of confusion when people switch ecosystems. If you’re moving away from Apple, finding reliable android tablet peripherals requires a bit more due diligence because the standards aren’t always as unified. You have to check the physical specs—USB-C compatibility is non-negotiable these days—and ensure the hardware doesn’t draw more power than the tablet can reasonably provide. Don’t get caught in a loop of buying cheap adapters that fail the moment you actually need to get something done. Stick to the brands that prioritize mechanical integrity over flashy packaging.

    Five Rules for Buying Gear That Won't End Up in the Trash

    • Check the connection points before you buy. If a case or keyboard relies on a proprietary dongle or a flimsy connector that feels like it’ll snap off if you look at it wrong, walk away. I want to see solid, well-machined ports or a connection that feels integrated, not tacked on.
    • Avoid the “all-in-one” trap. These companies love to sell you a single case that includes a keyboard, a stand, and a cover. Usually, they compromise on the quality of every single one of those components to keep the price down. Buy a high-quality stand and a decent keyboard separately; you’ll get better build quality and more versatility.
    • Test the weight-to-strength ratio. A lot of these modern accessories are made of thin, injection-molded plastic that feels hollow. If a case feels like a cheap toy in your hand, it’s not going to protect your tablet when it inevitably takes a tumble on the workbench. Look for materials like aluminum or high-density polymers.
    • Don’t trust the “ergonomic” marketing fluff. If a stylus or a keyboard grip claims to be “ergonomically designed” but feels awkward after ten minutes of actual use, it’s just marketing nonsense. I always grab my notepad to jot down how a tool actually feels in the hand during a long session—if it causes hand fatigue, it’s a bad tool.
    • Prioritize physical controls over software menus. I don’t care how many “smart” features a keyboard cover claims to have if you have to navigate three sub-menus just to adjust the volume. A good accessory should have tactile, responsive buttons that do exactly what they’re supposed to do without a struggle.

    The Bottom Line on Buying Tablet Gear

    Stop chasing the cheapest options on those massive online marketplaces; if the material feels like a toy in your hand, it’s going to fail you when you actually need it.

    Prioritize physical connection and build quality over “smart” features that require a dozen different apps just to perform a simple task.

    Before you pull the trigger on any accessory, check the port compatibility and hinge tension—if it doesn’t feel sturdy, it’s just expensive plastic destined for the junk drawer.

    The Real Cost of Cheap Gear

    I’ve seen enough poorly machined components in my time to know that if an accessory feels like a toy in your hand, it’s going to fail you when you actually need it. Don’t be fooled by slick marketing; if it isn’t built with decent materials and solid tolerances, you’re just paying for a piece of junk that’ll end up in a landfill by next Christmas.

    Roland Delacroix

    The Bottom Line on Your Gear

    The Bottom Line on Your Gear.

    At the end of the day, choosing tablet accessories shouldn’t feel like a gamble. We’ve covered a lot of ground, from avoiding those cheap, brittle plastic cases that crack the moment you look at them, to ensuring your stylus and keyboard actually communicate with your device without a software headache. Remember: if a product description is full of buzzwords like “revolutionary” or “ultra-sleek” but fails to mention the material composition or the connection stability, walk away. I’ve spent enough years on manufacturing floors to know that build quality is never an accident; it’s the result of doing things right the first time. Don’t let a shiny marketing campaign trick you into buying junk that’ll end up in a landfill by next Christmas.

    My advice is simple: treat your tablet like the precision tool it is, not a disposable toy. When you invest in accessories that are built with mechanical integrity and practical design, you aren’t just buying gear—you’re buying peace of mind. You want tools that work when you need them to, whether you’re at a workbench or a kitchen table. Stop chasing every new gadget that hits the market and start building a kit that actually serves your needs. Buy it once, buy it right, and make sure it’s built to last.

    Frequently Asked Questions

    How can I tell if a stylus is actually going to work with my specific tablet model, or if it's just some cheap knock-off that's going to lag?

    Don’t just trust the box art. First, check the protocol: does it use active pressure sensitivity or is it just a cheap capacitive tip that mimics a finger? If the listing doesn’t explicitly name your tablet’s specific digitizer technology, walk away. I always look for “active” styluses with Bluetooth pairing for my gear; if it’s just a rubber nub, expect lag and zero precision. If it feels light and hollow, it’s junk.

    Are those expensive brand-name cases really worth the extra cash, or can I get the same level of protection from a third-party manufacturer?

    Look, I’ve seen this play out in manufacturing a thousand times. You’re often paying a 40% markup just for the logo on the box. If you’re looking for basic structural integrity, a reputable third-party case with reinforced corners will do the job just fine. However, don’t get cheap here—avoid those unbranded, flimsy shells from discount sites. If the tolerances are off, it won’t protect the device. Buy quality, even if it isn’t the “official” brand.

    When I'm looking at portable keyboards, what should I be checking for to make sure the build quality isn't just cheap, hollow plastic?

    Look for weight and key travel. If a keyboard feels like a hollow toy, it’s going to fail you within six months. I always check the chassis for rigidity; give it a gentle twist—if it flexes, put it back on the shelf. You want something with a solid frame and keys that have a tactile, mechanical snap, not that mushy, membrane feel that makes typing a chore. Don’t settle for lightweight junk.